Guide 5 of 8
Manage orders and kitchen view
KoulChi Pro brings together orders taken by the team, QR codes, the customer app and the public page in a single operational flow.
The screenshots show the French interface; the layout and features are the same in every language.
Documentation navigation
Chapter 1
Take an order on site
The team can create an order from the counter or directly at the table, with the same products and options as the customer.
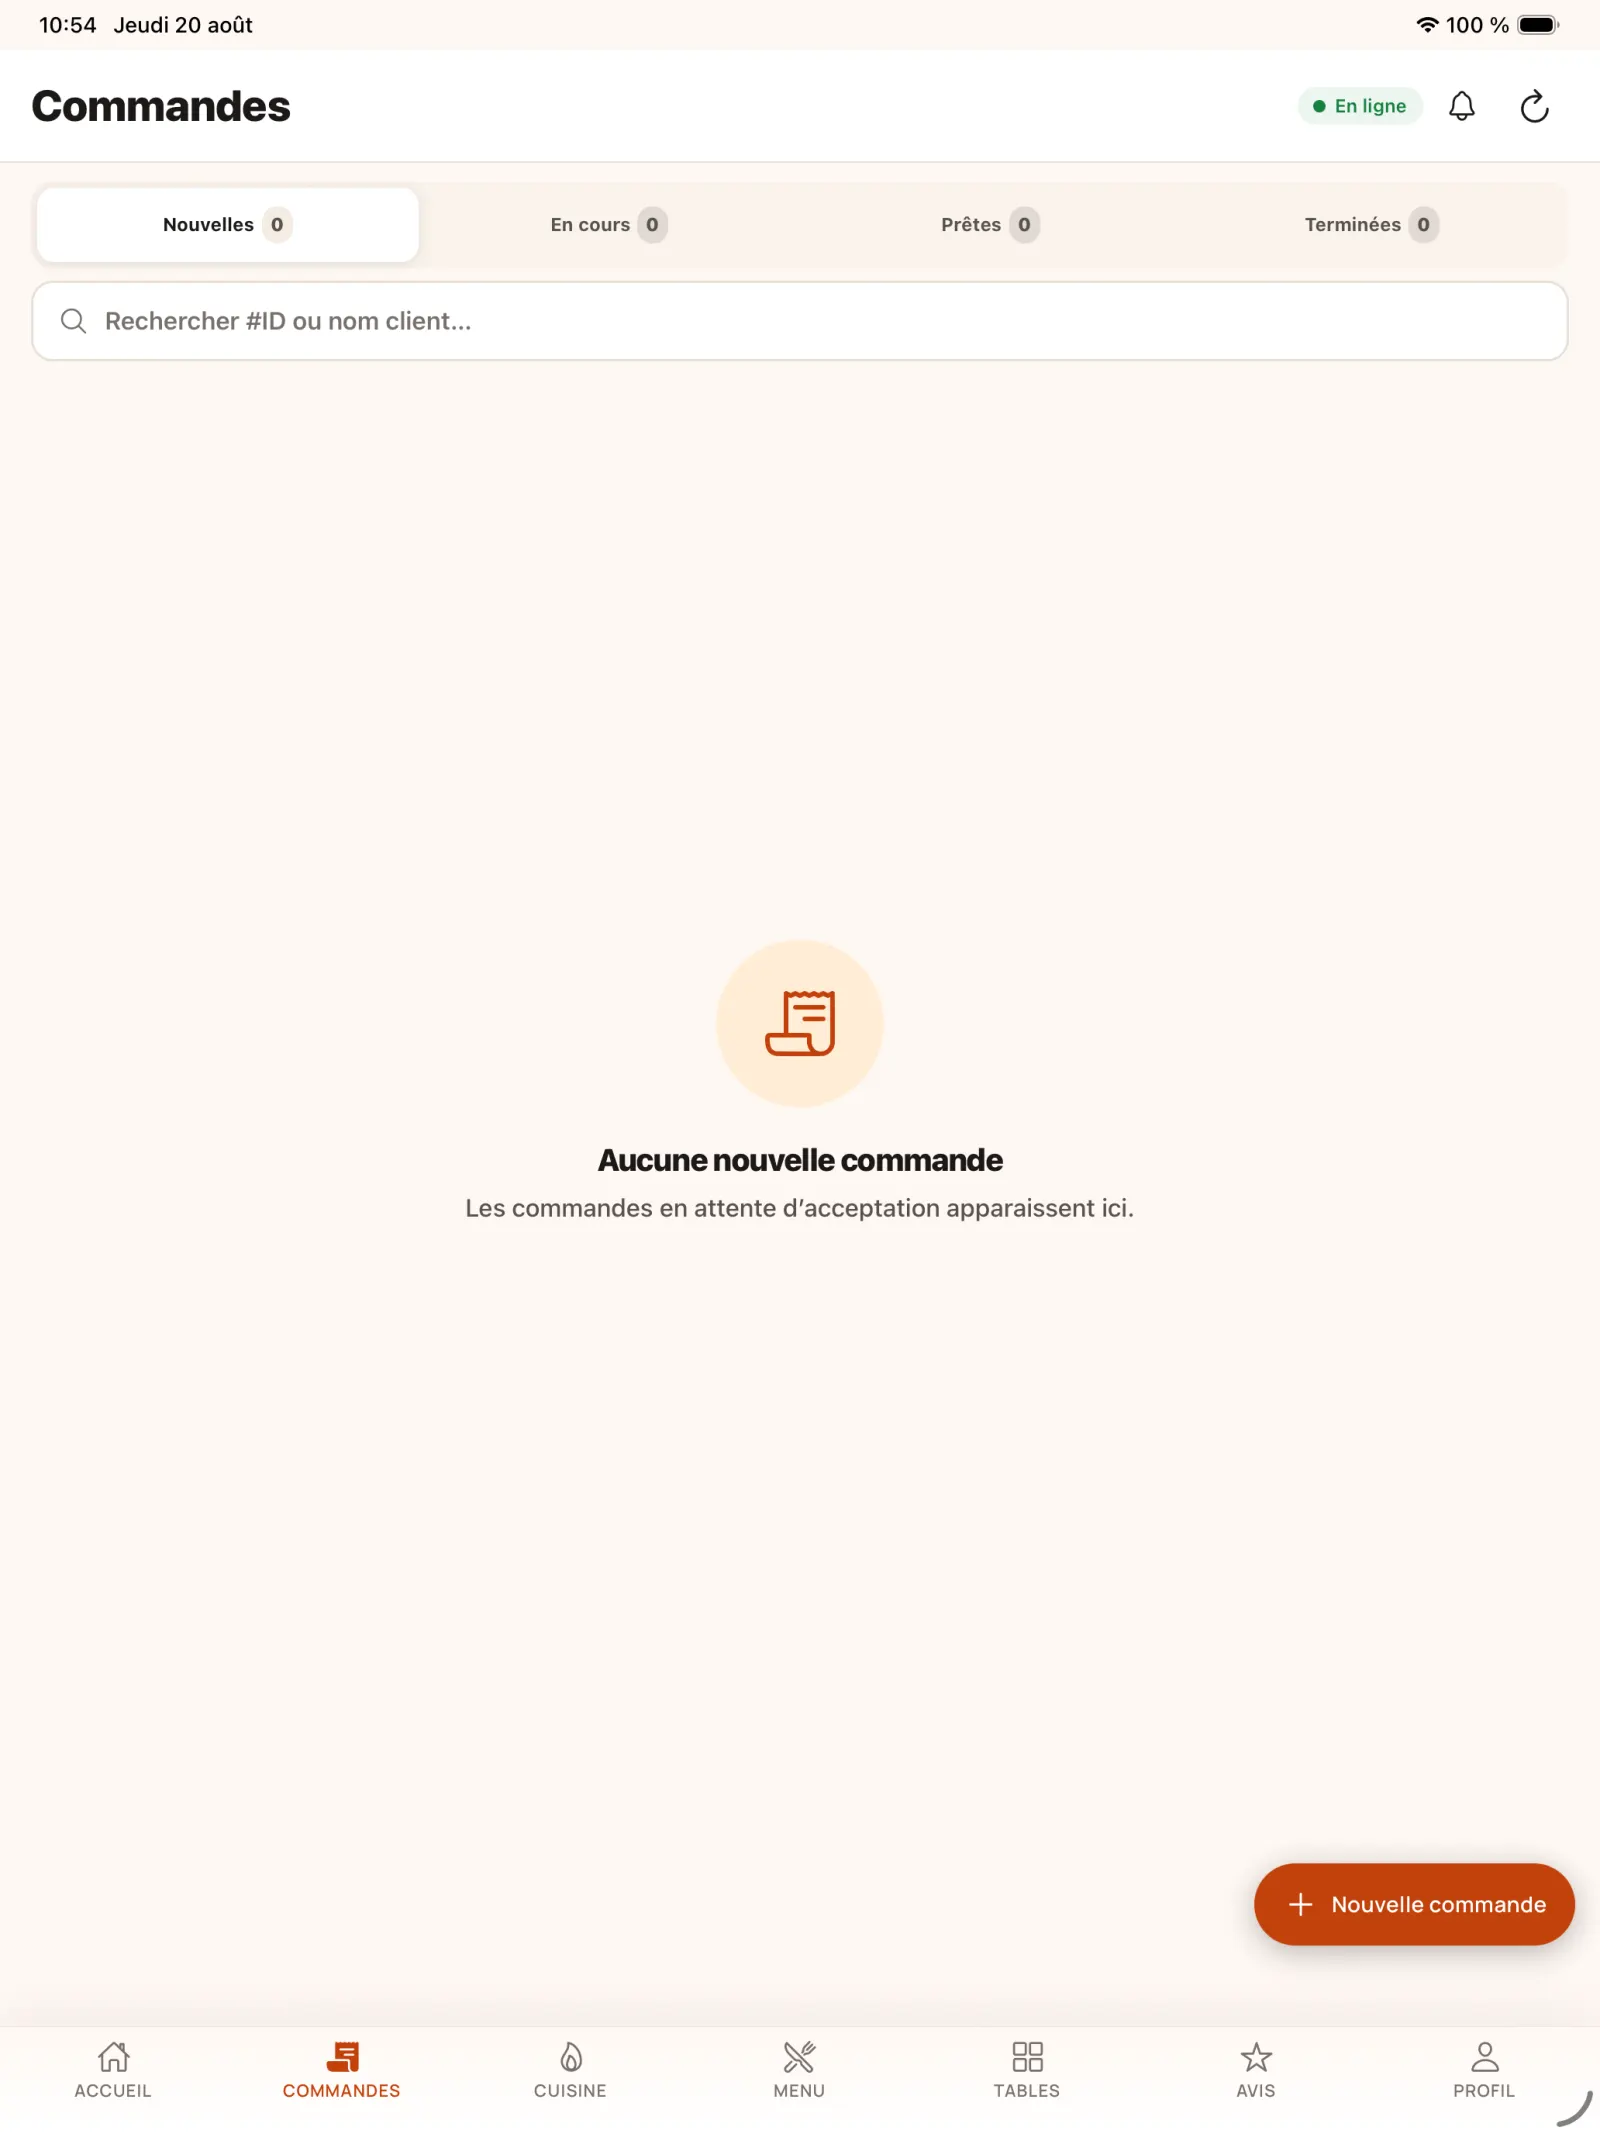
Step 1
Open the orders screen
The “Orders” tab centralises all channels. Select “New Order” to enter an order on behalf of staff.
In practice. KoulChi Pro centralises orders taken at the counter, at the table by a member of the team, from a QR code, from the web page and from the KoulChi application. A server can also enter the order directly on their phone next to the customer.
Open full-size image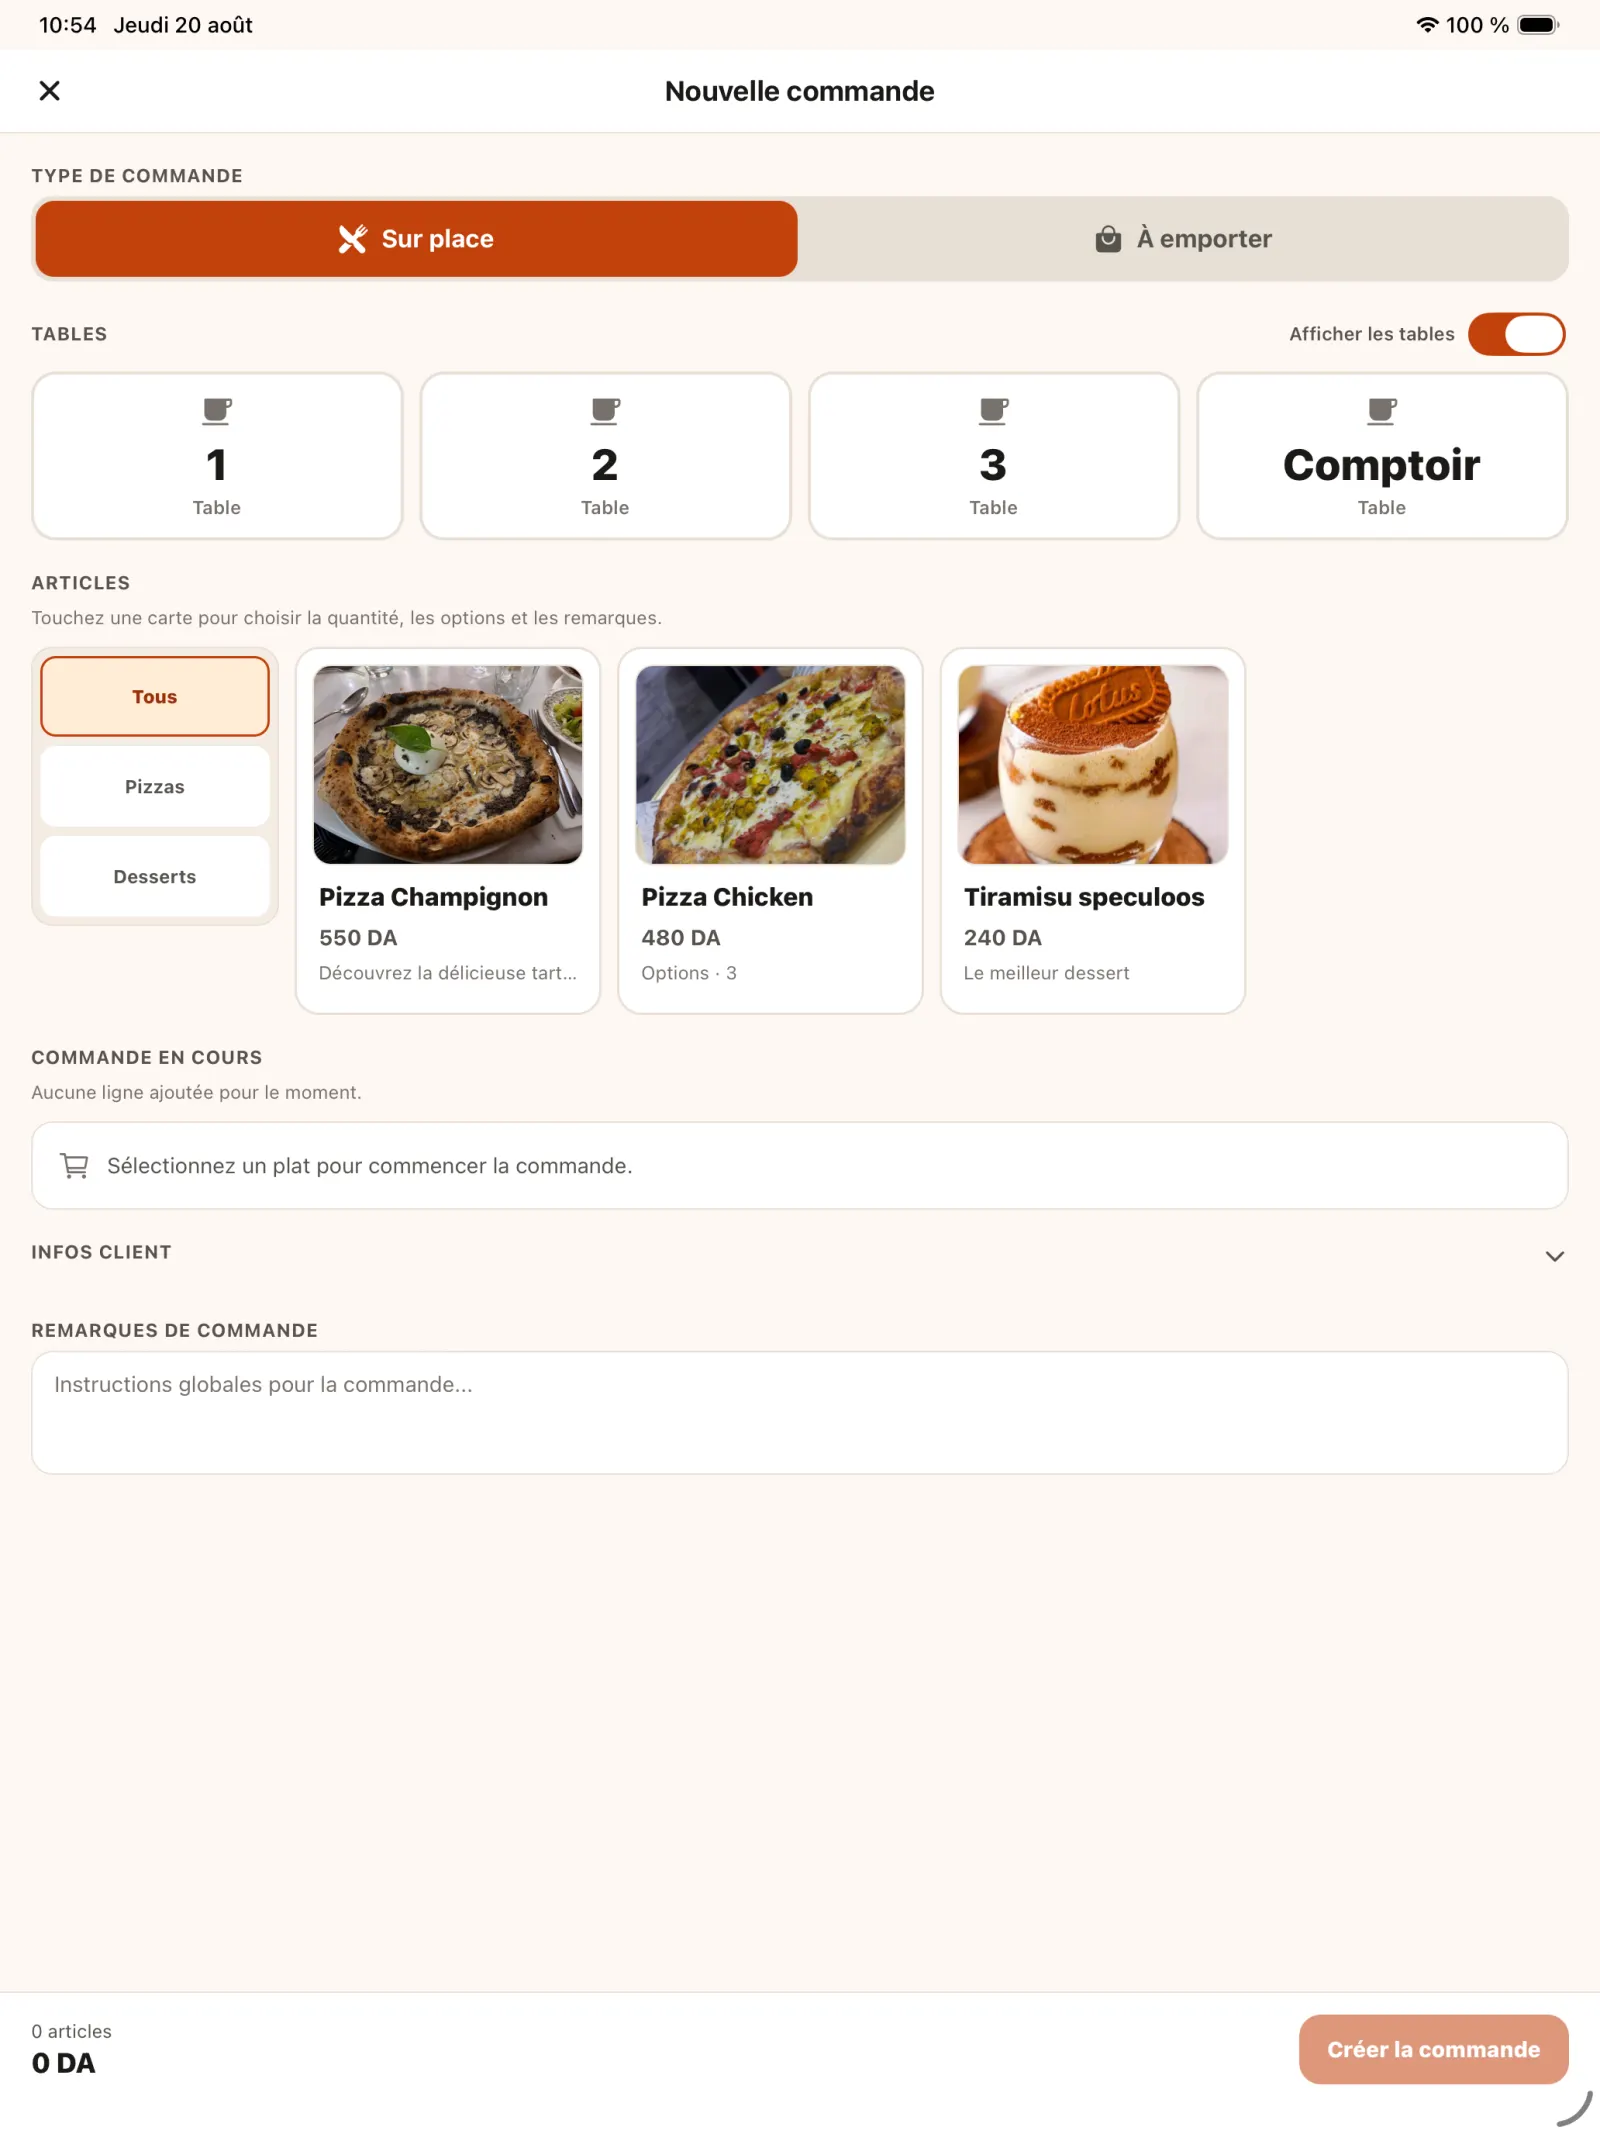
Step 2
Choose service context
Select “Dine in” or “Take out”, optionally associate a table, then browse the categories and products. A general comment can be passed on to the kitchen.
In practice. Associating a table remains optional. Categories speed up search during service and the summary allows you to confirm the order with the customer. Any remark related to an allergen or a special request is forwarded to the kitchen.
Open full-size image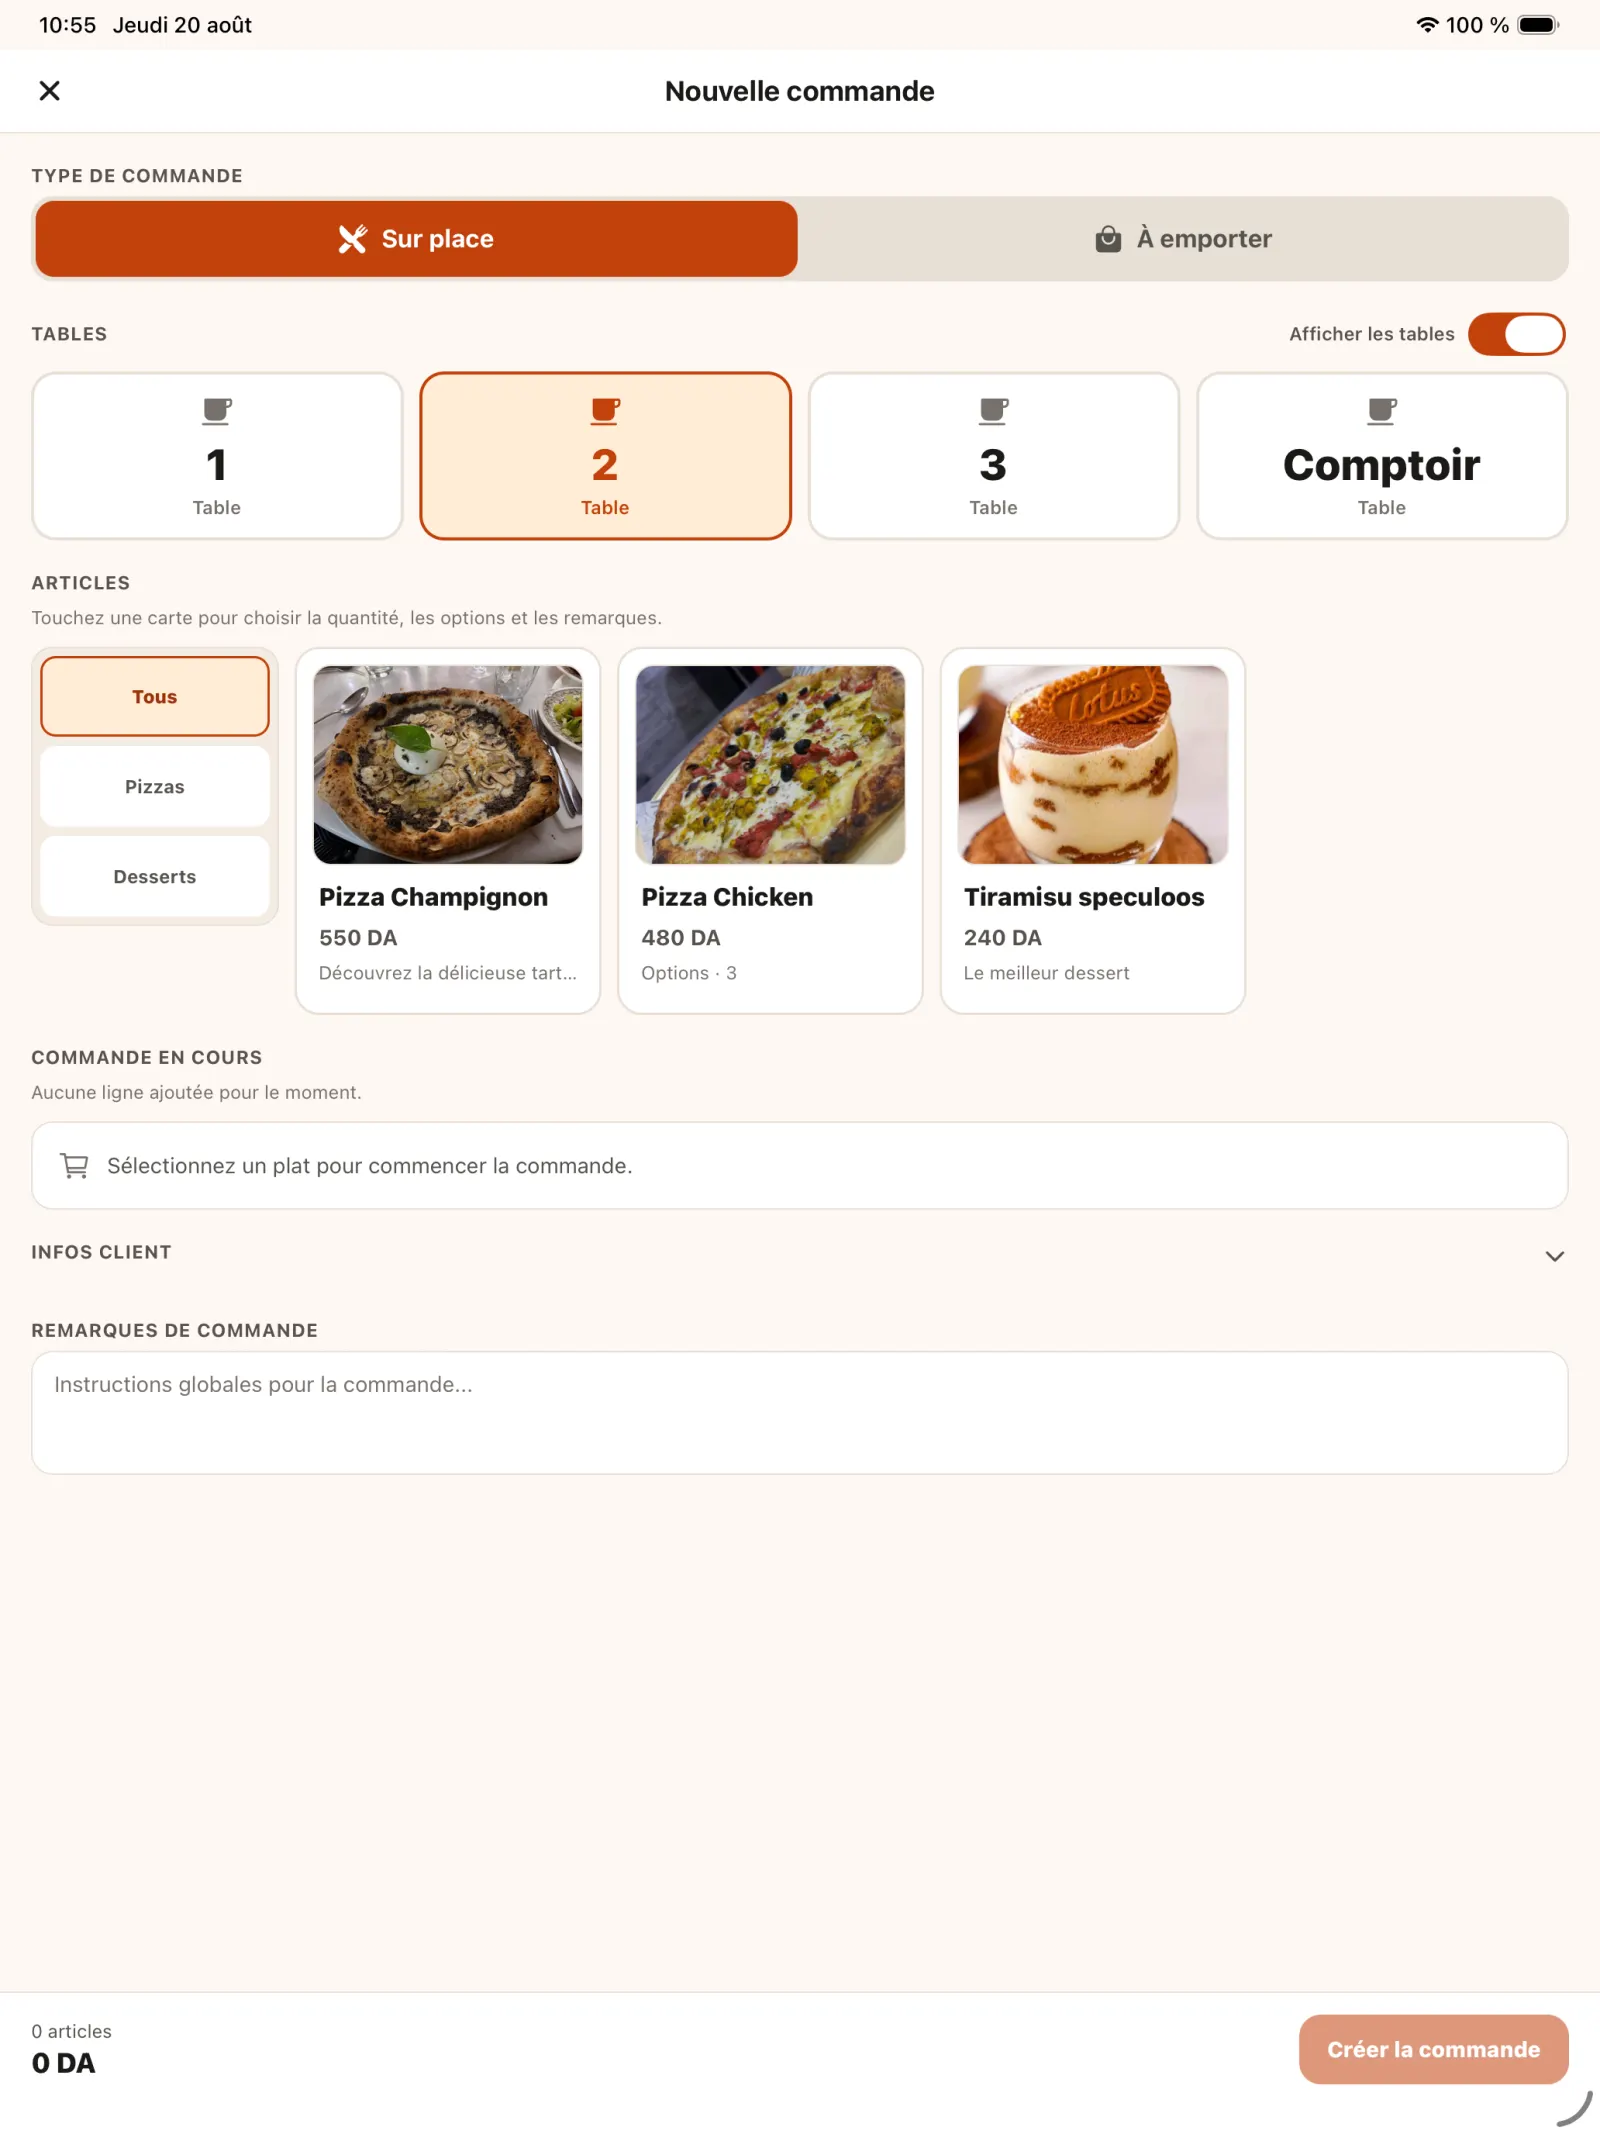
Step 3
Associate a table
Select the occupied table so that it is visible in the order tracking.
Open full-size image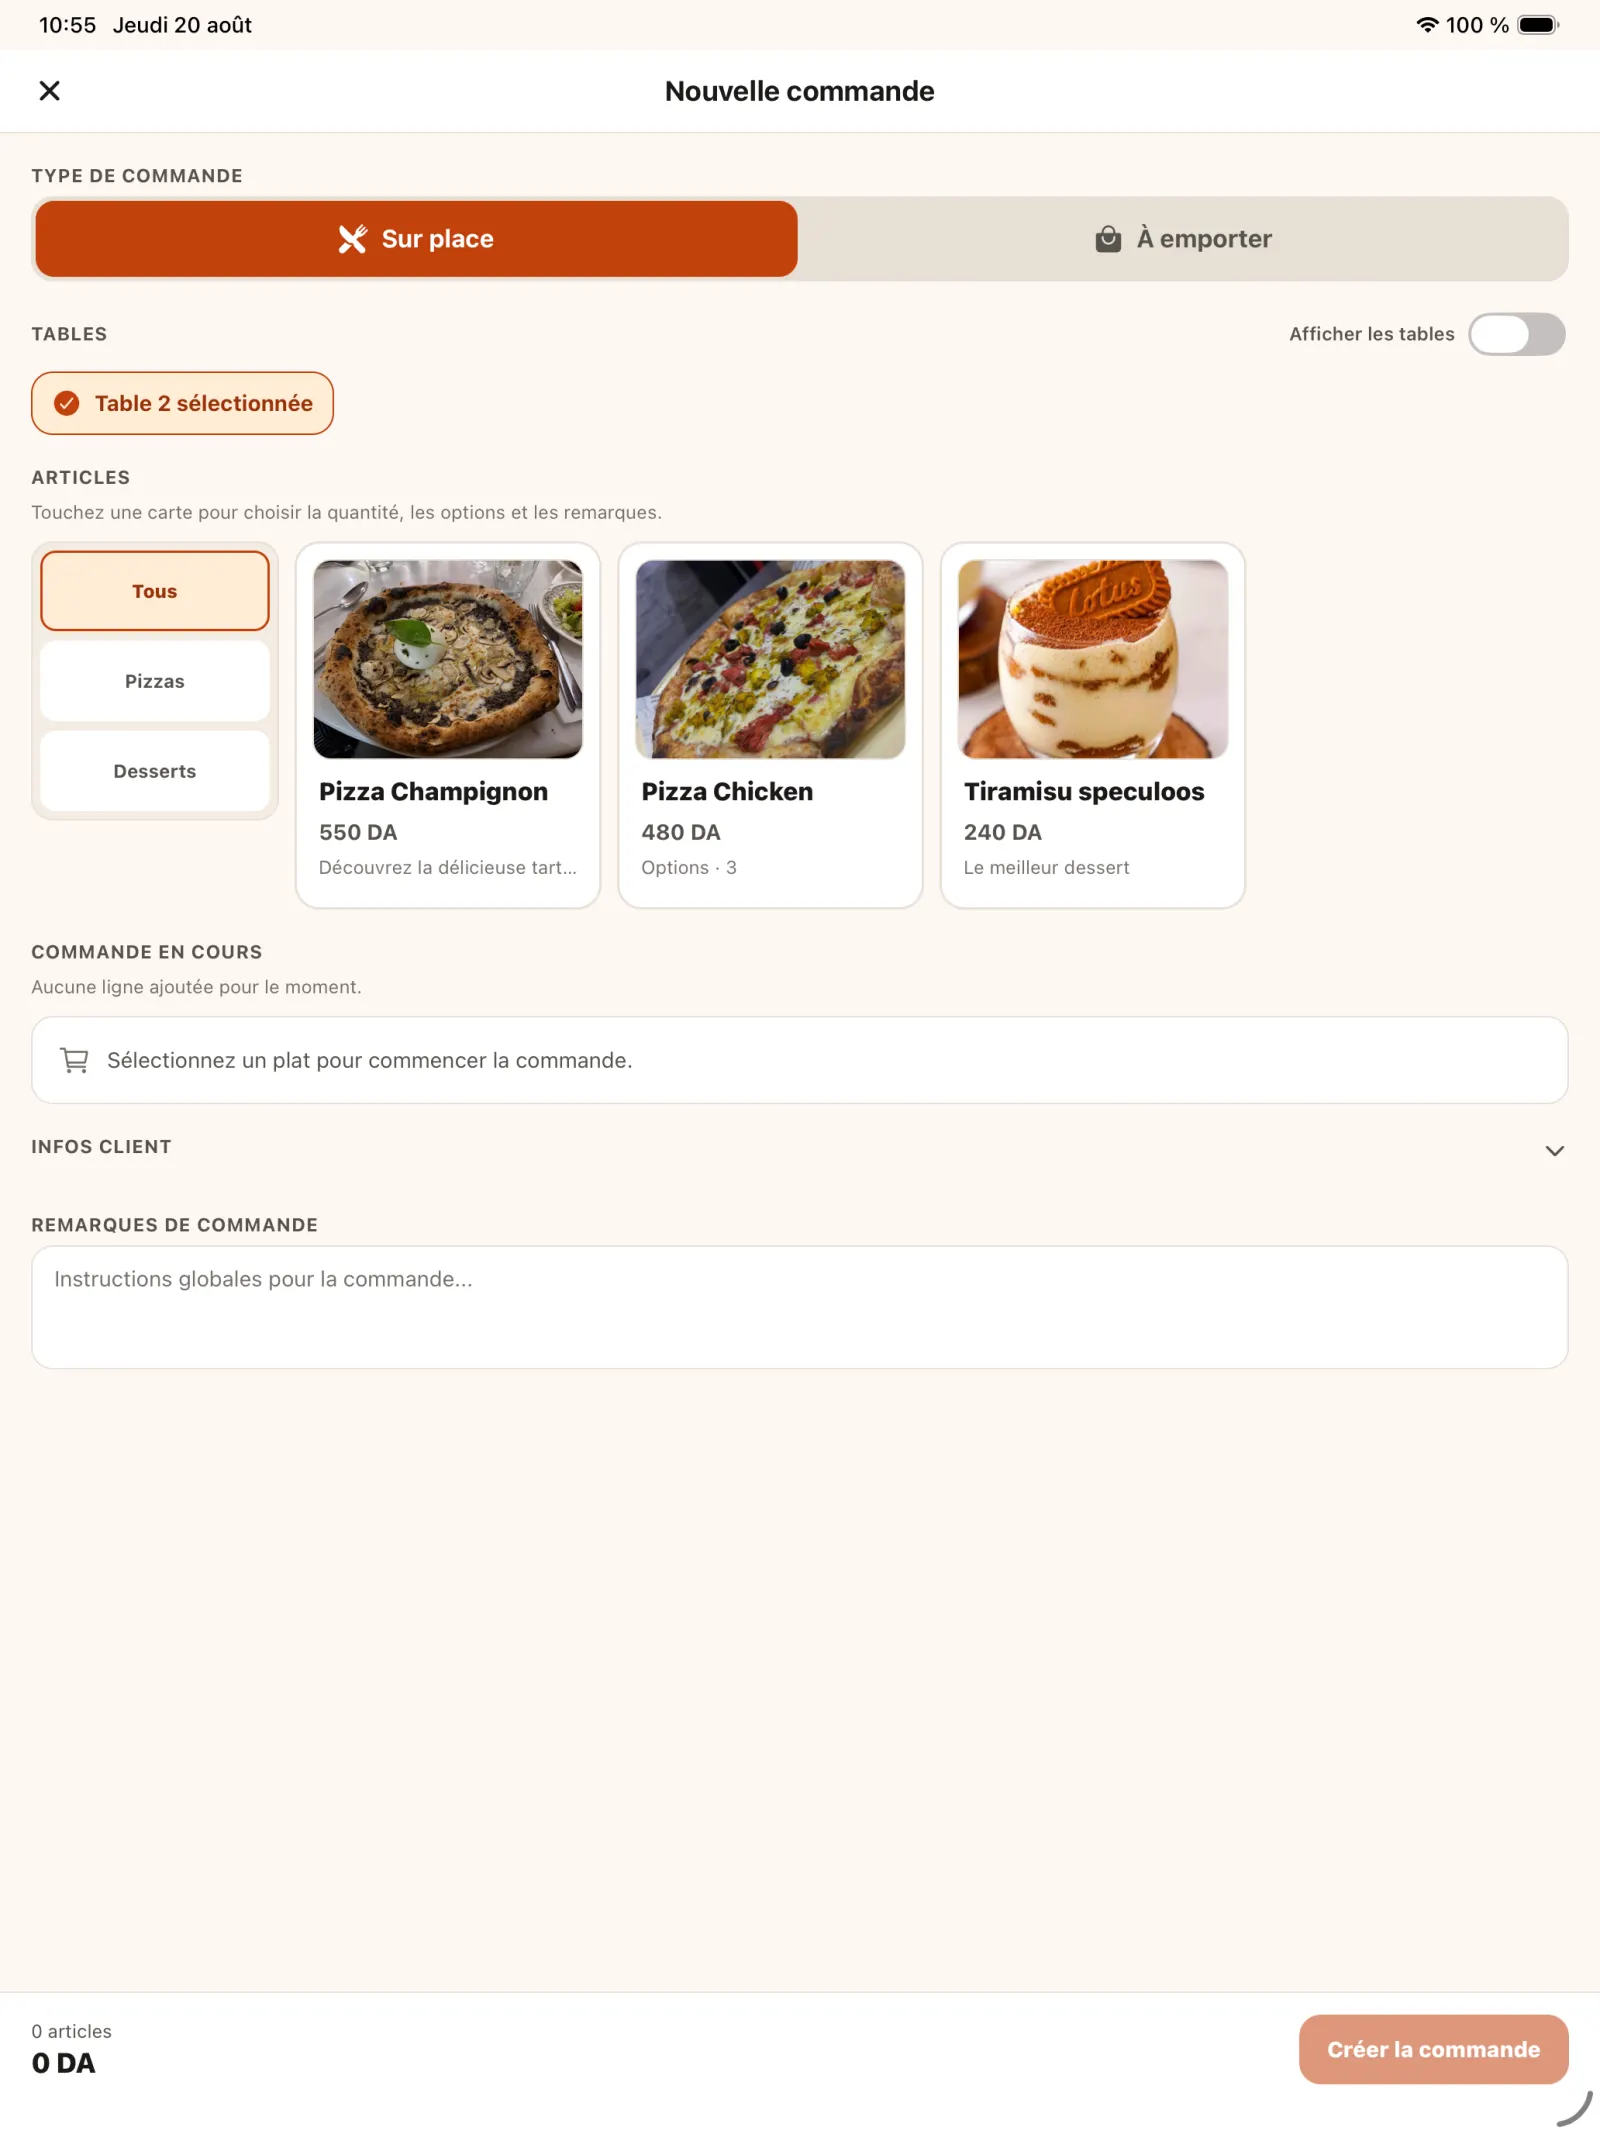
Step 4
Collapse the table list
Once the table is chosen, hide the selector to free up space while typing.
Open full-size image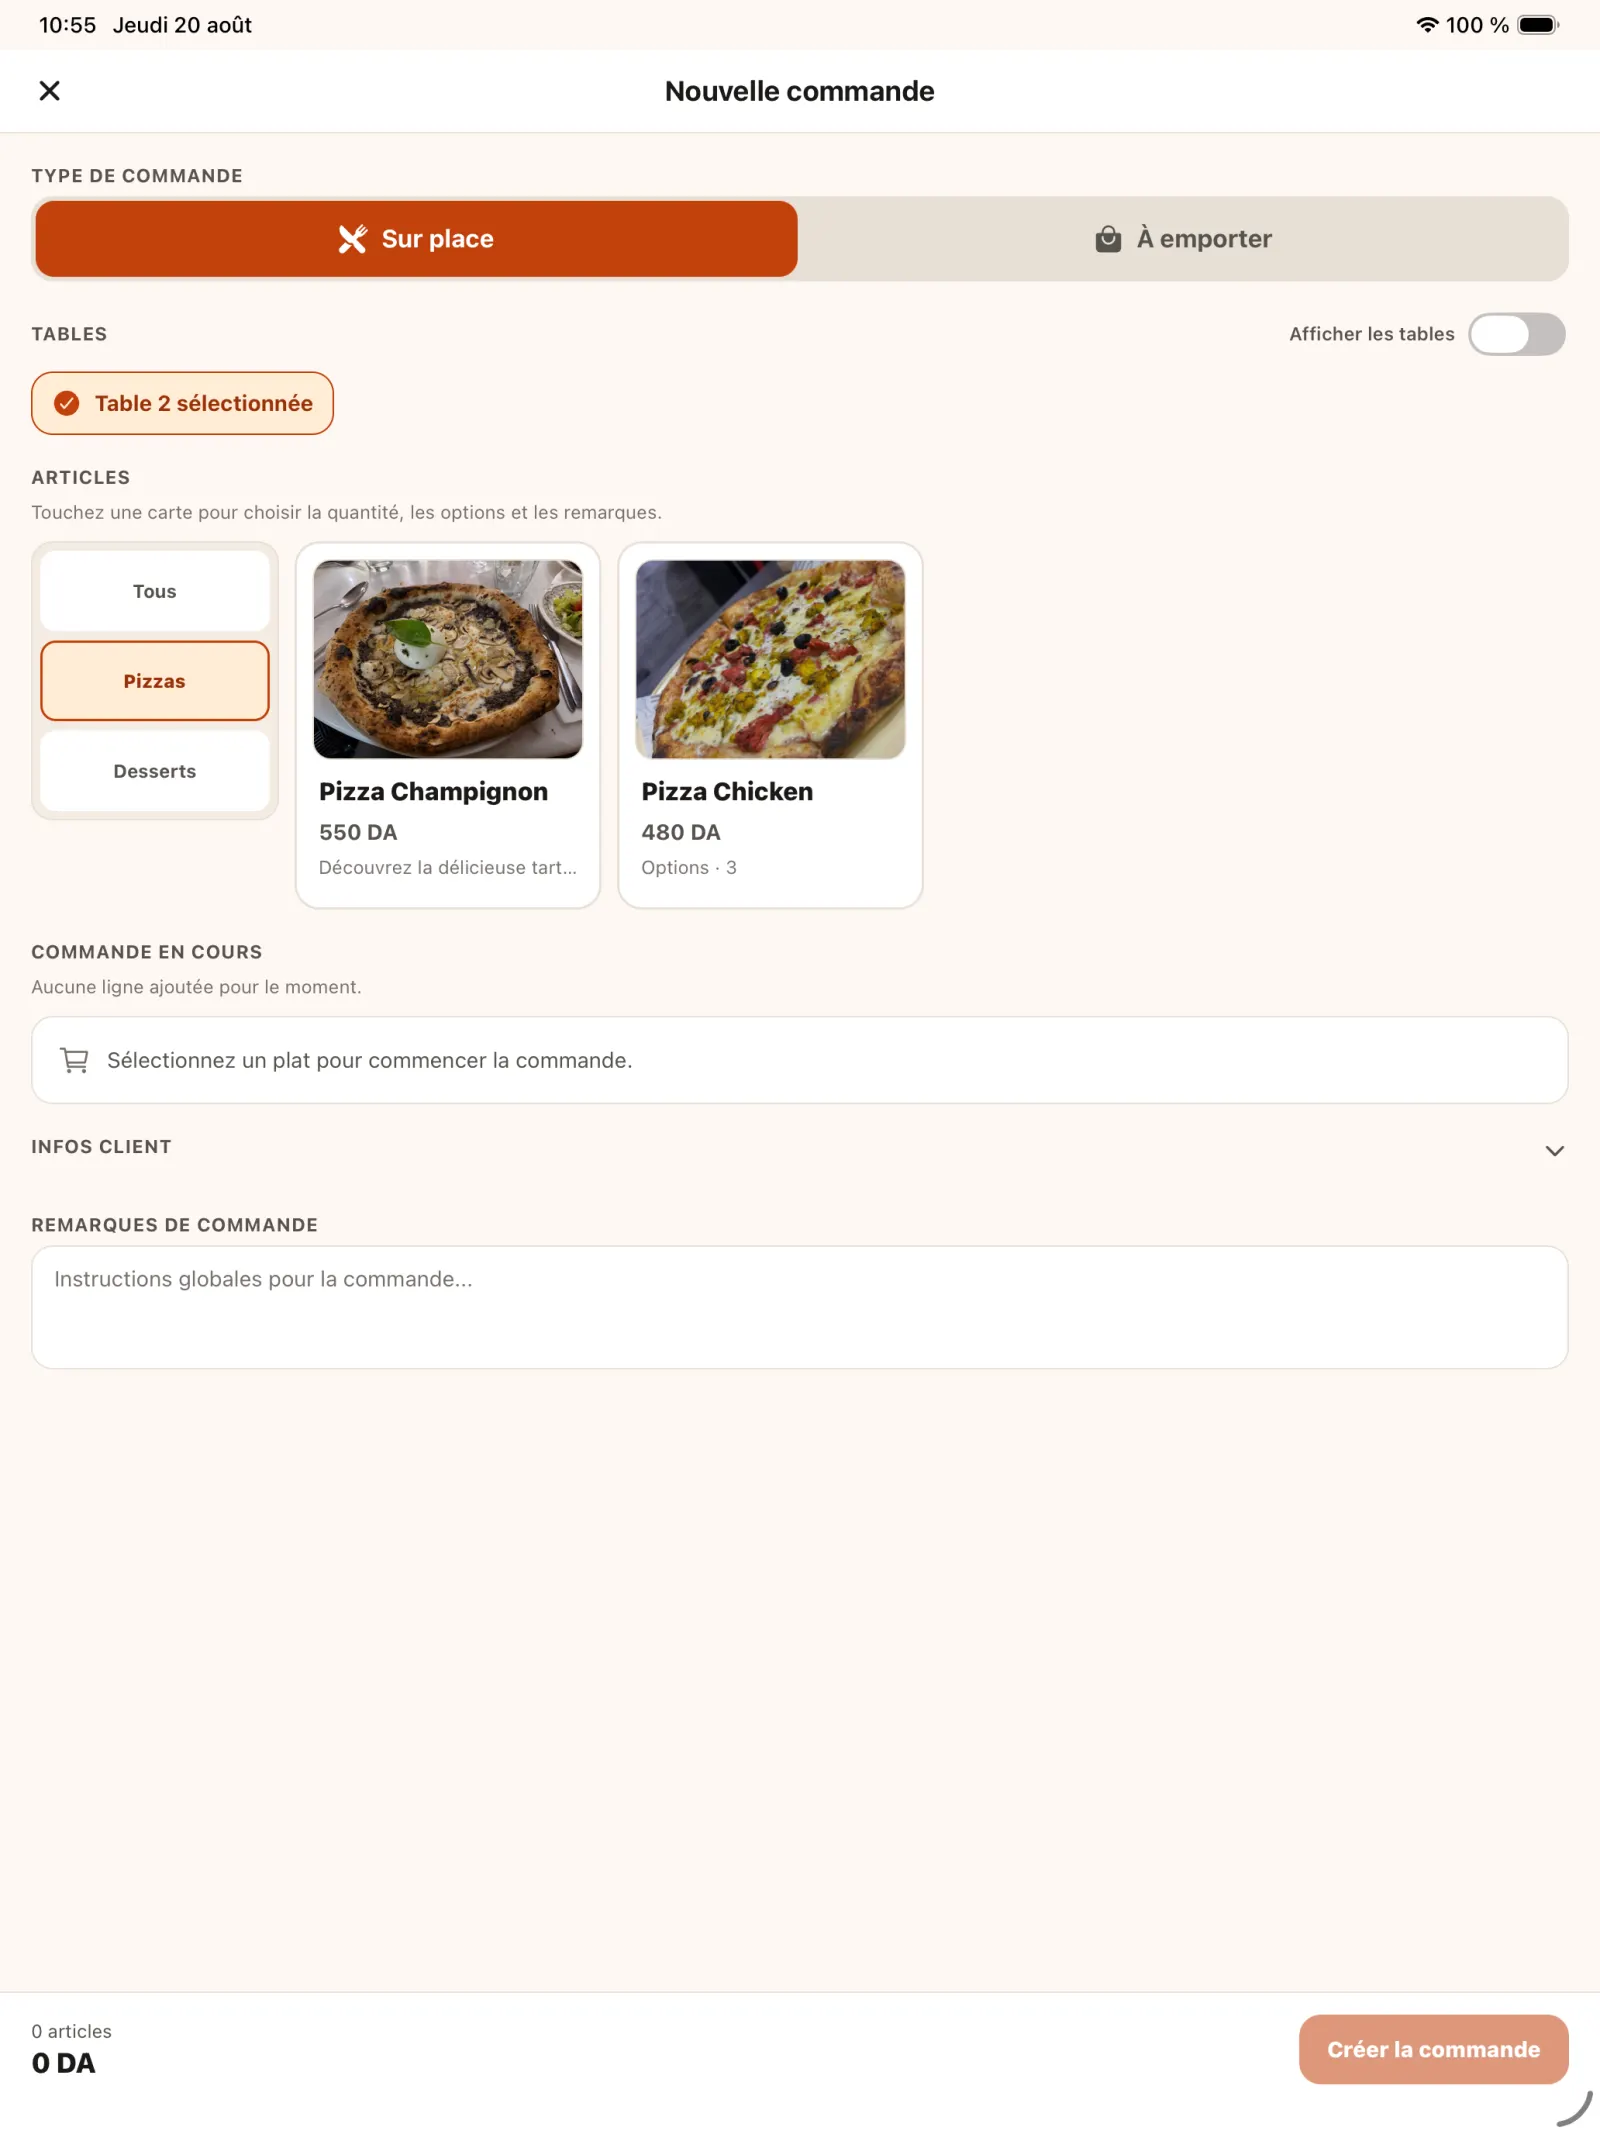
Step 5
Filter the catalogue
Use the categories to find the requested products more quickly.
Open full-size image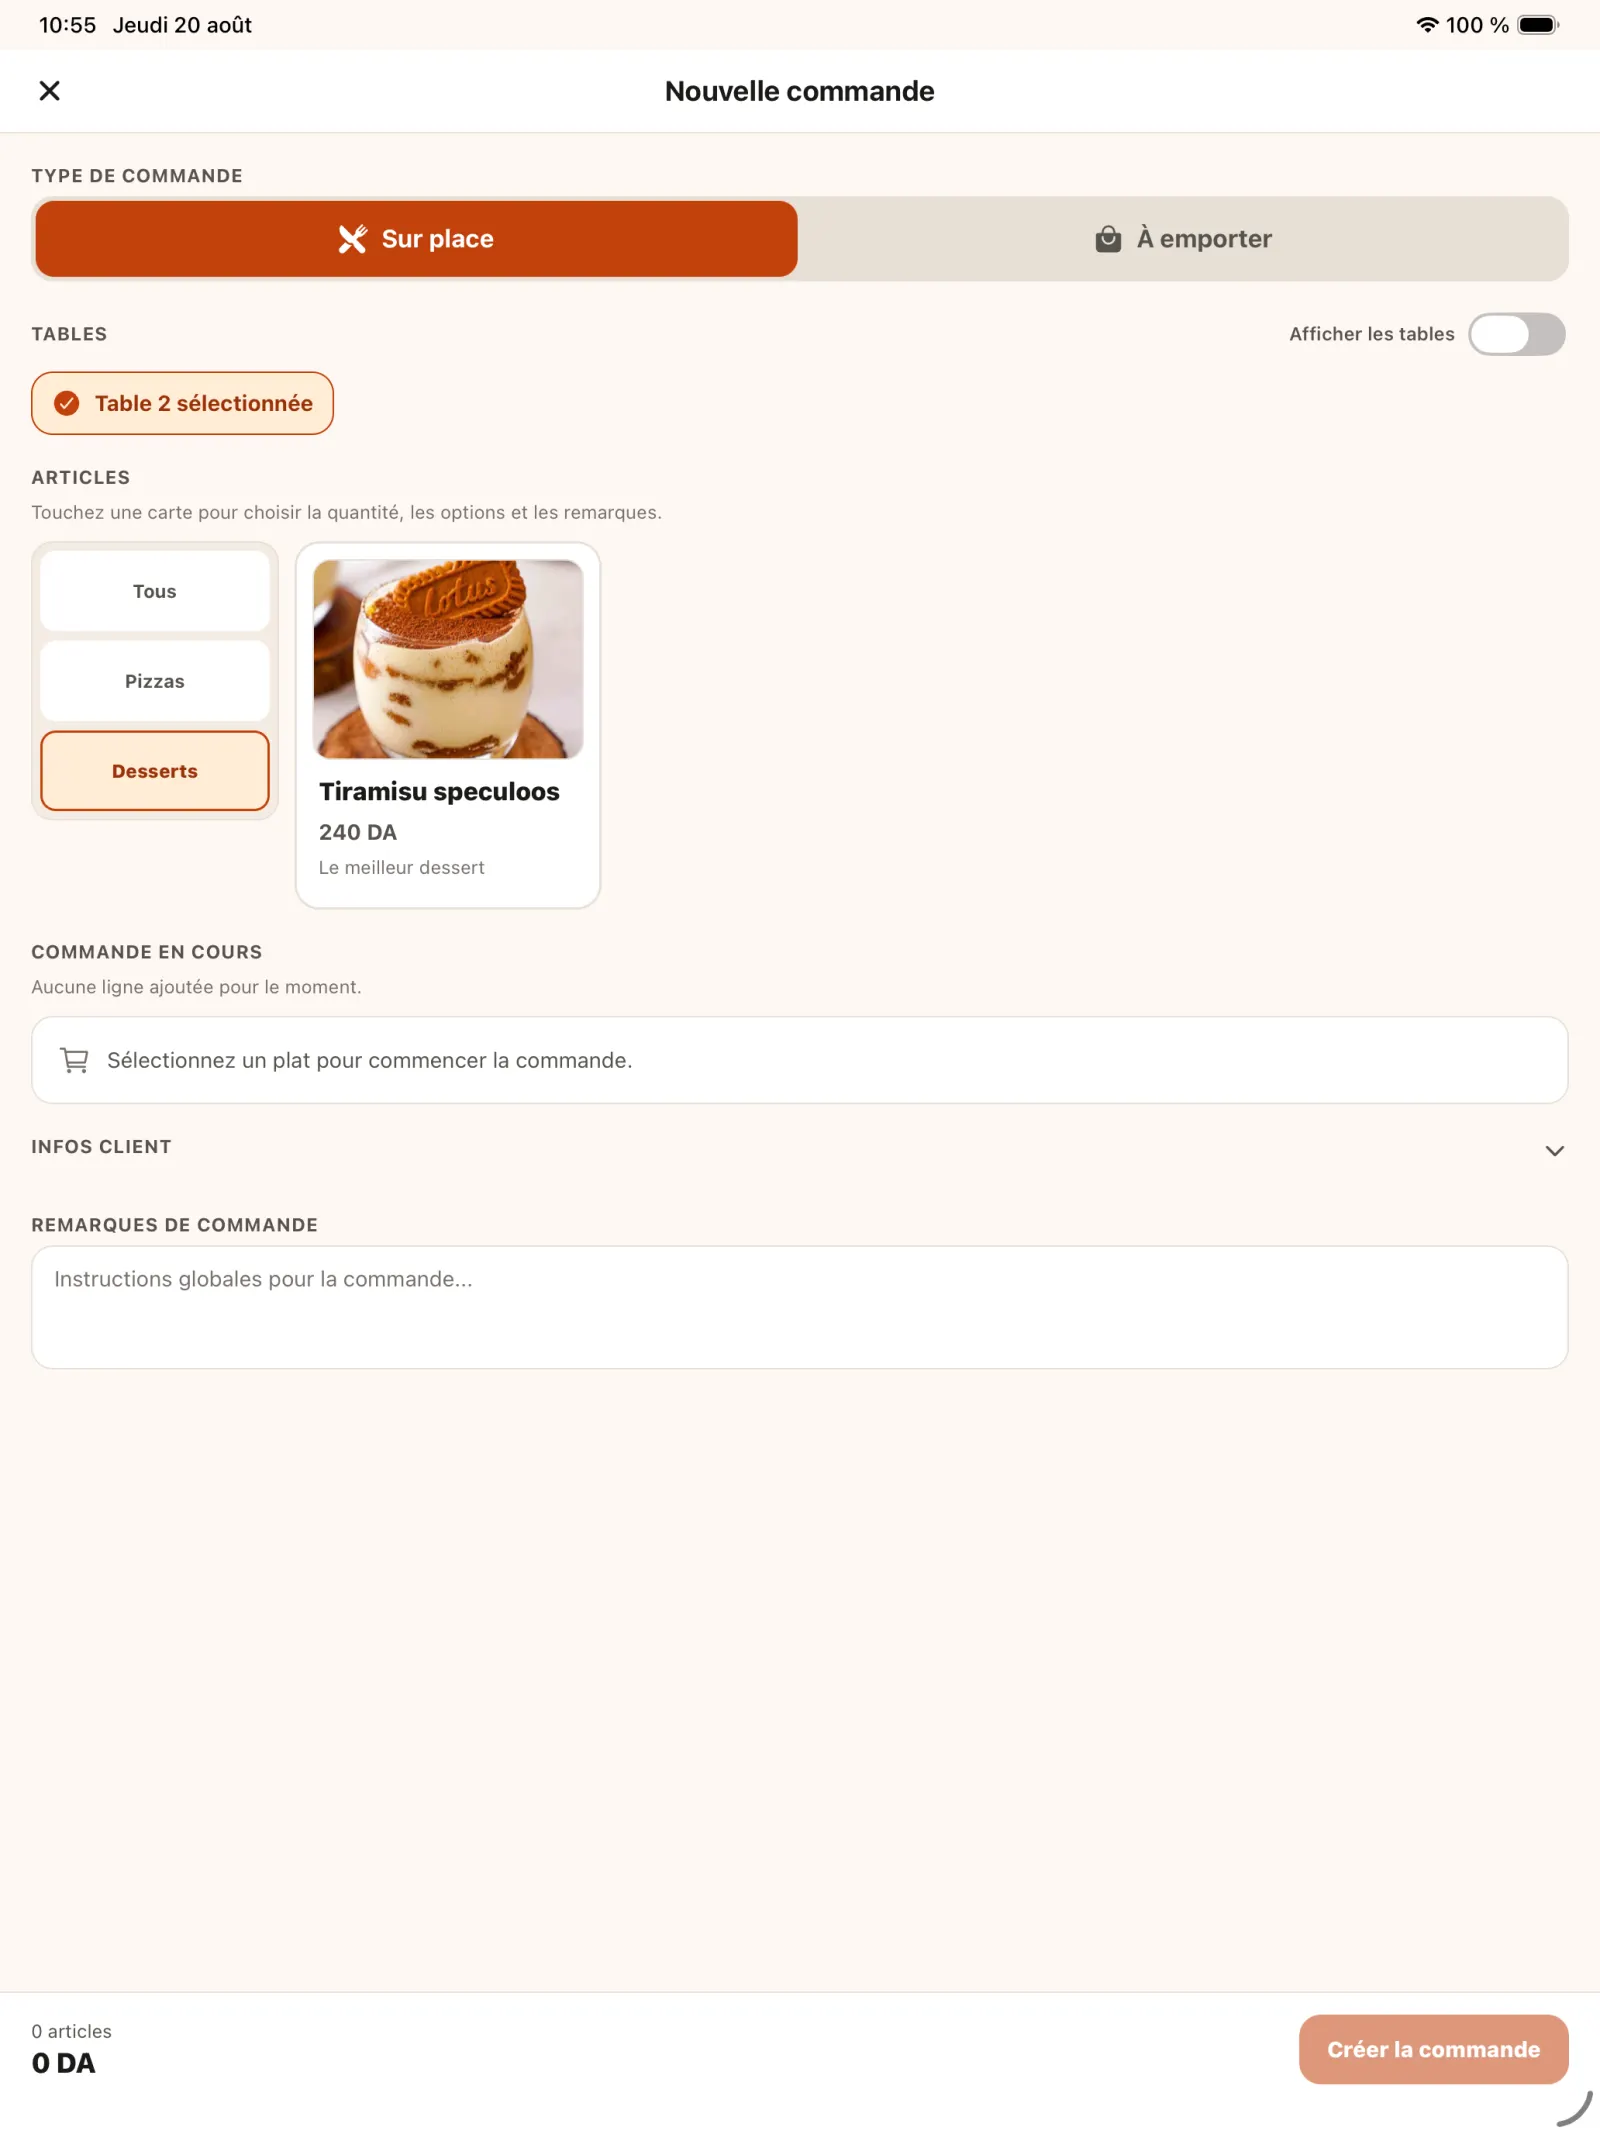
Step 6
Add products
Select the products in the order and adjust their quantities before moving on to customisations.
Open full-size image
Chapter 2
customise and confirm order
The rules created in the menu are reused when the team takes an order.
Step 7
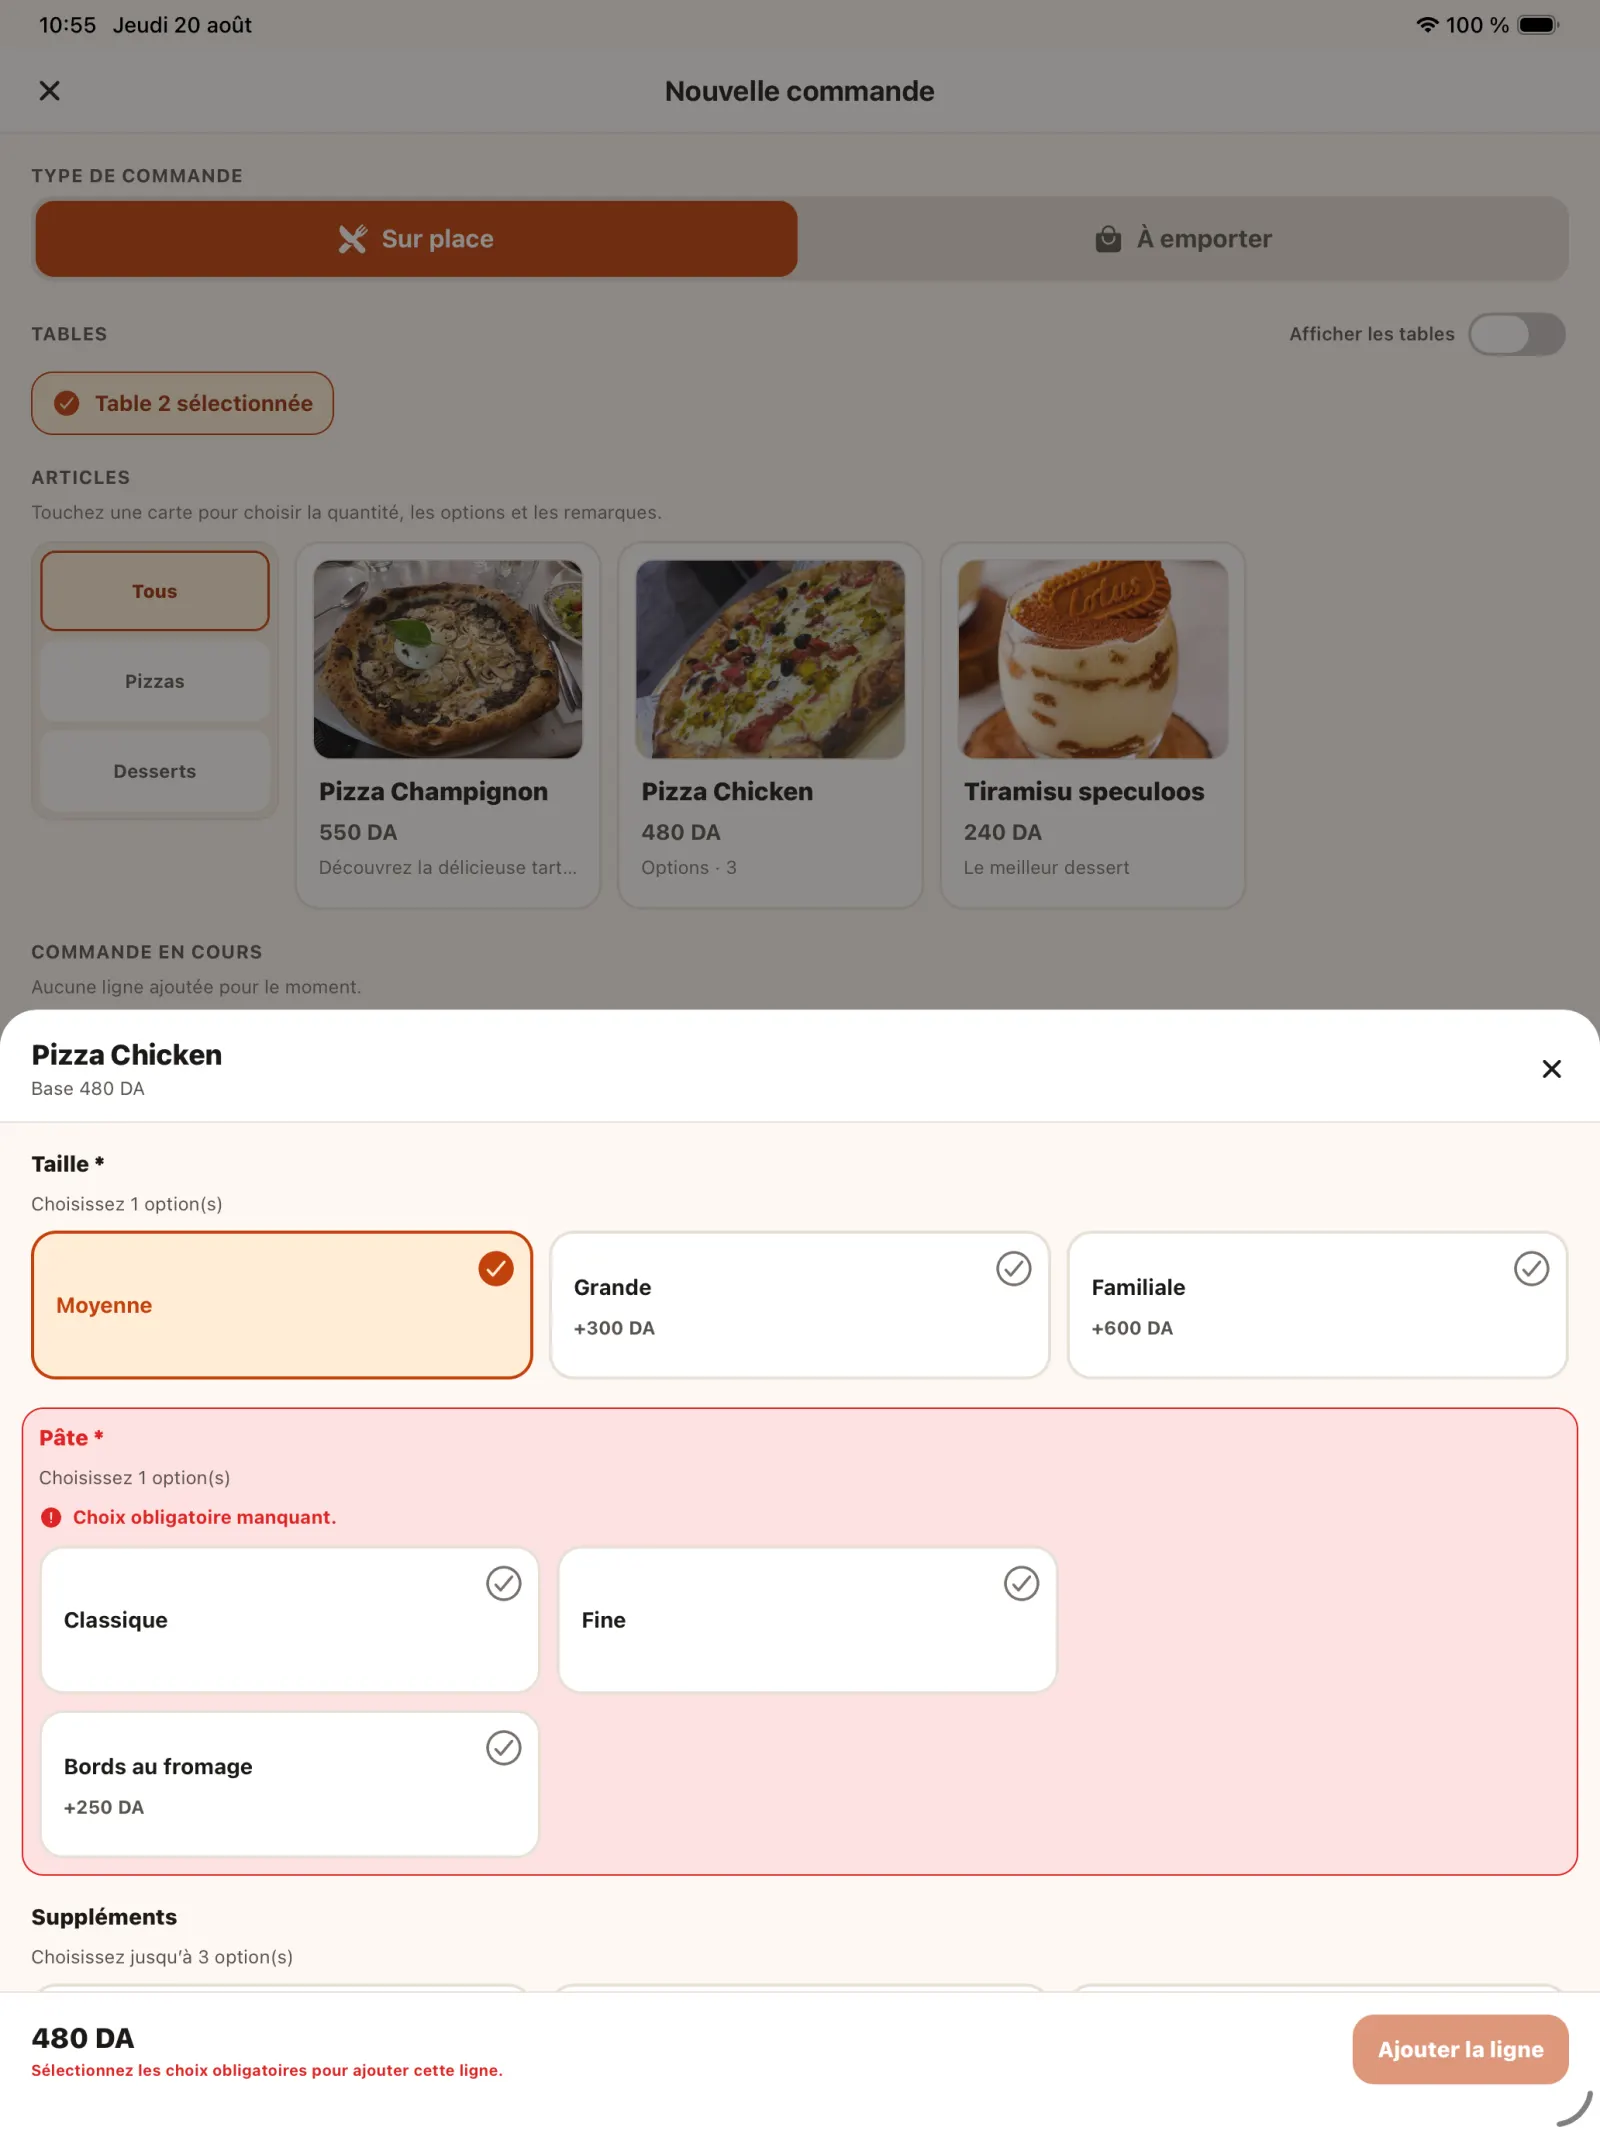
Choose product options
Select the size, paste and extras requested by the customer.
Open full-size image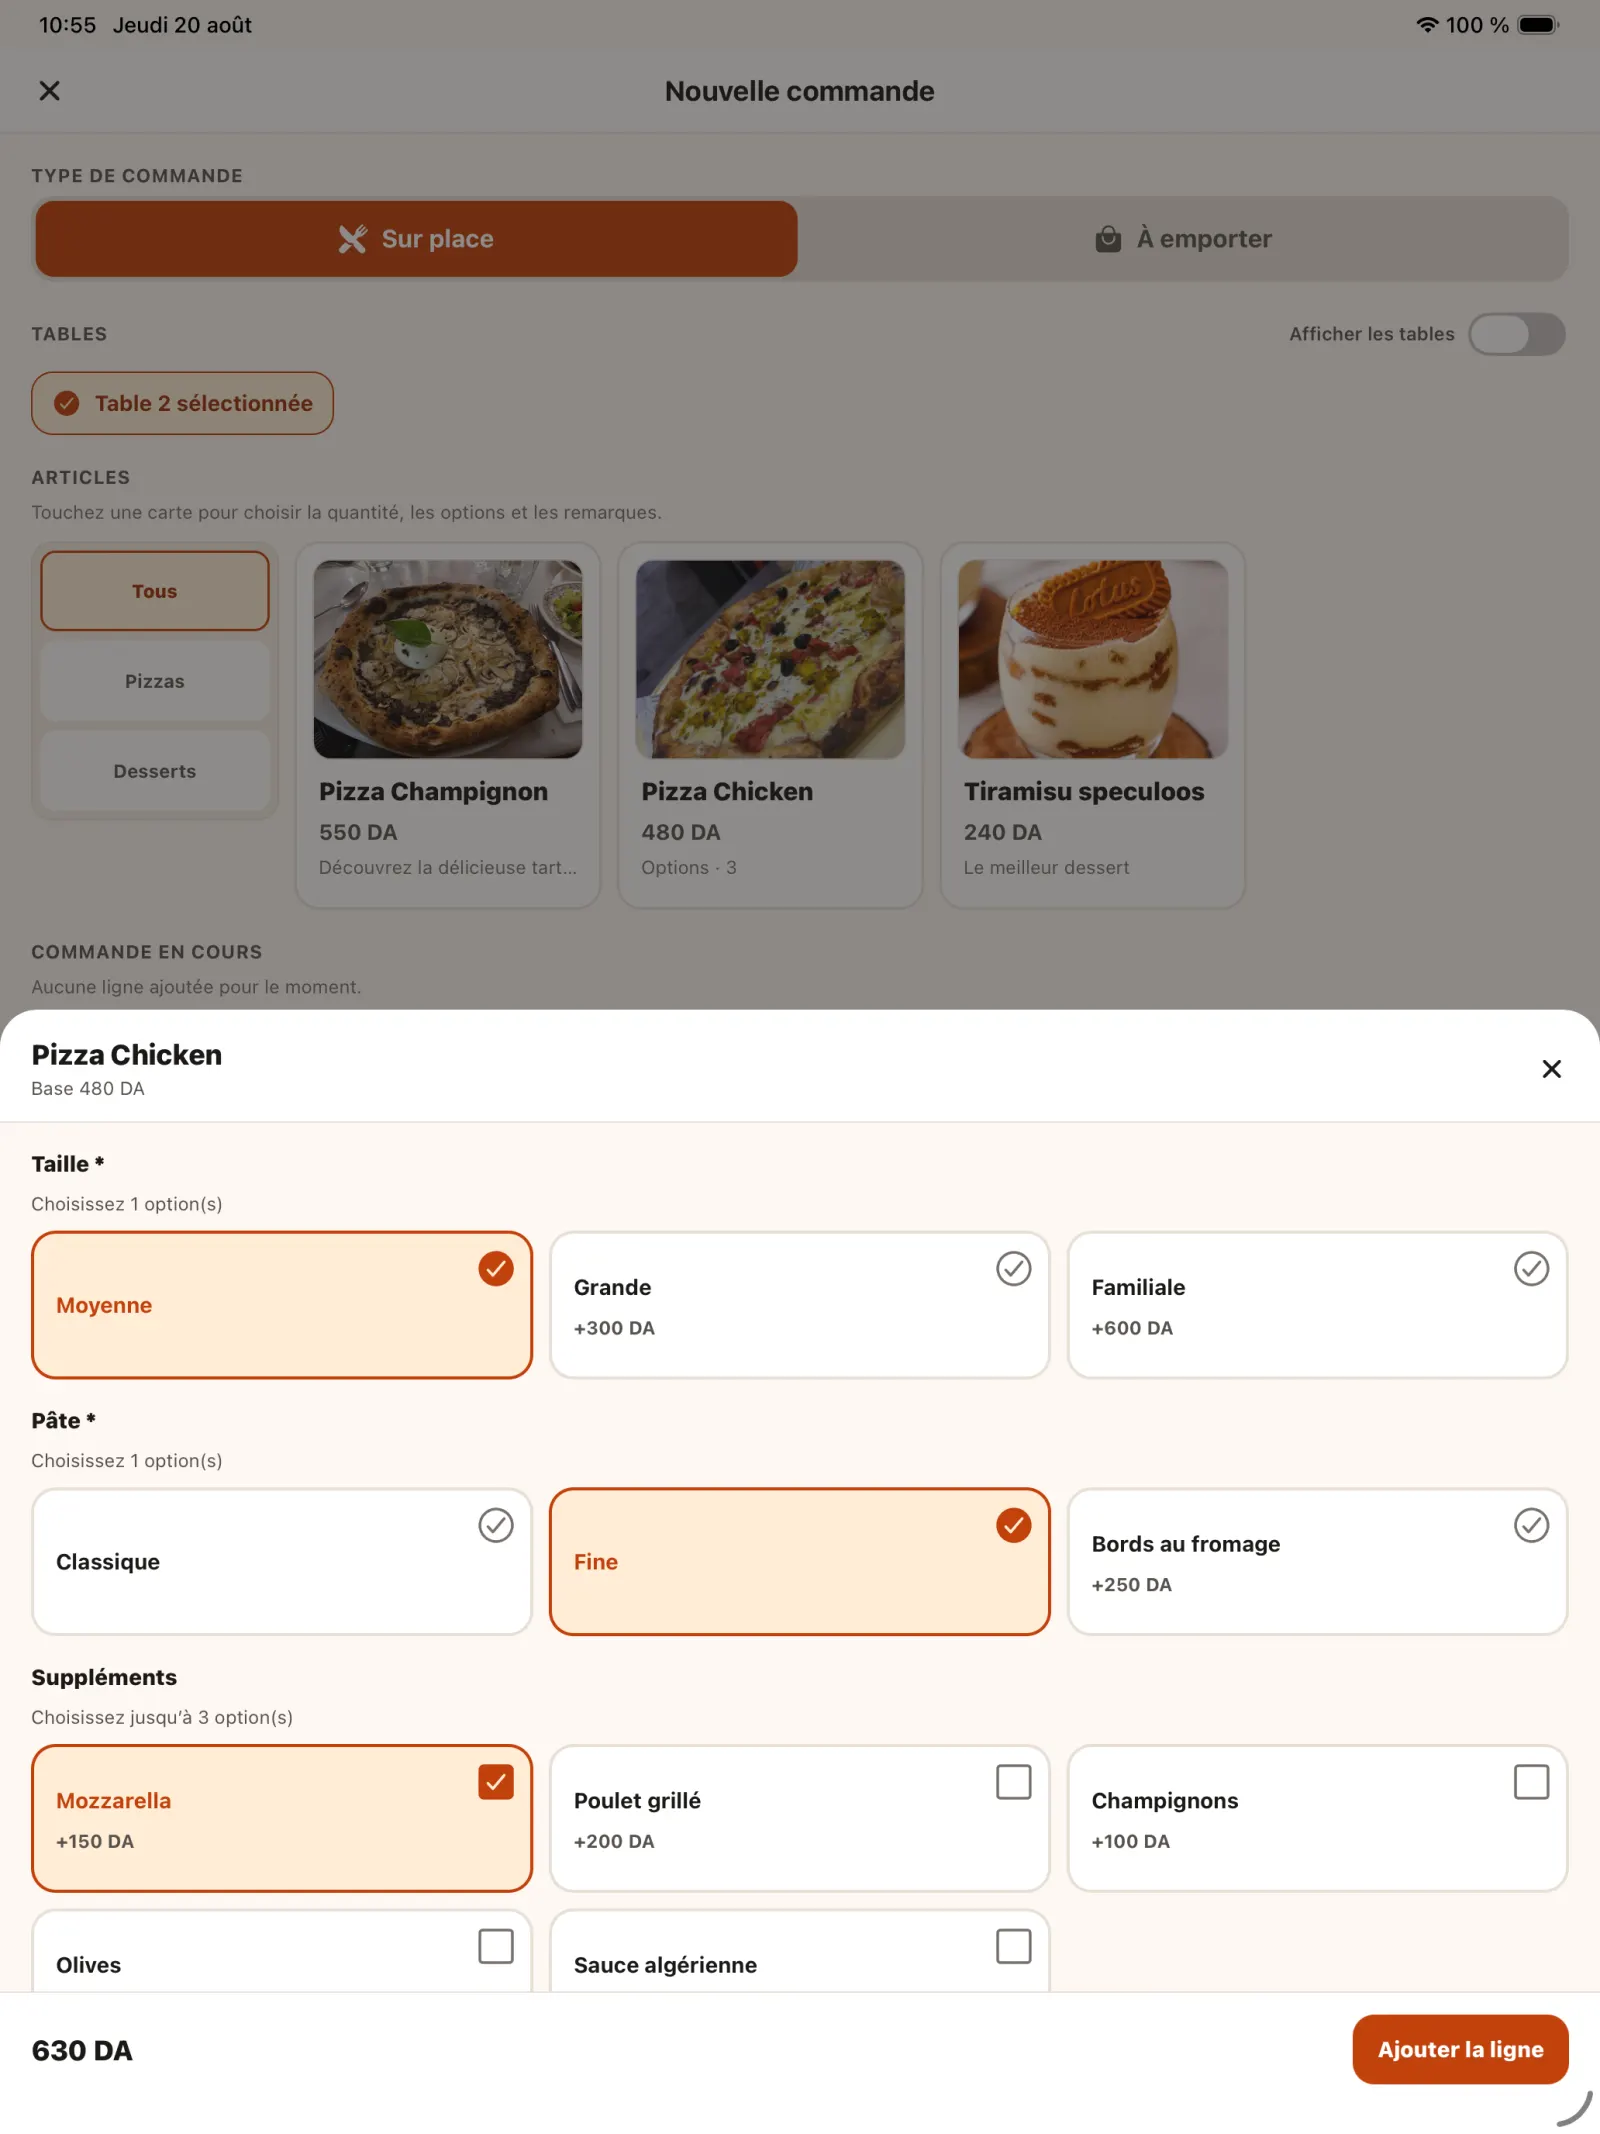
Step 8
Check the recalculated price
The amount of the product changes automatically according to the paid options selected.
Open full-size image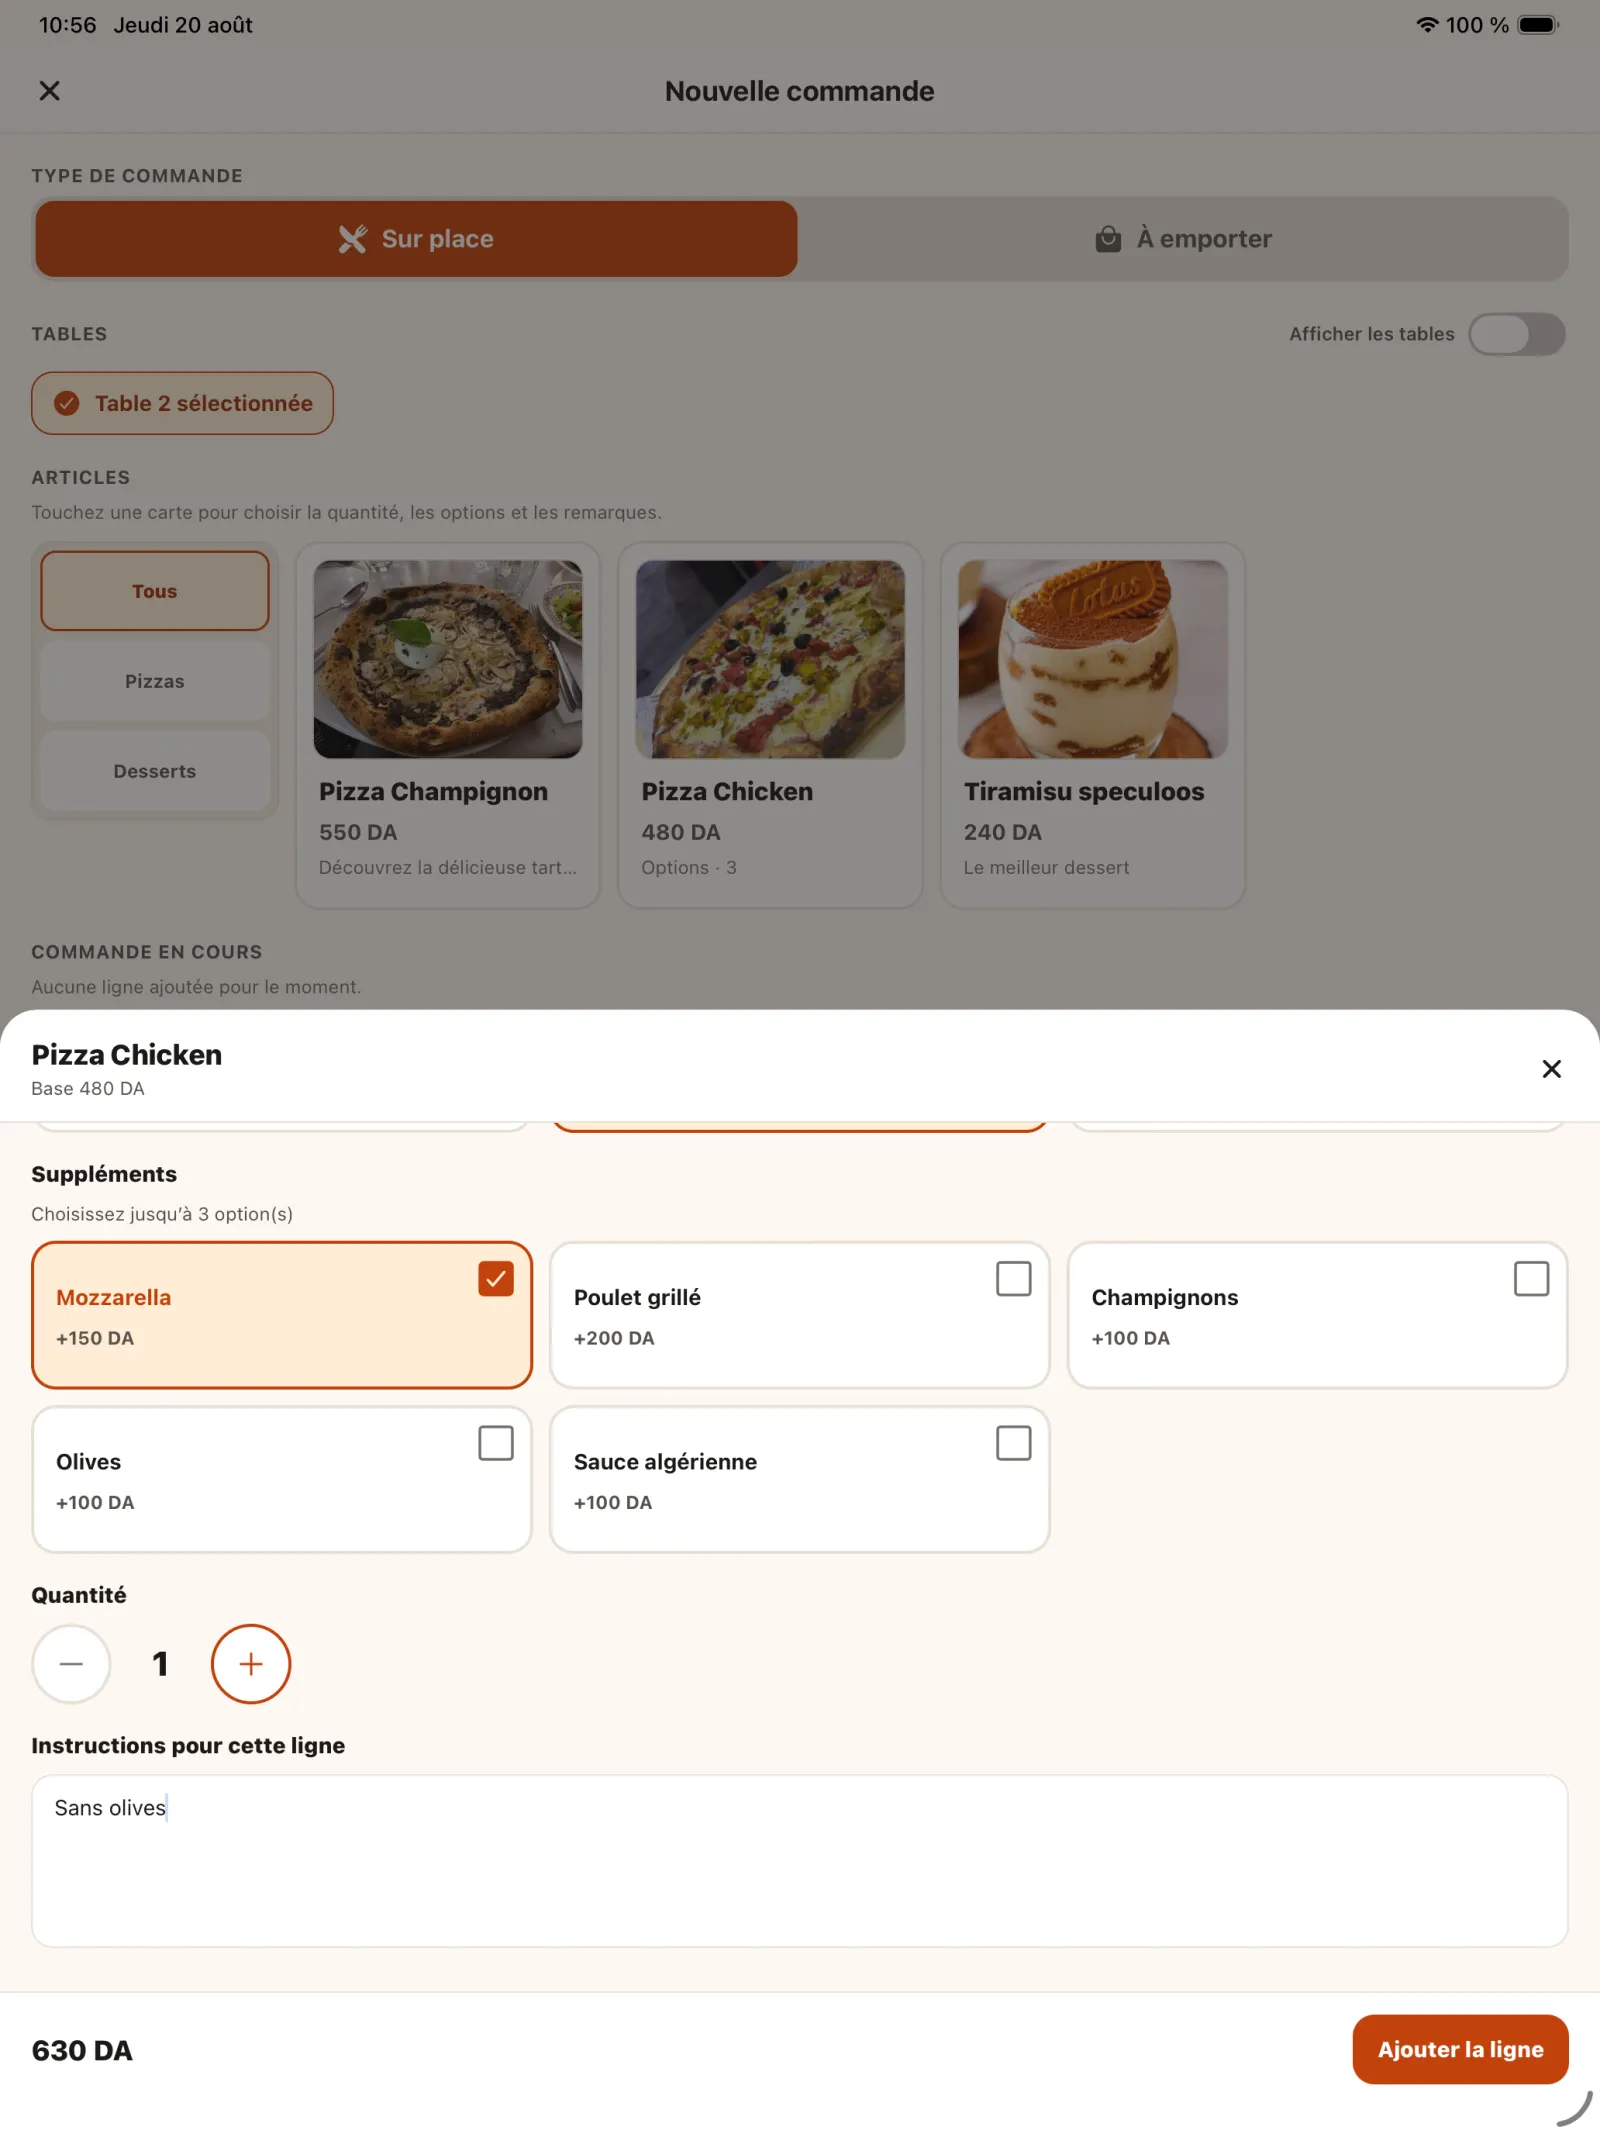
Step 9
Add a note for the kitchen
Enter a special request, such as removing an ingredient, so that it appears on the preparation sheet.
Open full-size image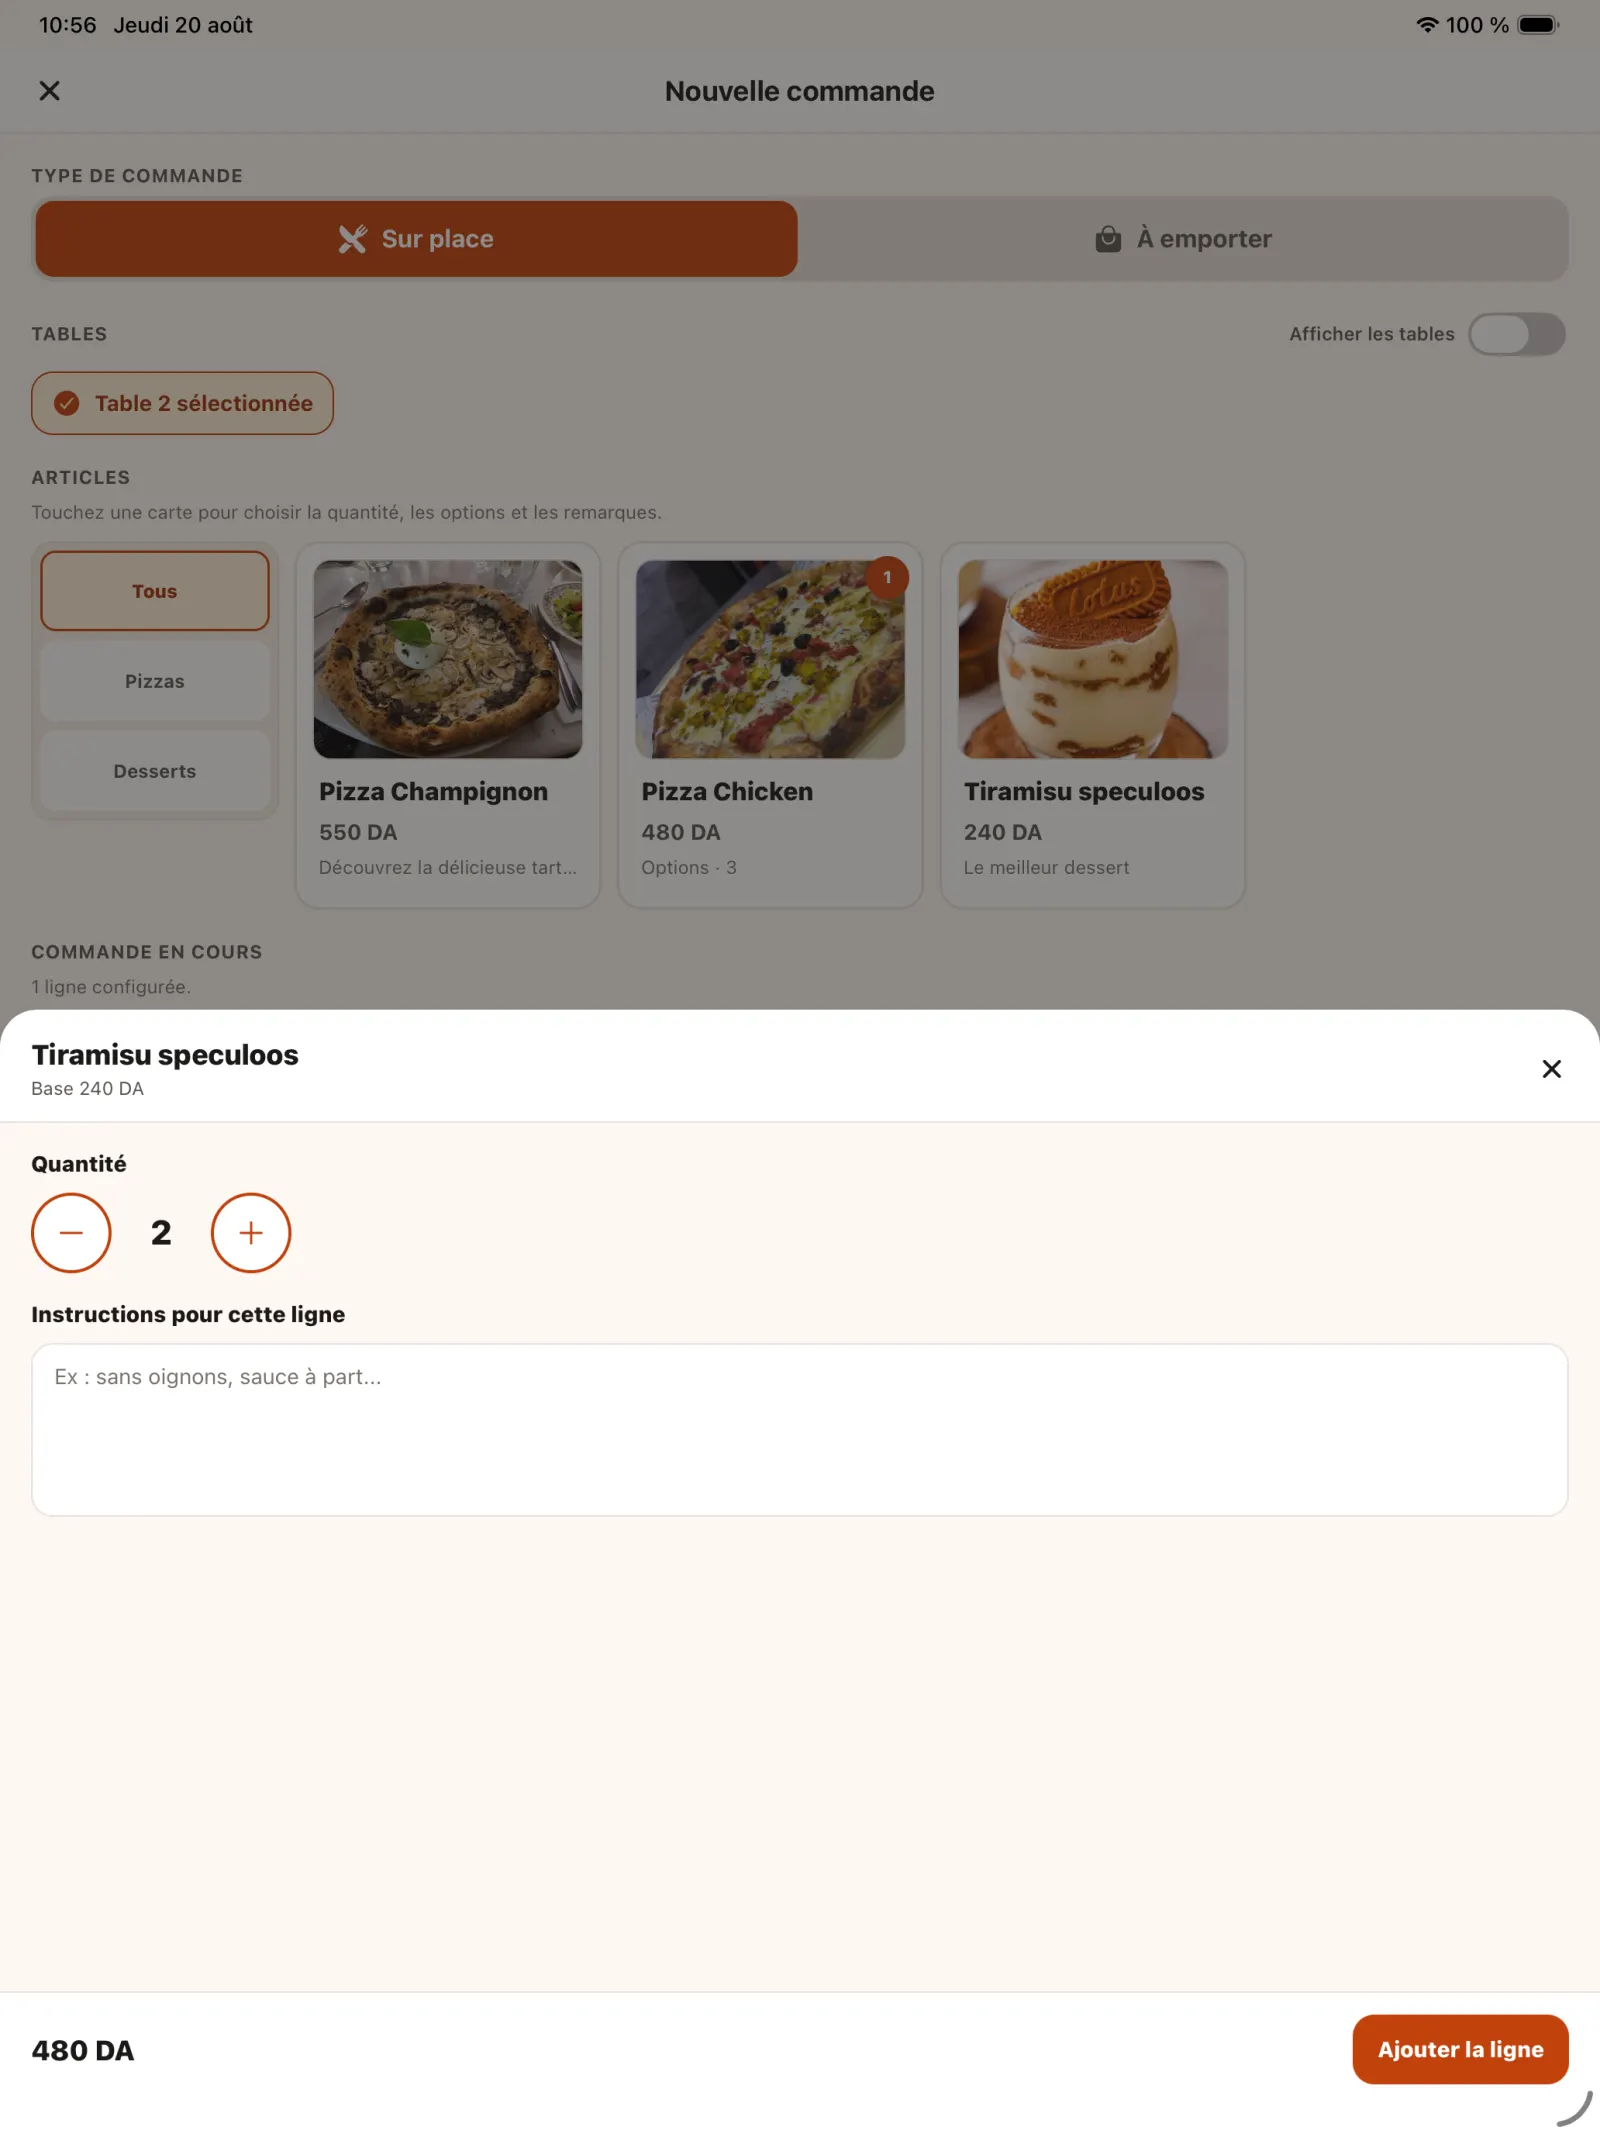
Step 10
Complete the order
Add the other products and modify the quantities if necessary.
Open full-size image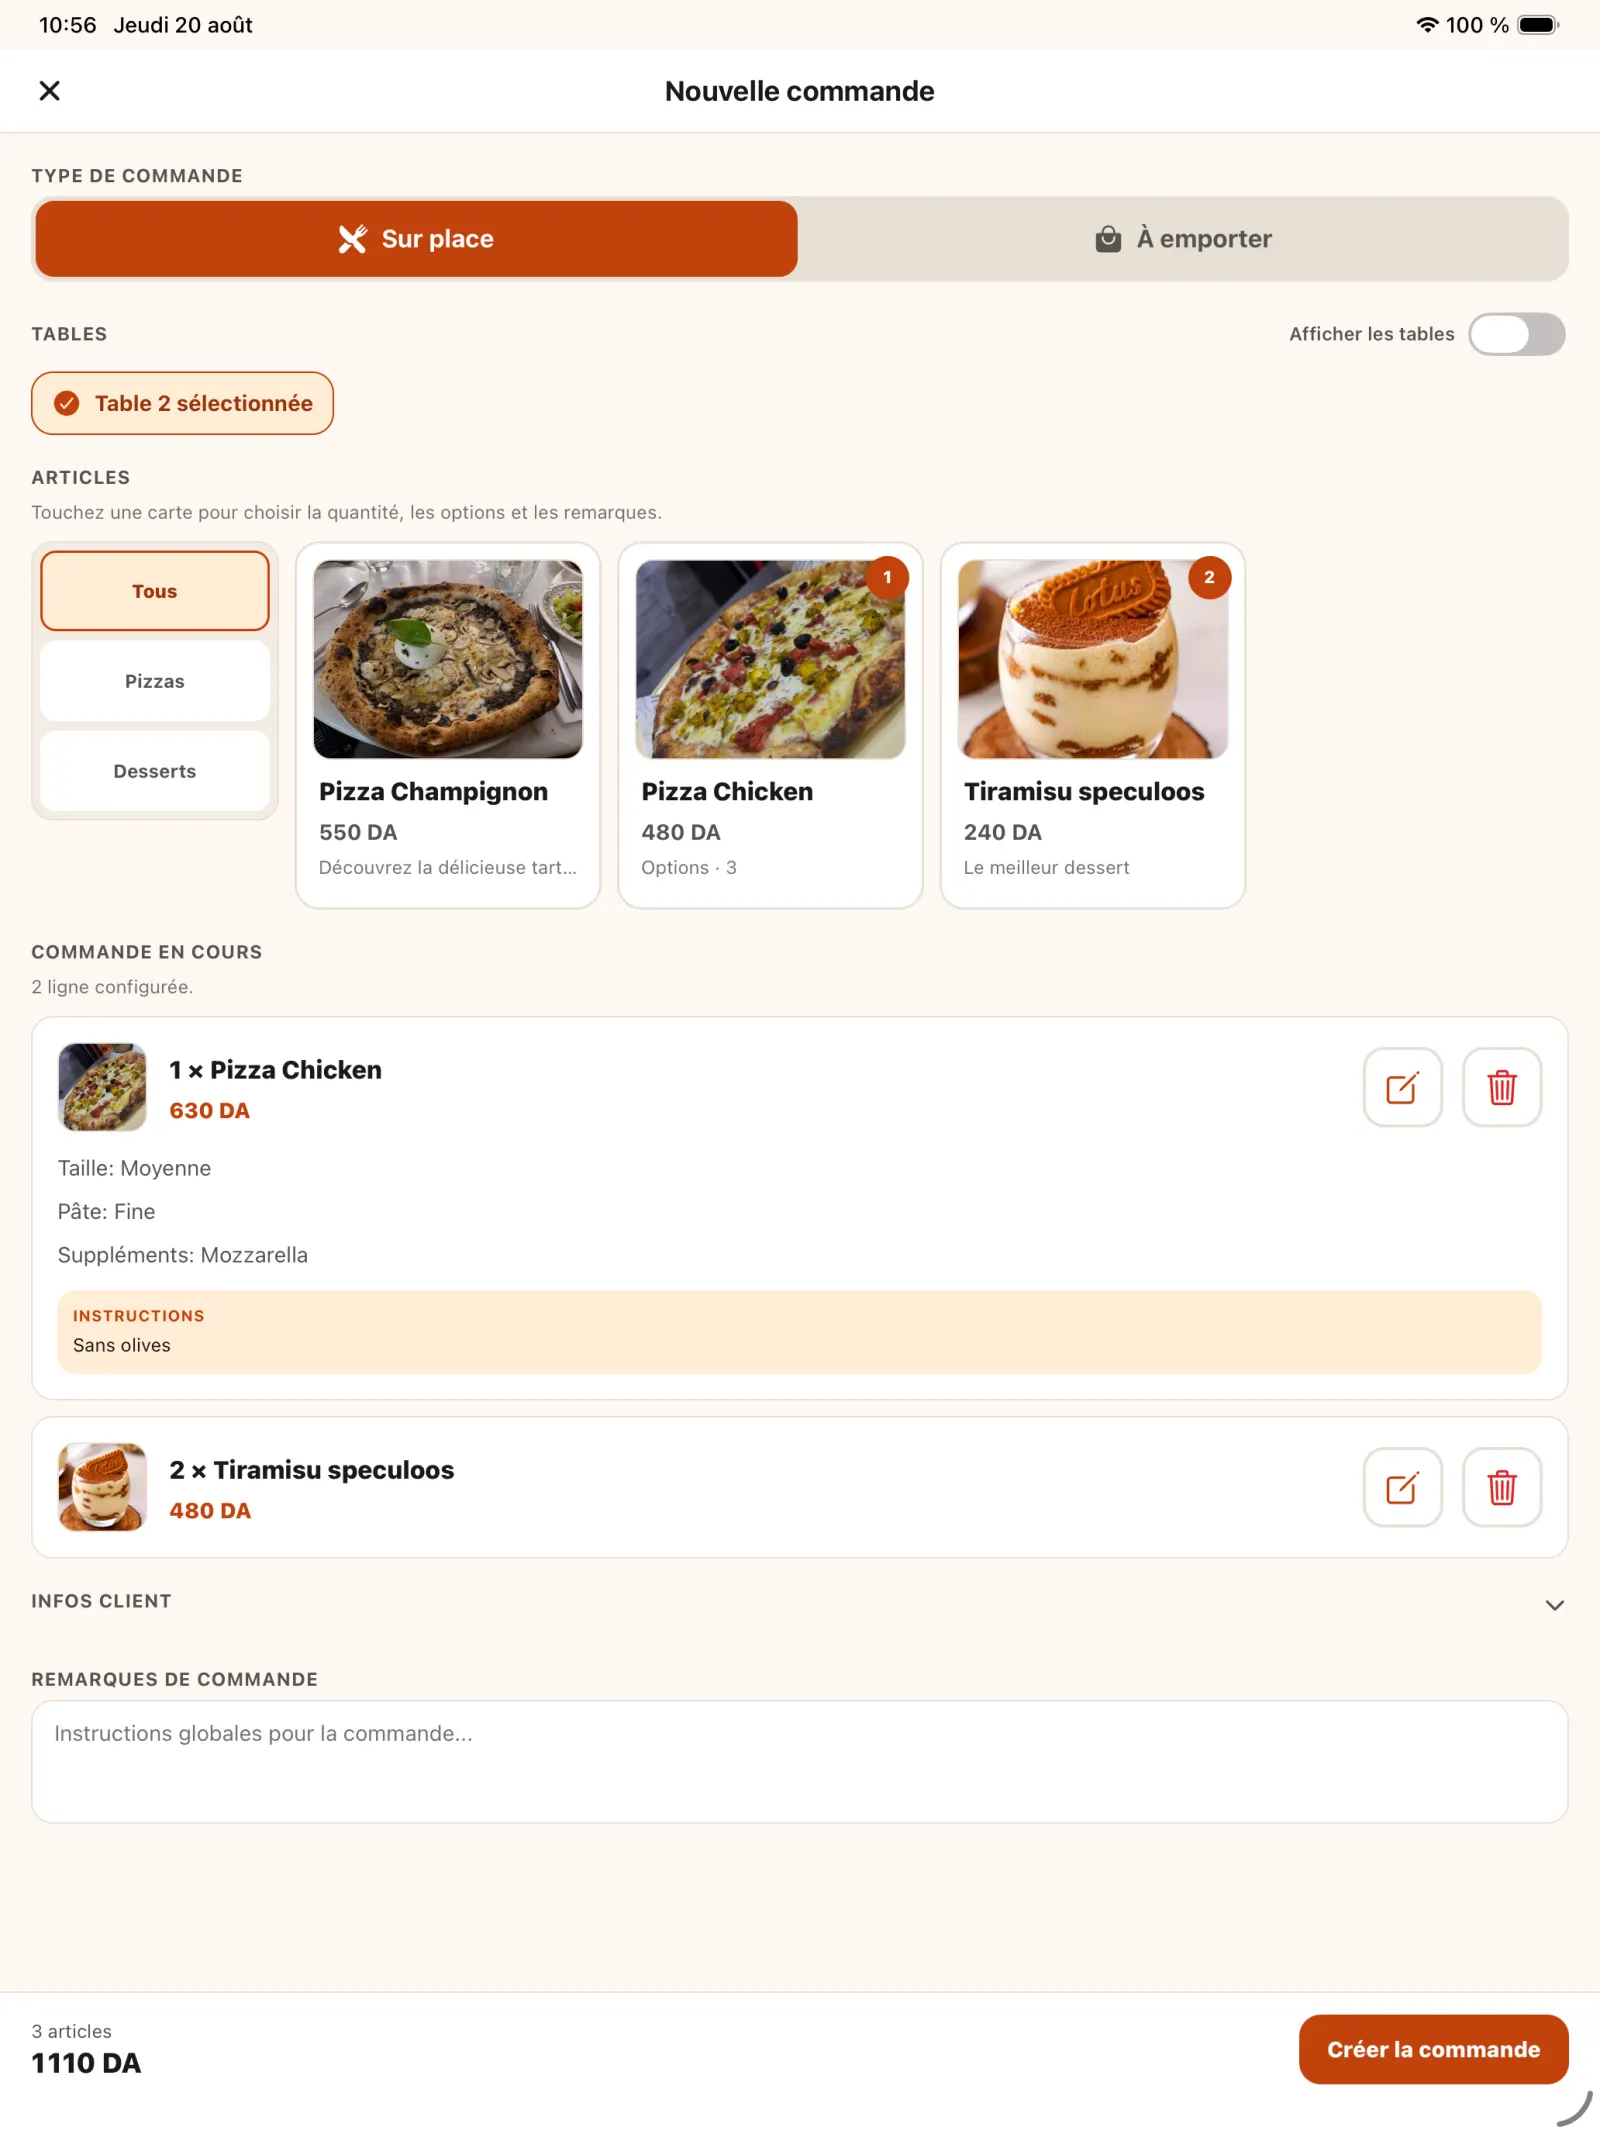
Step 11
Validate the summary
Review the table, products, options, quantities and note, then select “Create order”.
Open full-size image
Chapter 3
Prepare and serve
The kitchen view highlights items, customisations and priority level to help the team organise preparation.
Step 12
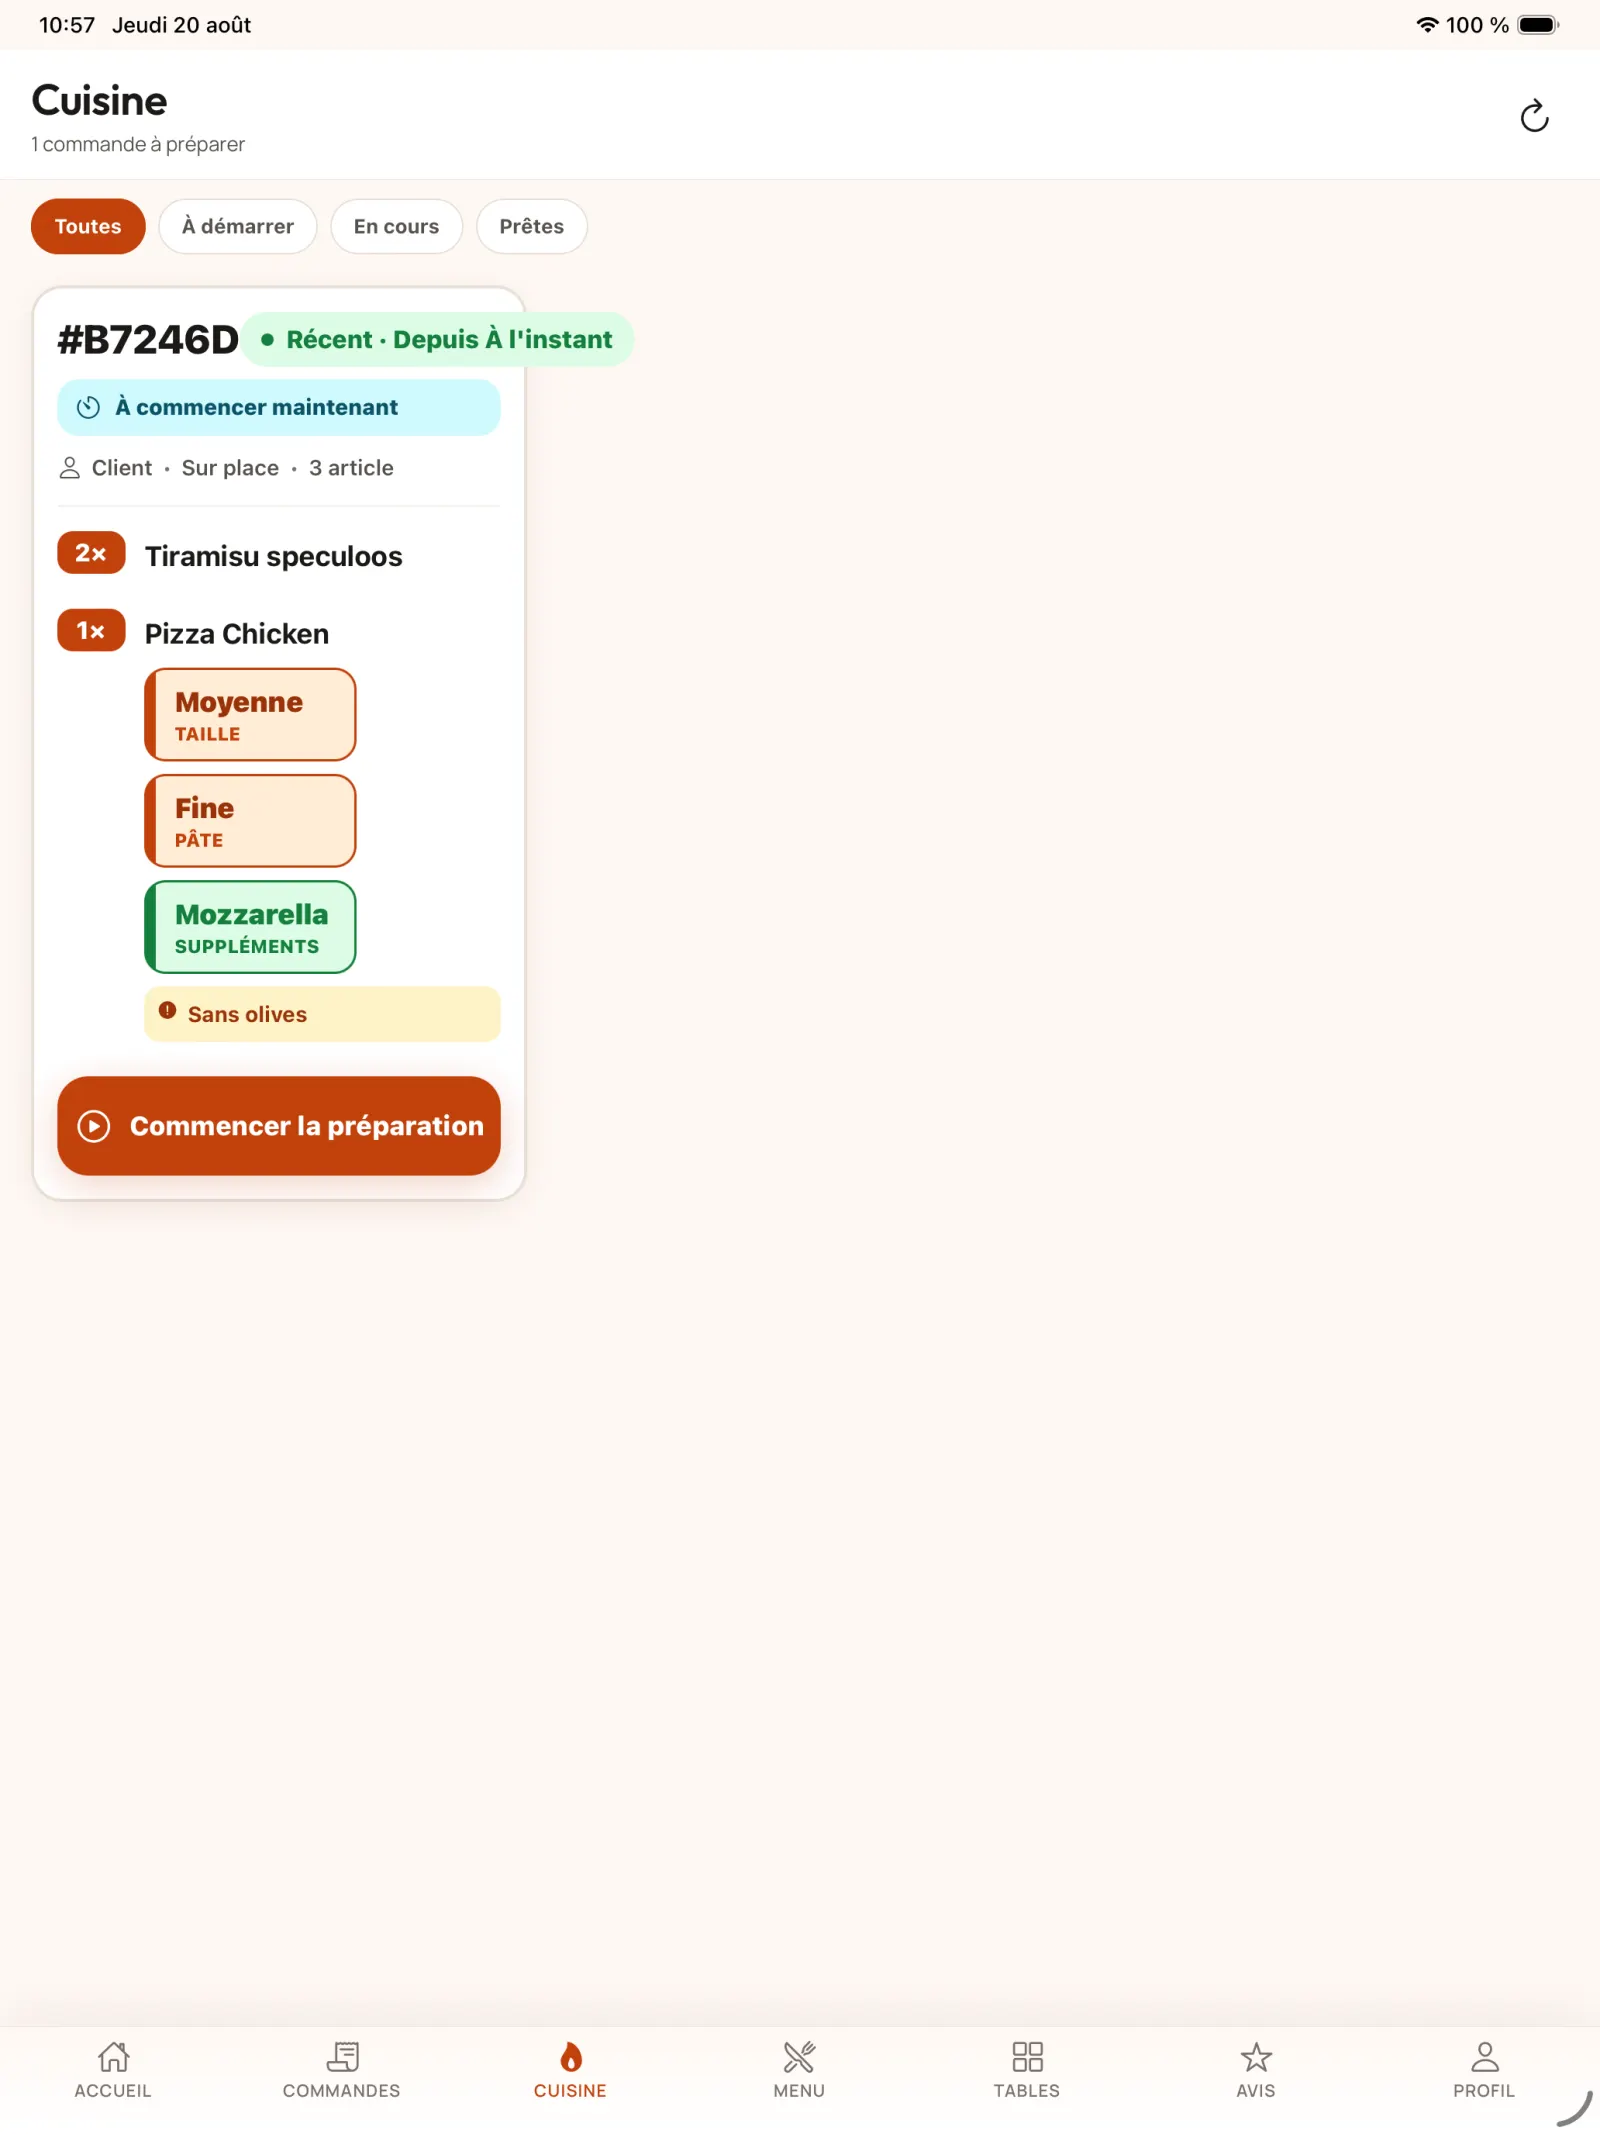
Receive the order in the kitchen
The order clearly displays quantities, options and remarks. Filters allow you to distinguish between tasks to start, in progress or ready.
In practice. The options are displayed large to remain readable in the kitchen. The "To start", "In progress" and "Ready" filters, as well as the indication of the recommended time, help to immediately process an order on the spot and wait for the right time for a scheduled order.
Open full-size image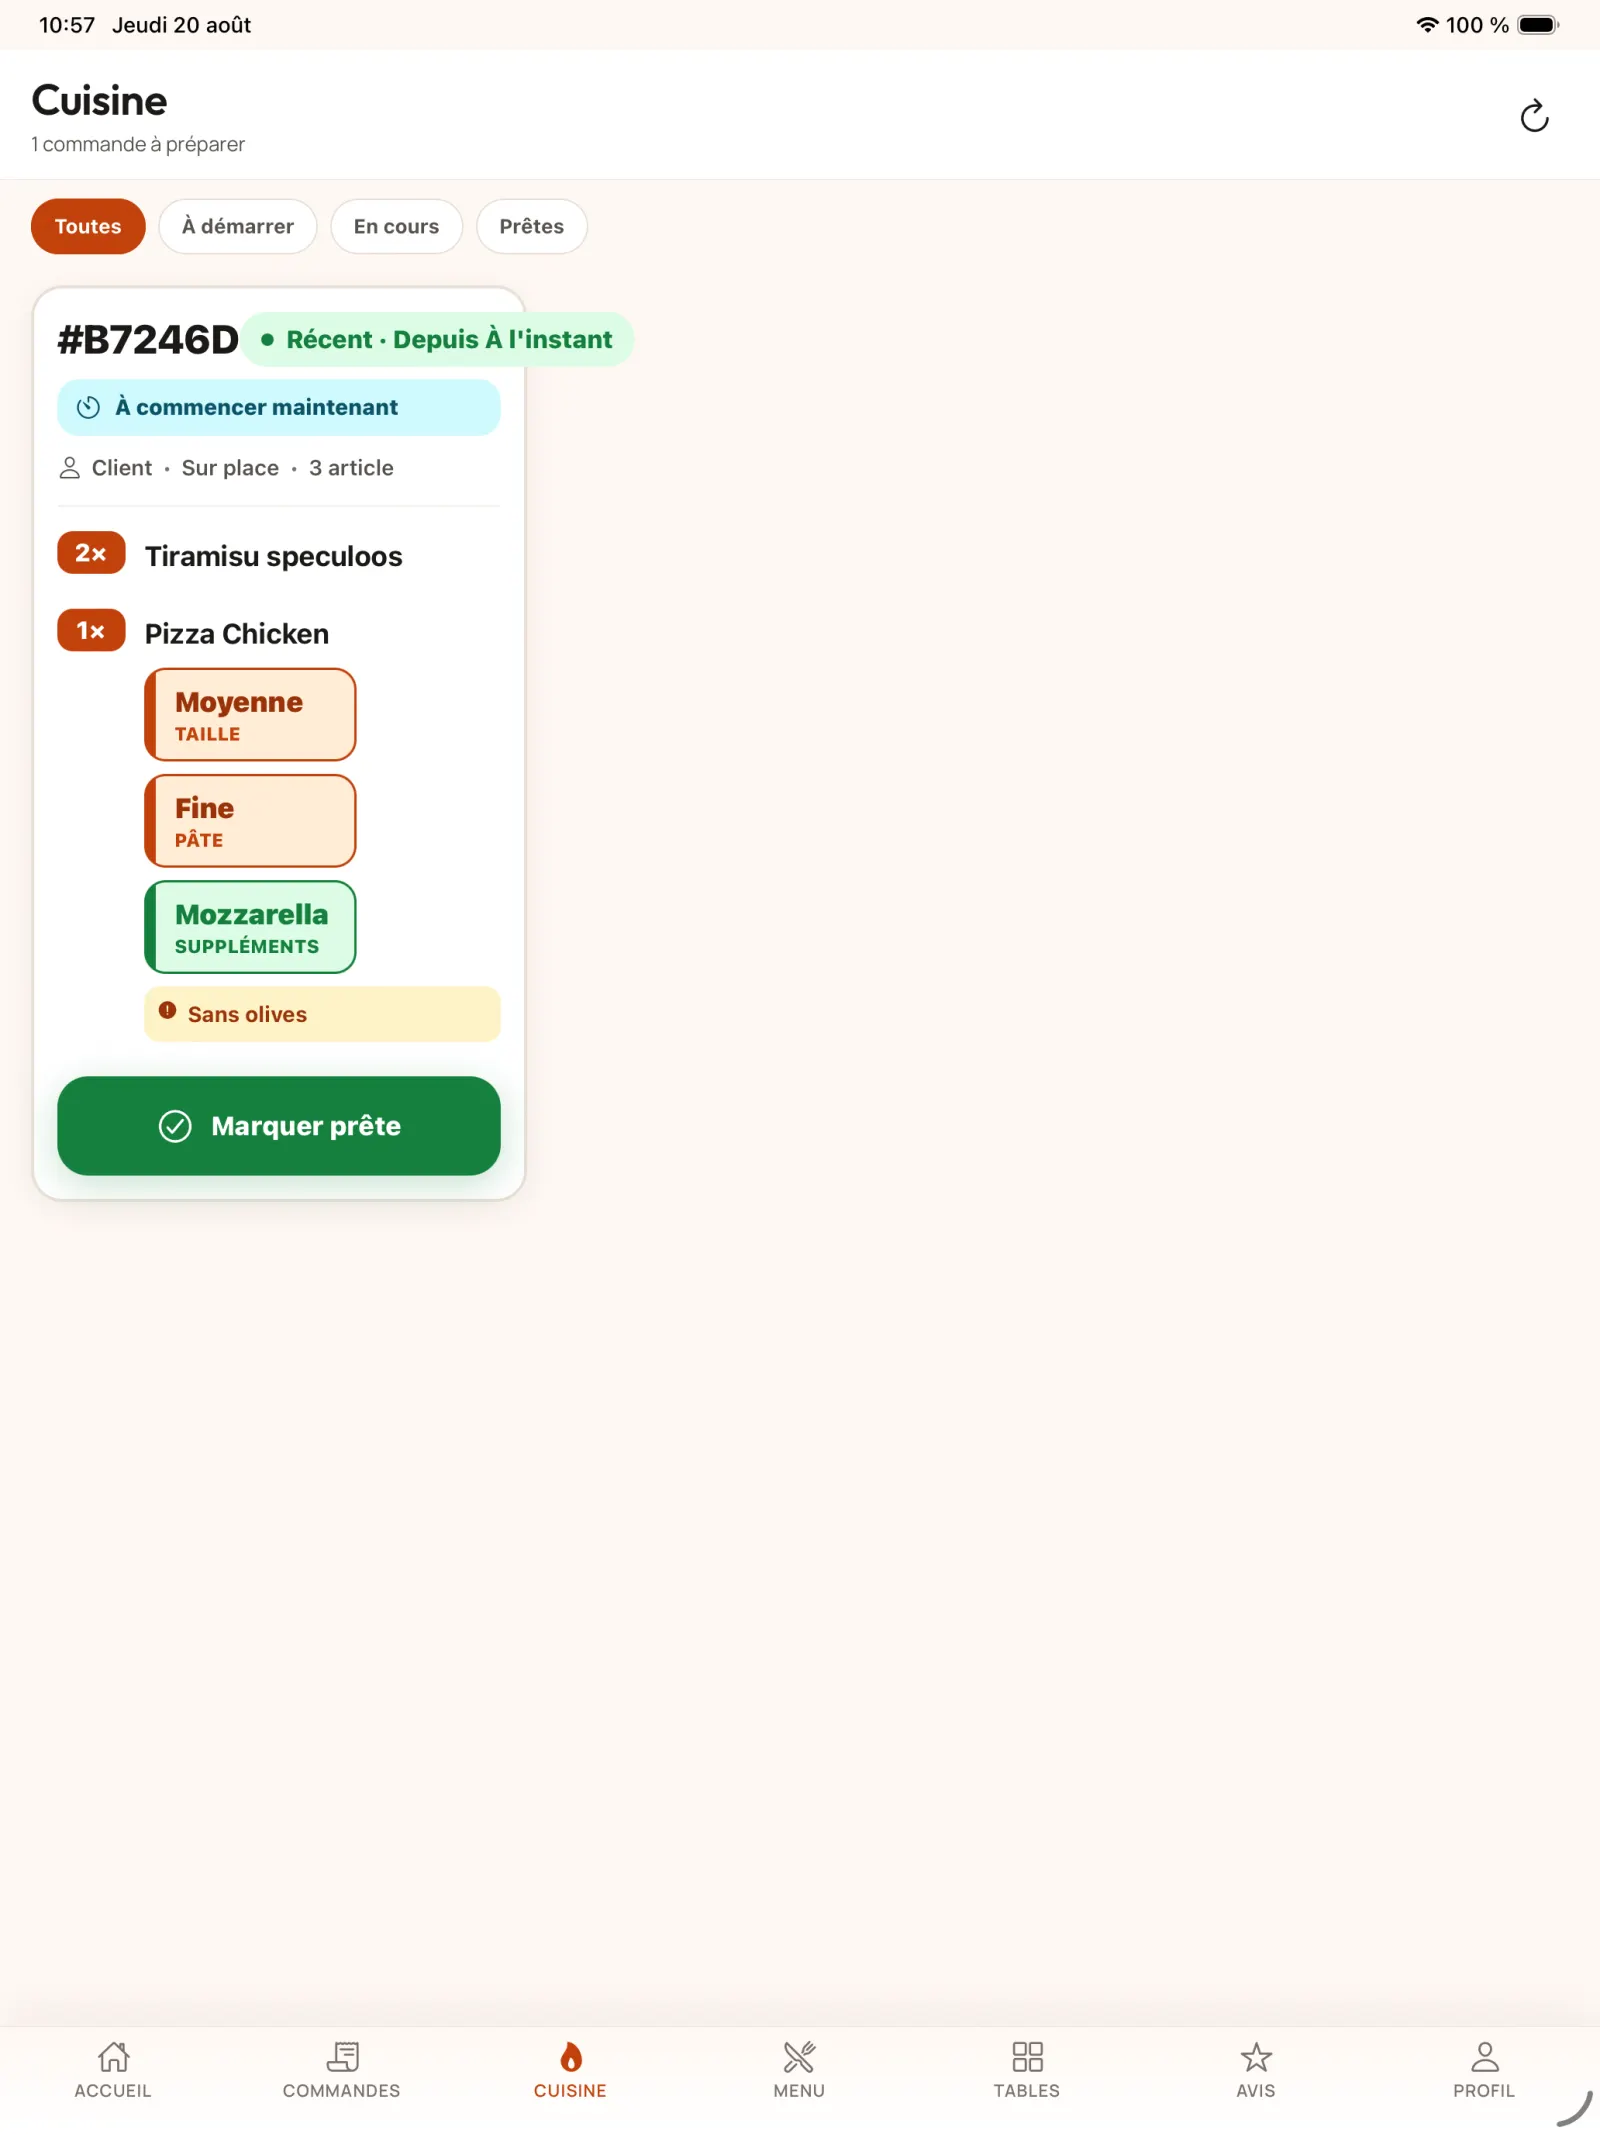
Step 13
Move preparation forward
Select “Start Preparing,” then mark the order ready when all items are complete.
Open full-size image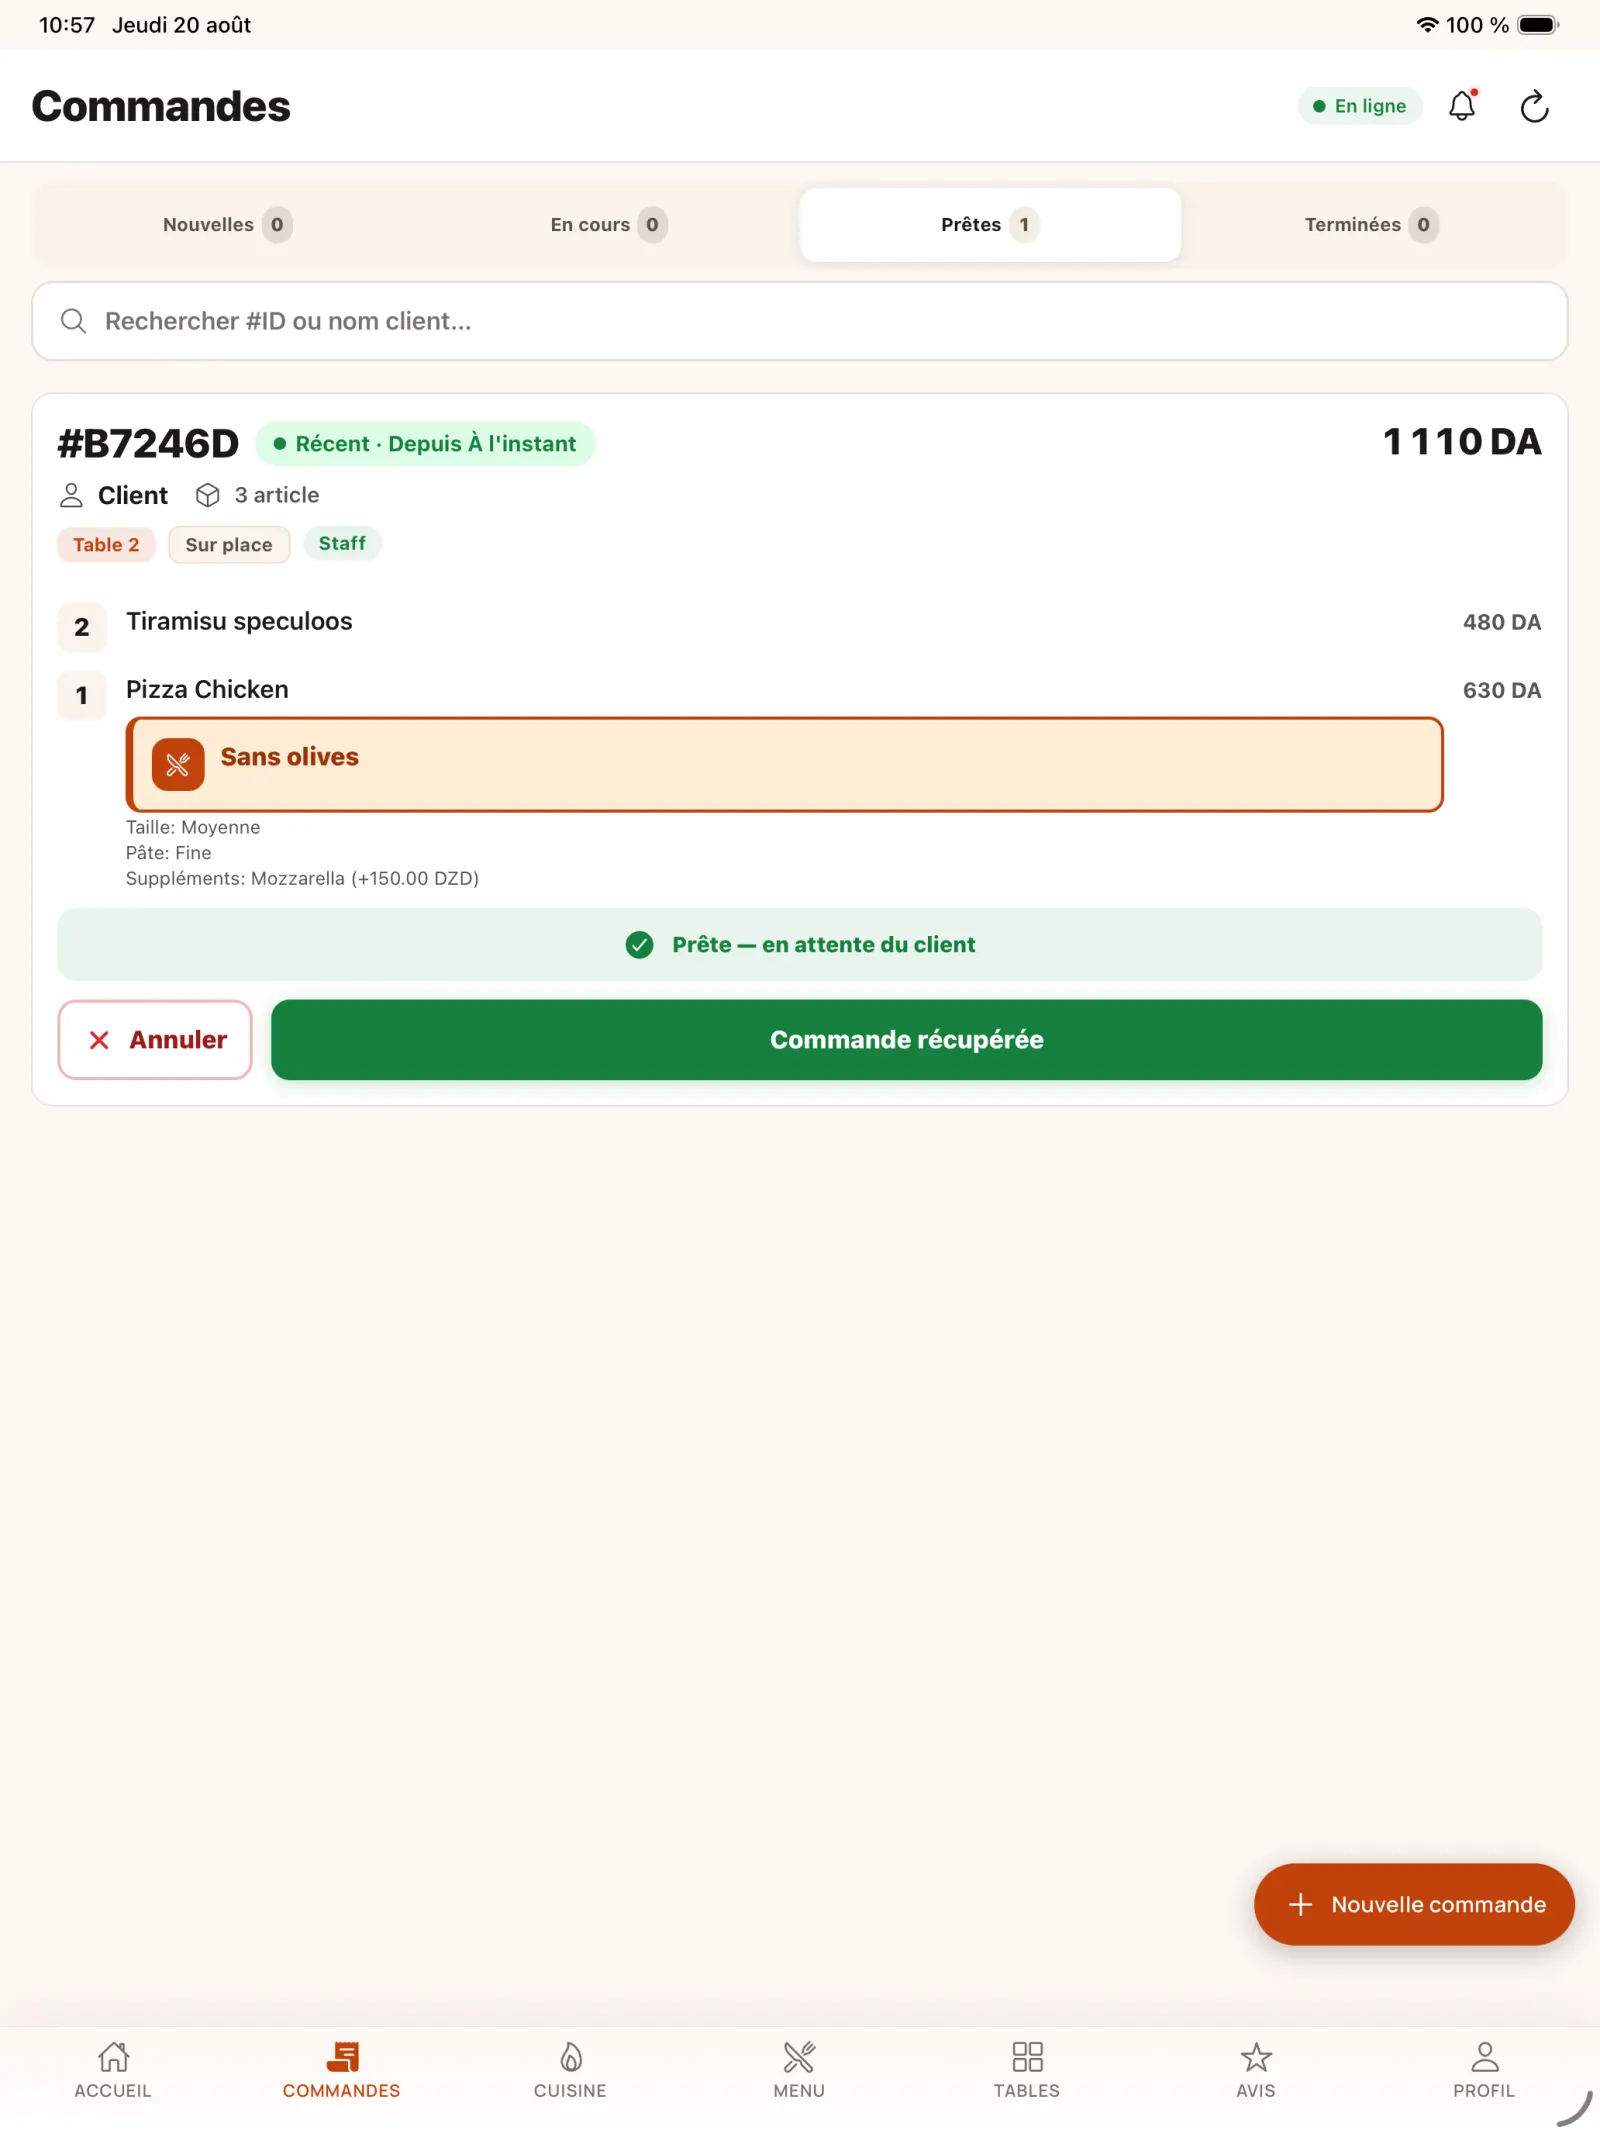
Step 14
Complete the order after service
Once the customer is served, confirm the handover to complete the order and release its operational tracking.
Open full-size image
Chapter 4
Manage takeaway and activity
The same process applies to take-out orders. The owner also has indicators and a check on the availability of the restaurant.
Step 15
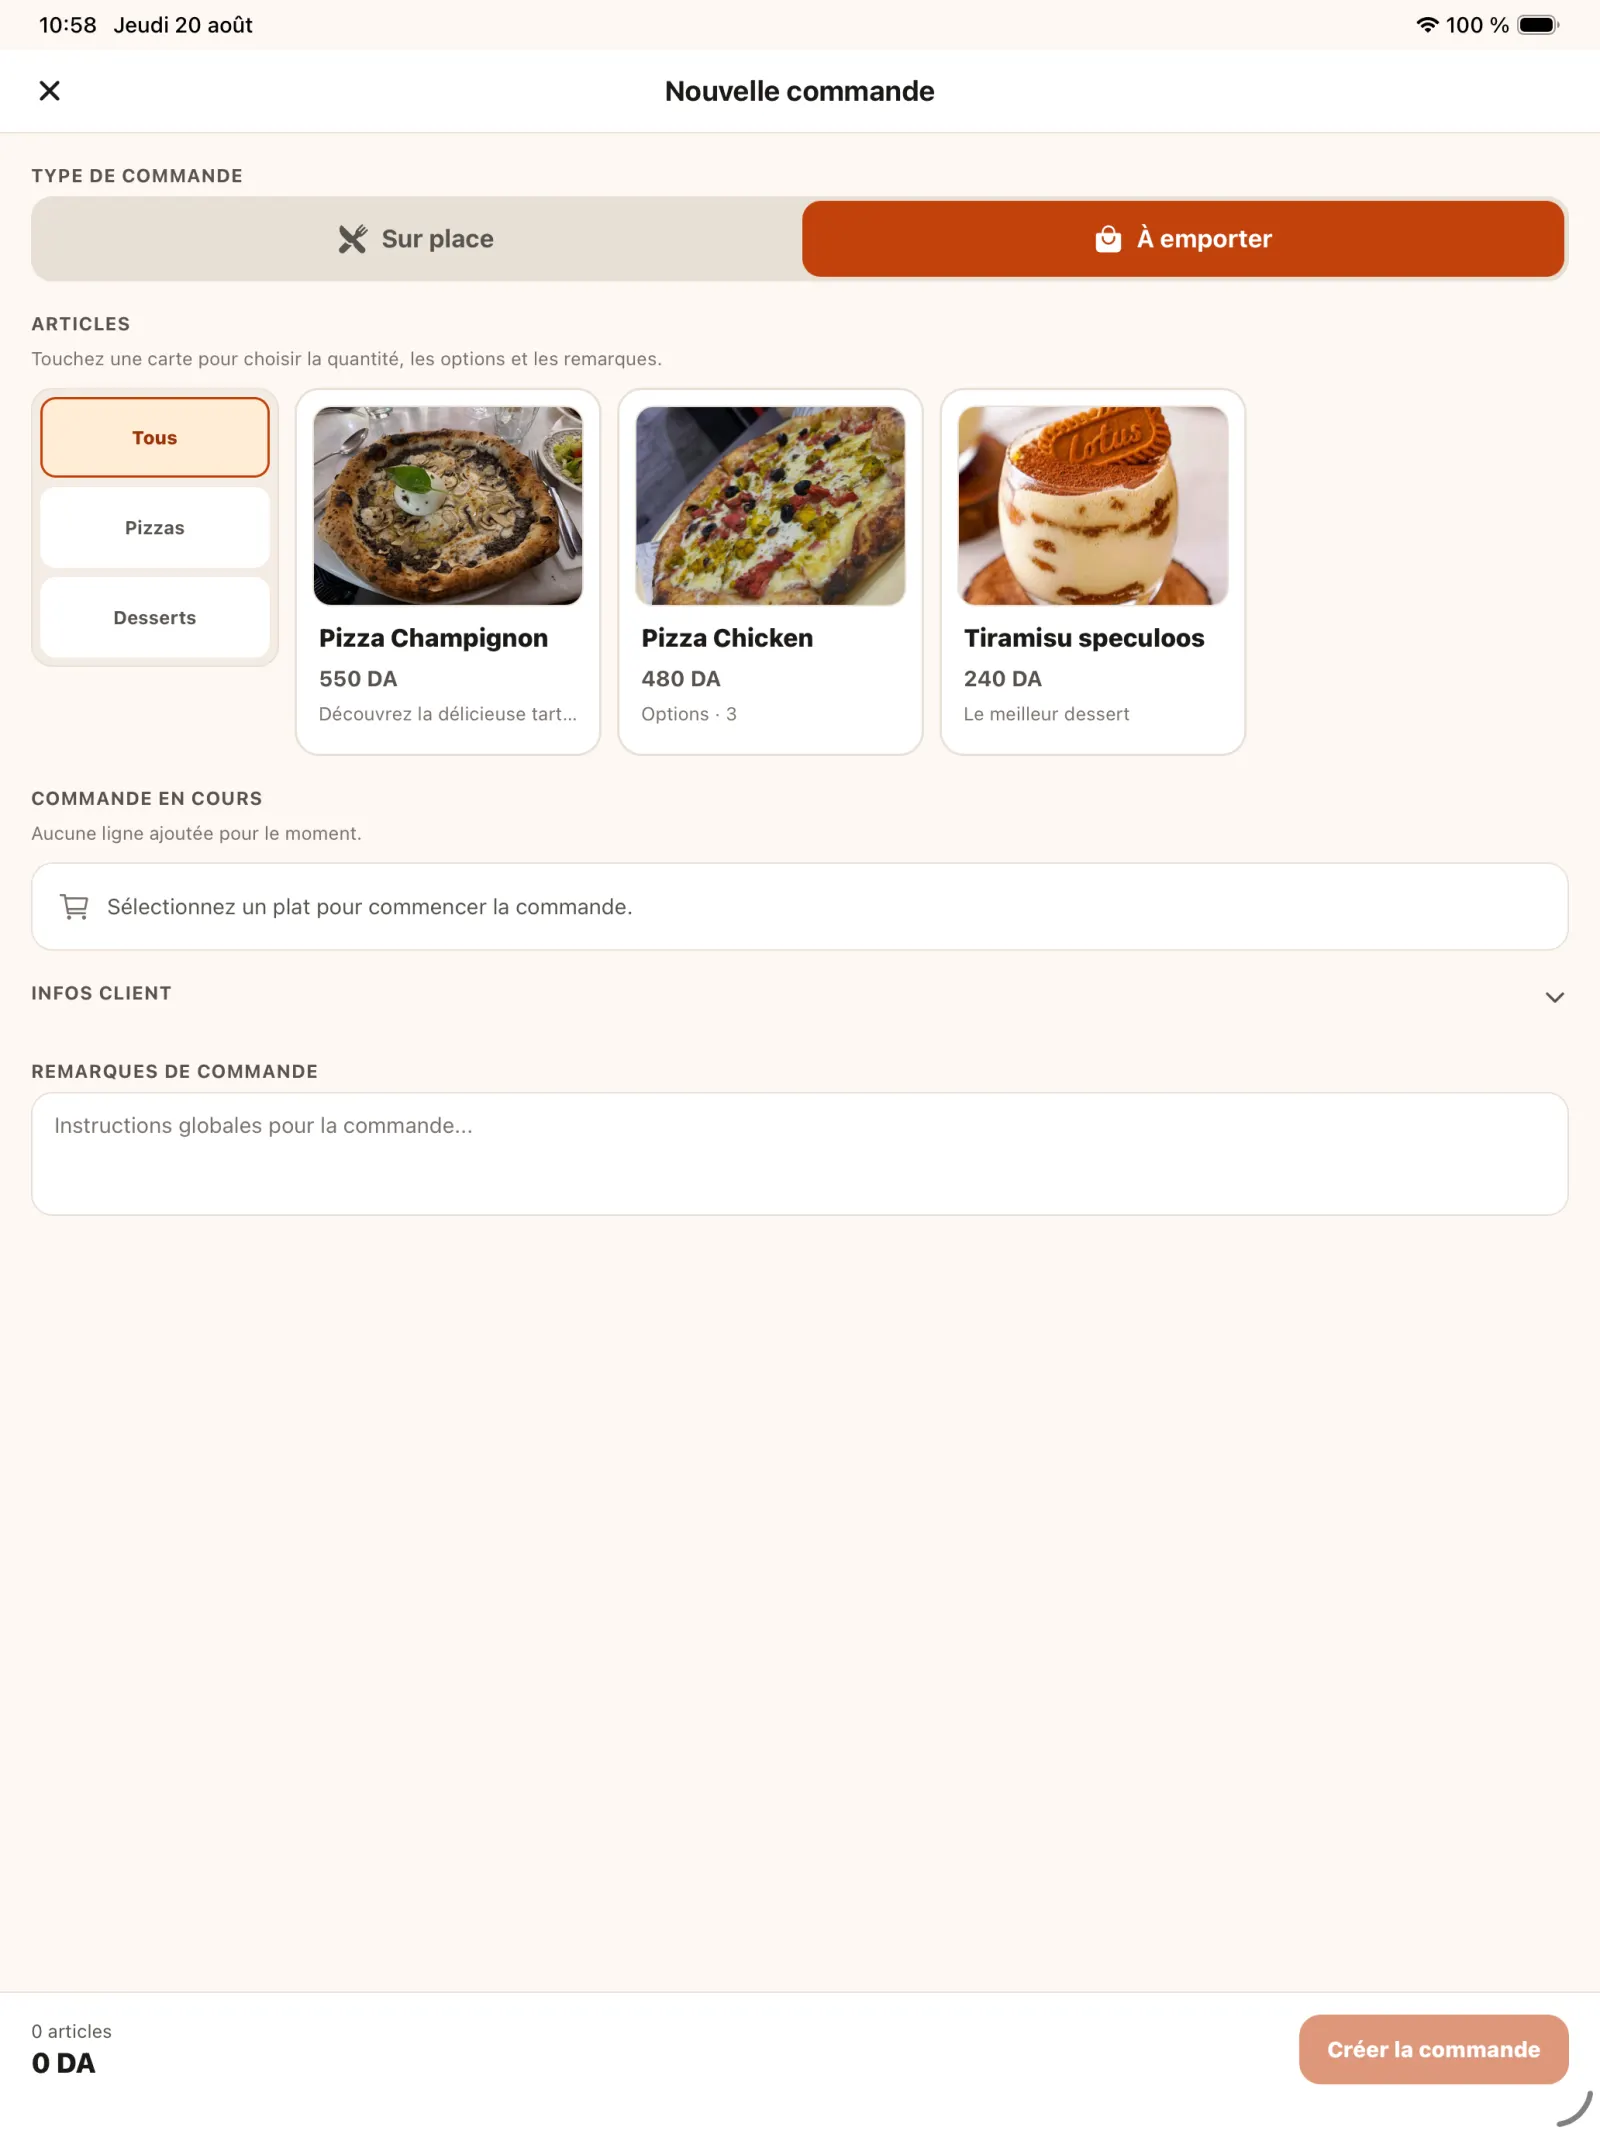
Create a takeaway order
Choose “Take Away” mode before selecting the products.
Open full-size image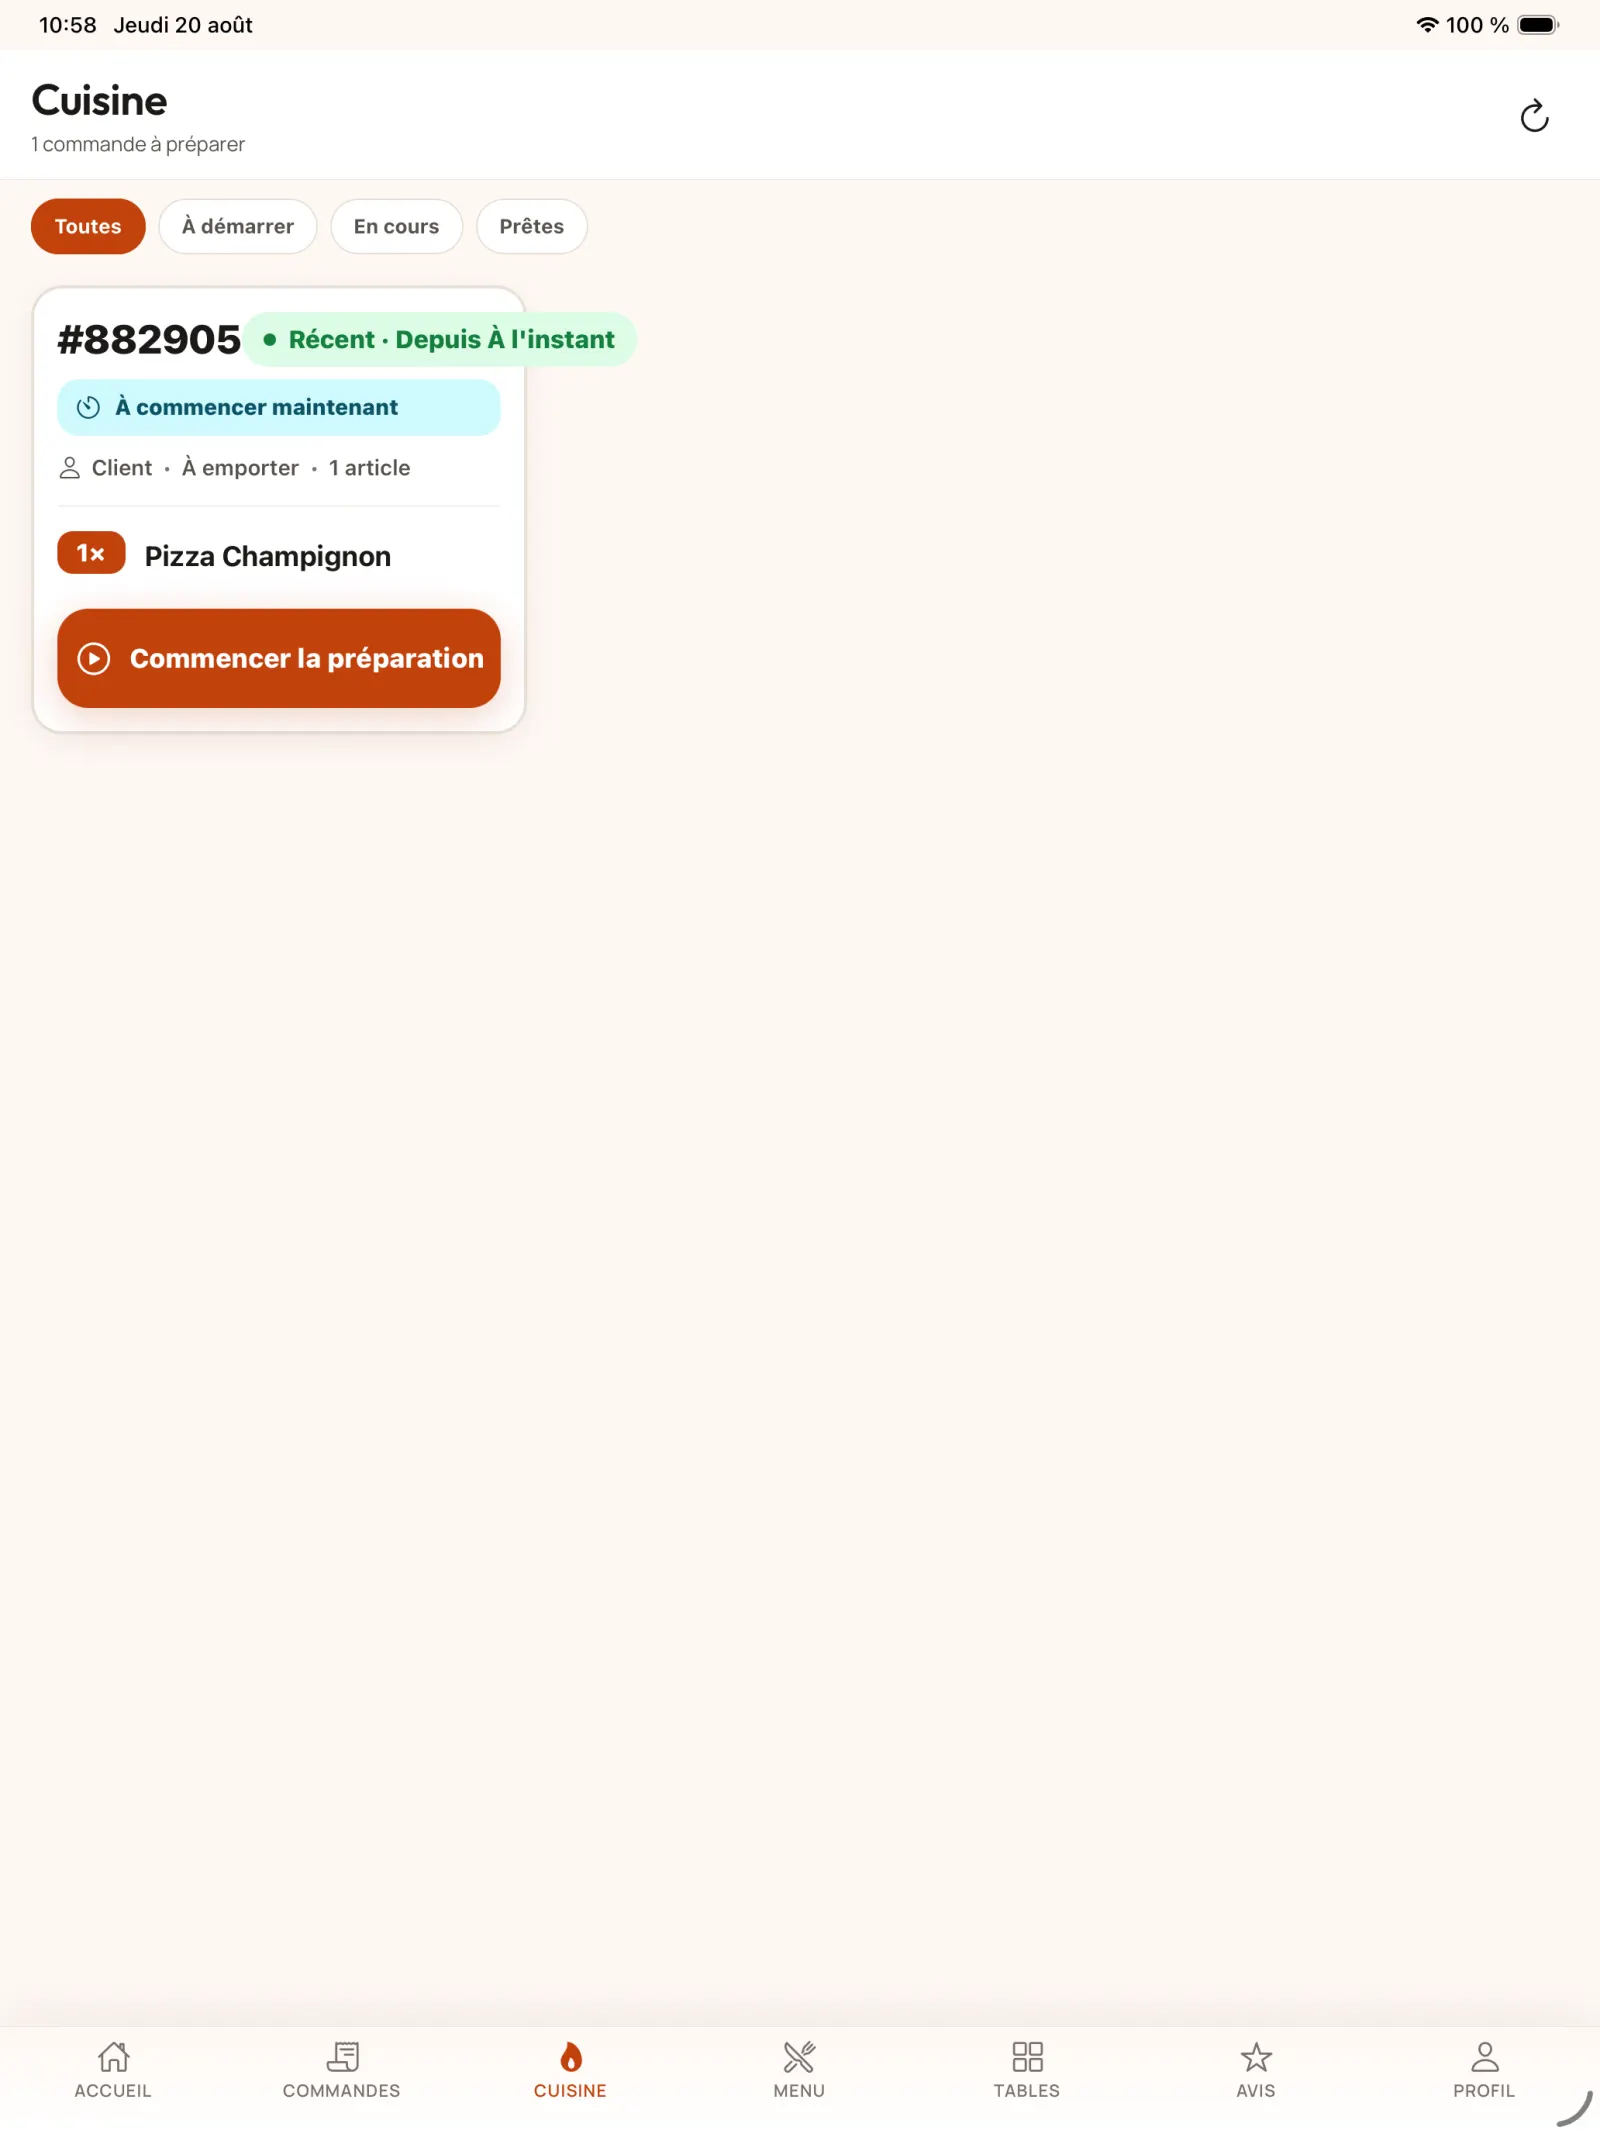
Step 16
Submit the takeaway order
Add the products, options and remarks with the same procedure as for an on-site order.
Open full-size image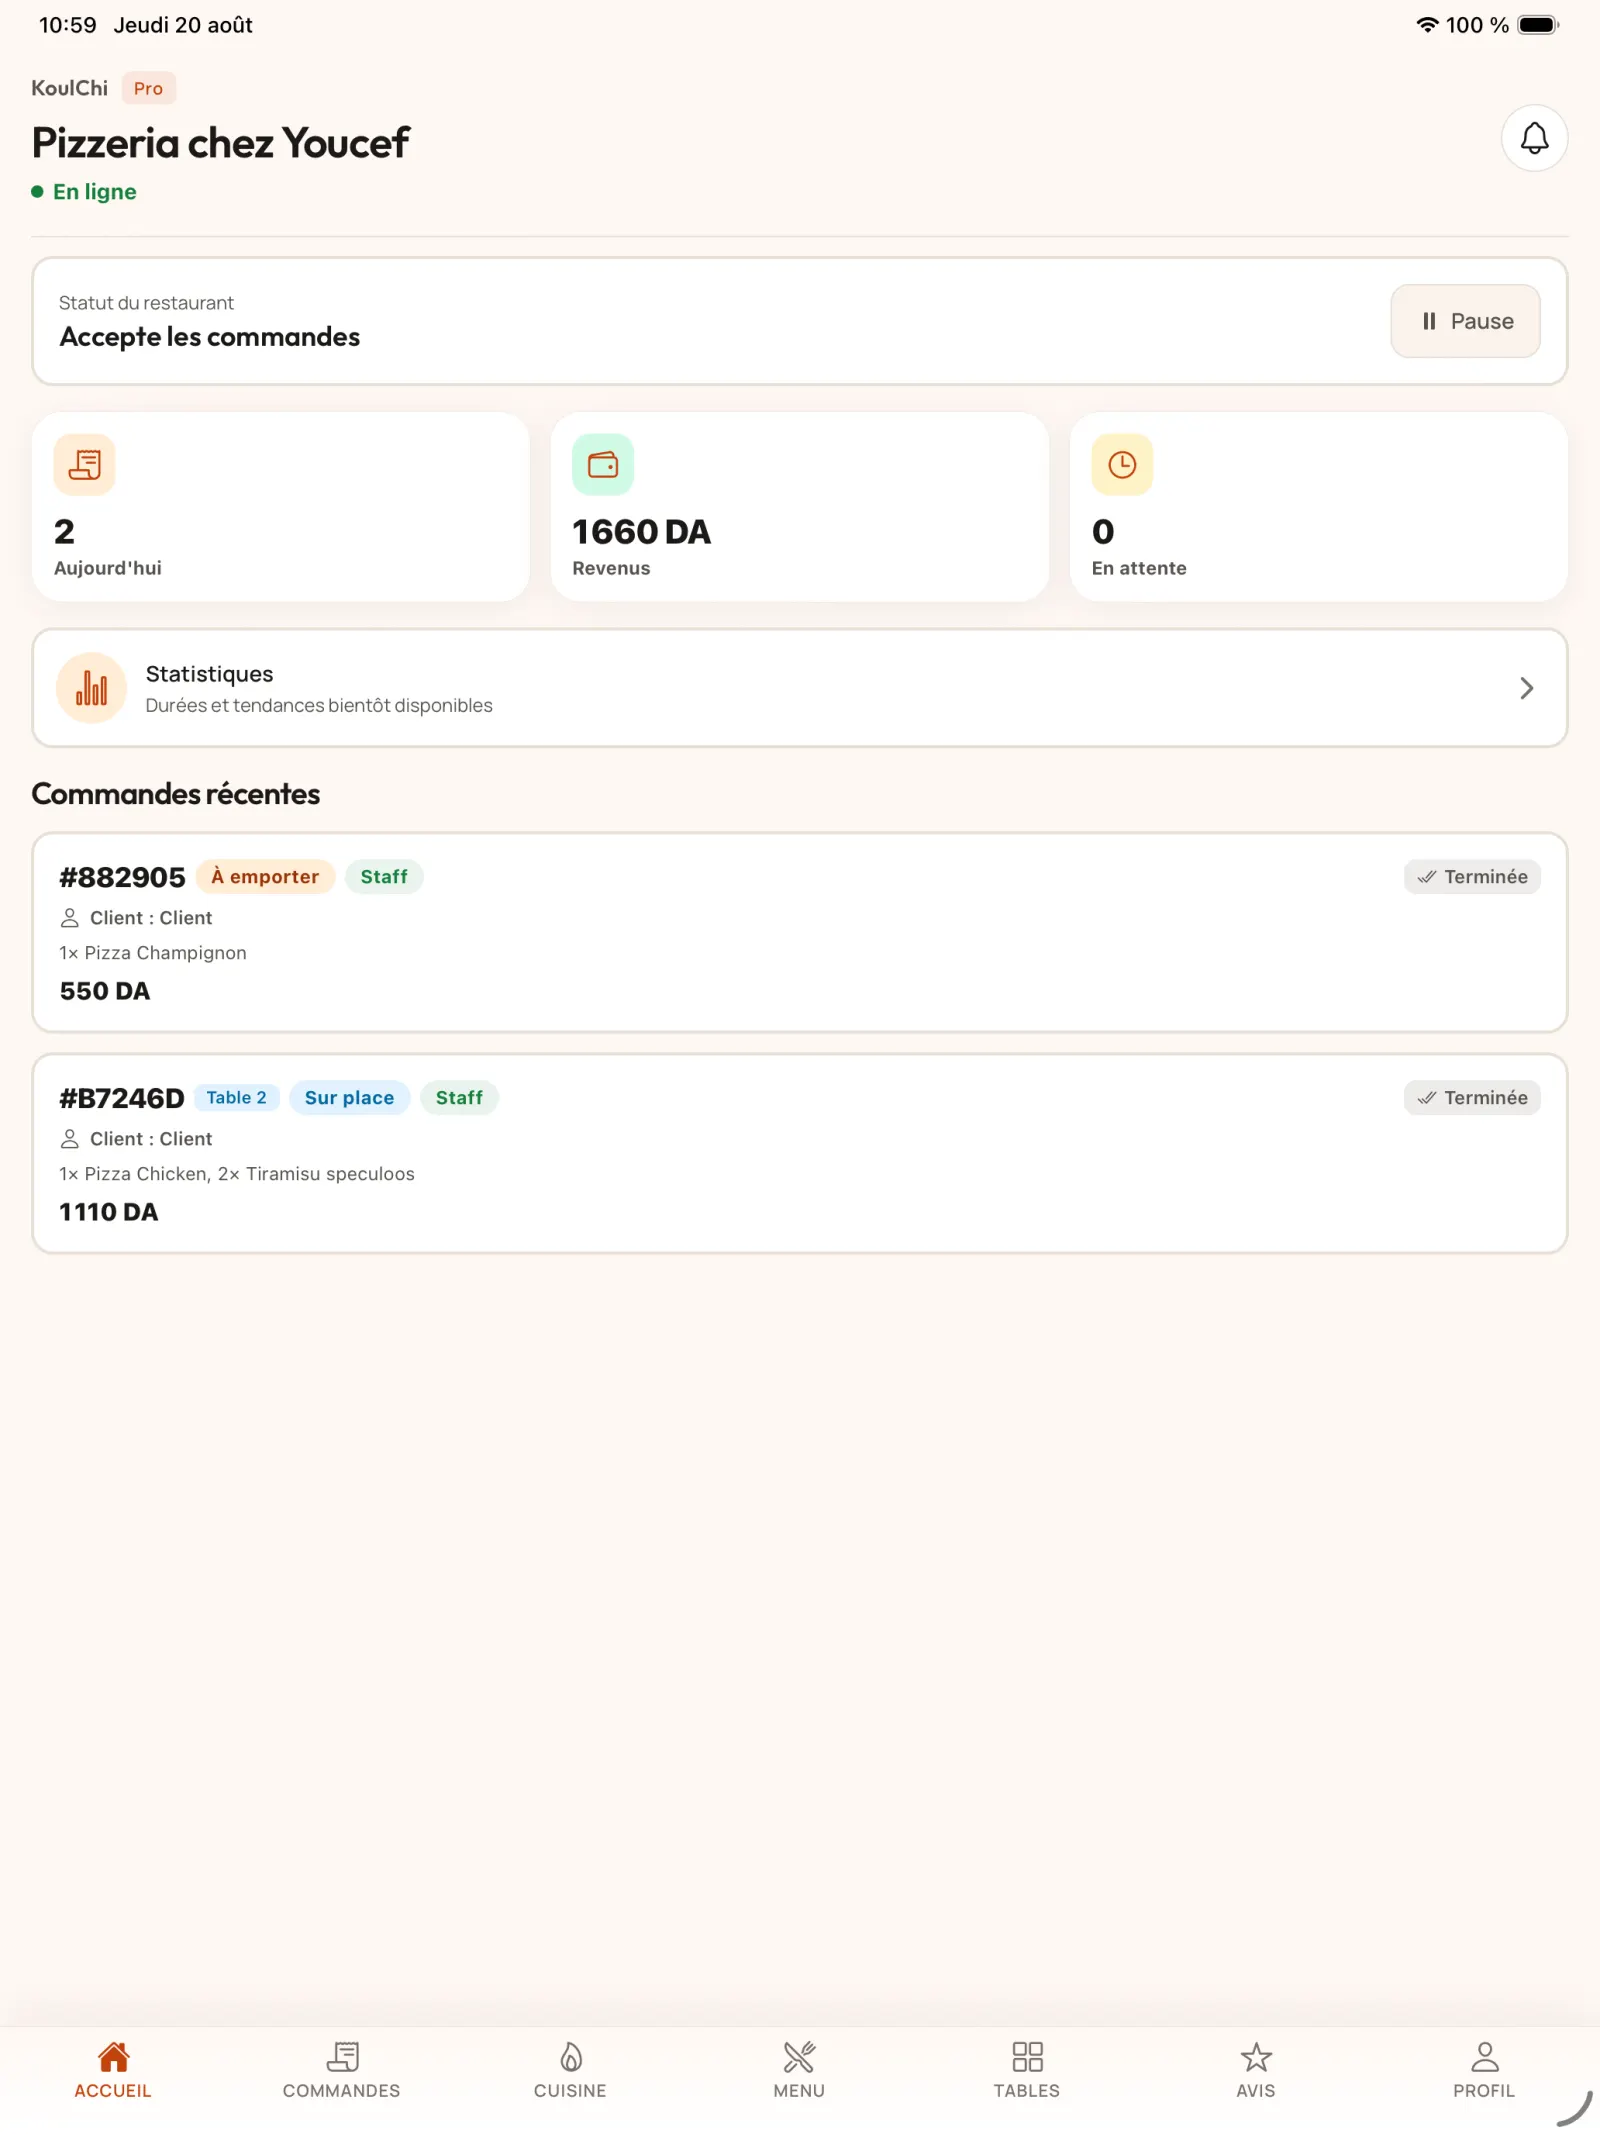
Step 17
View today’s activity
The admin dashboard shows revenue, order volume and recent orders.
Open full-size image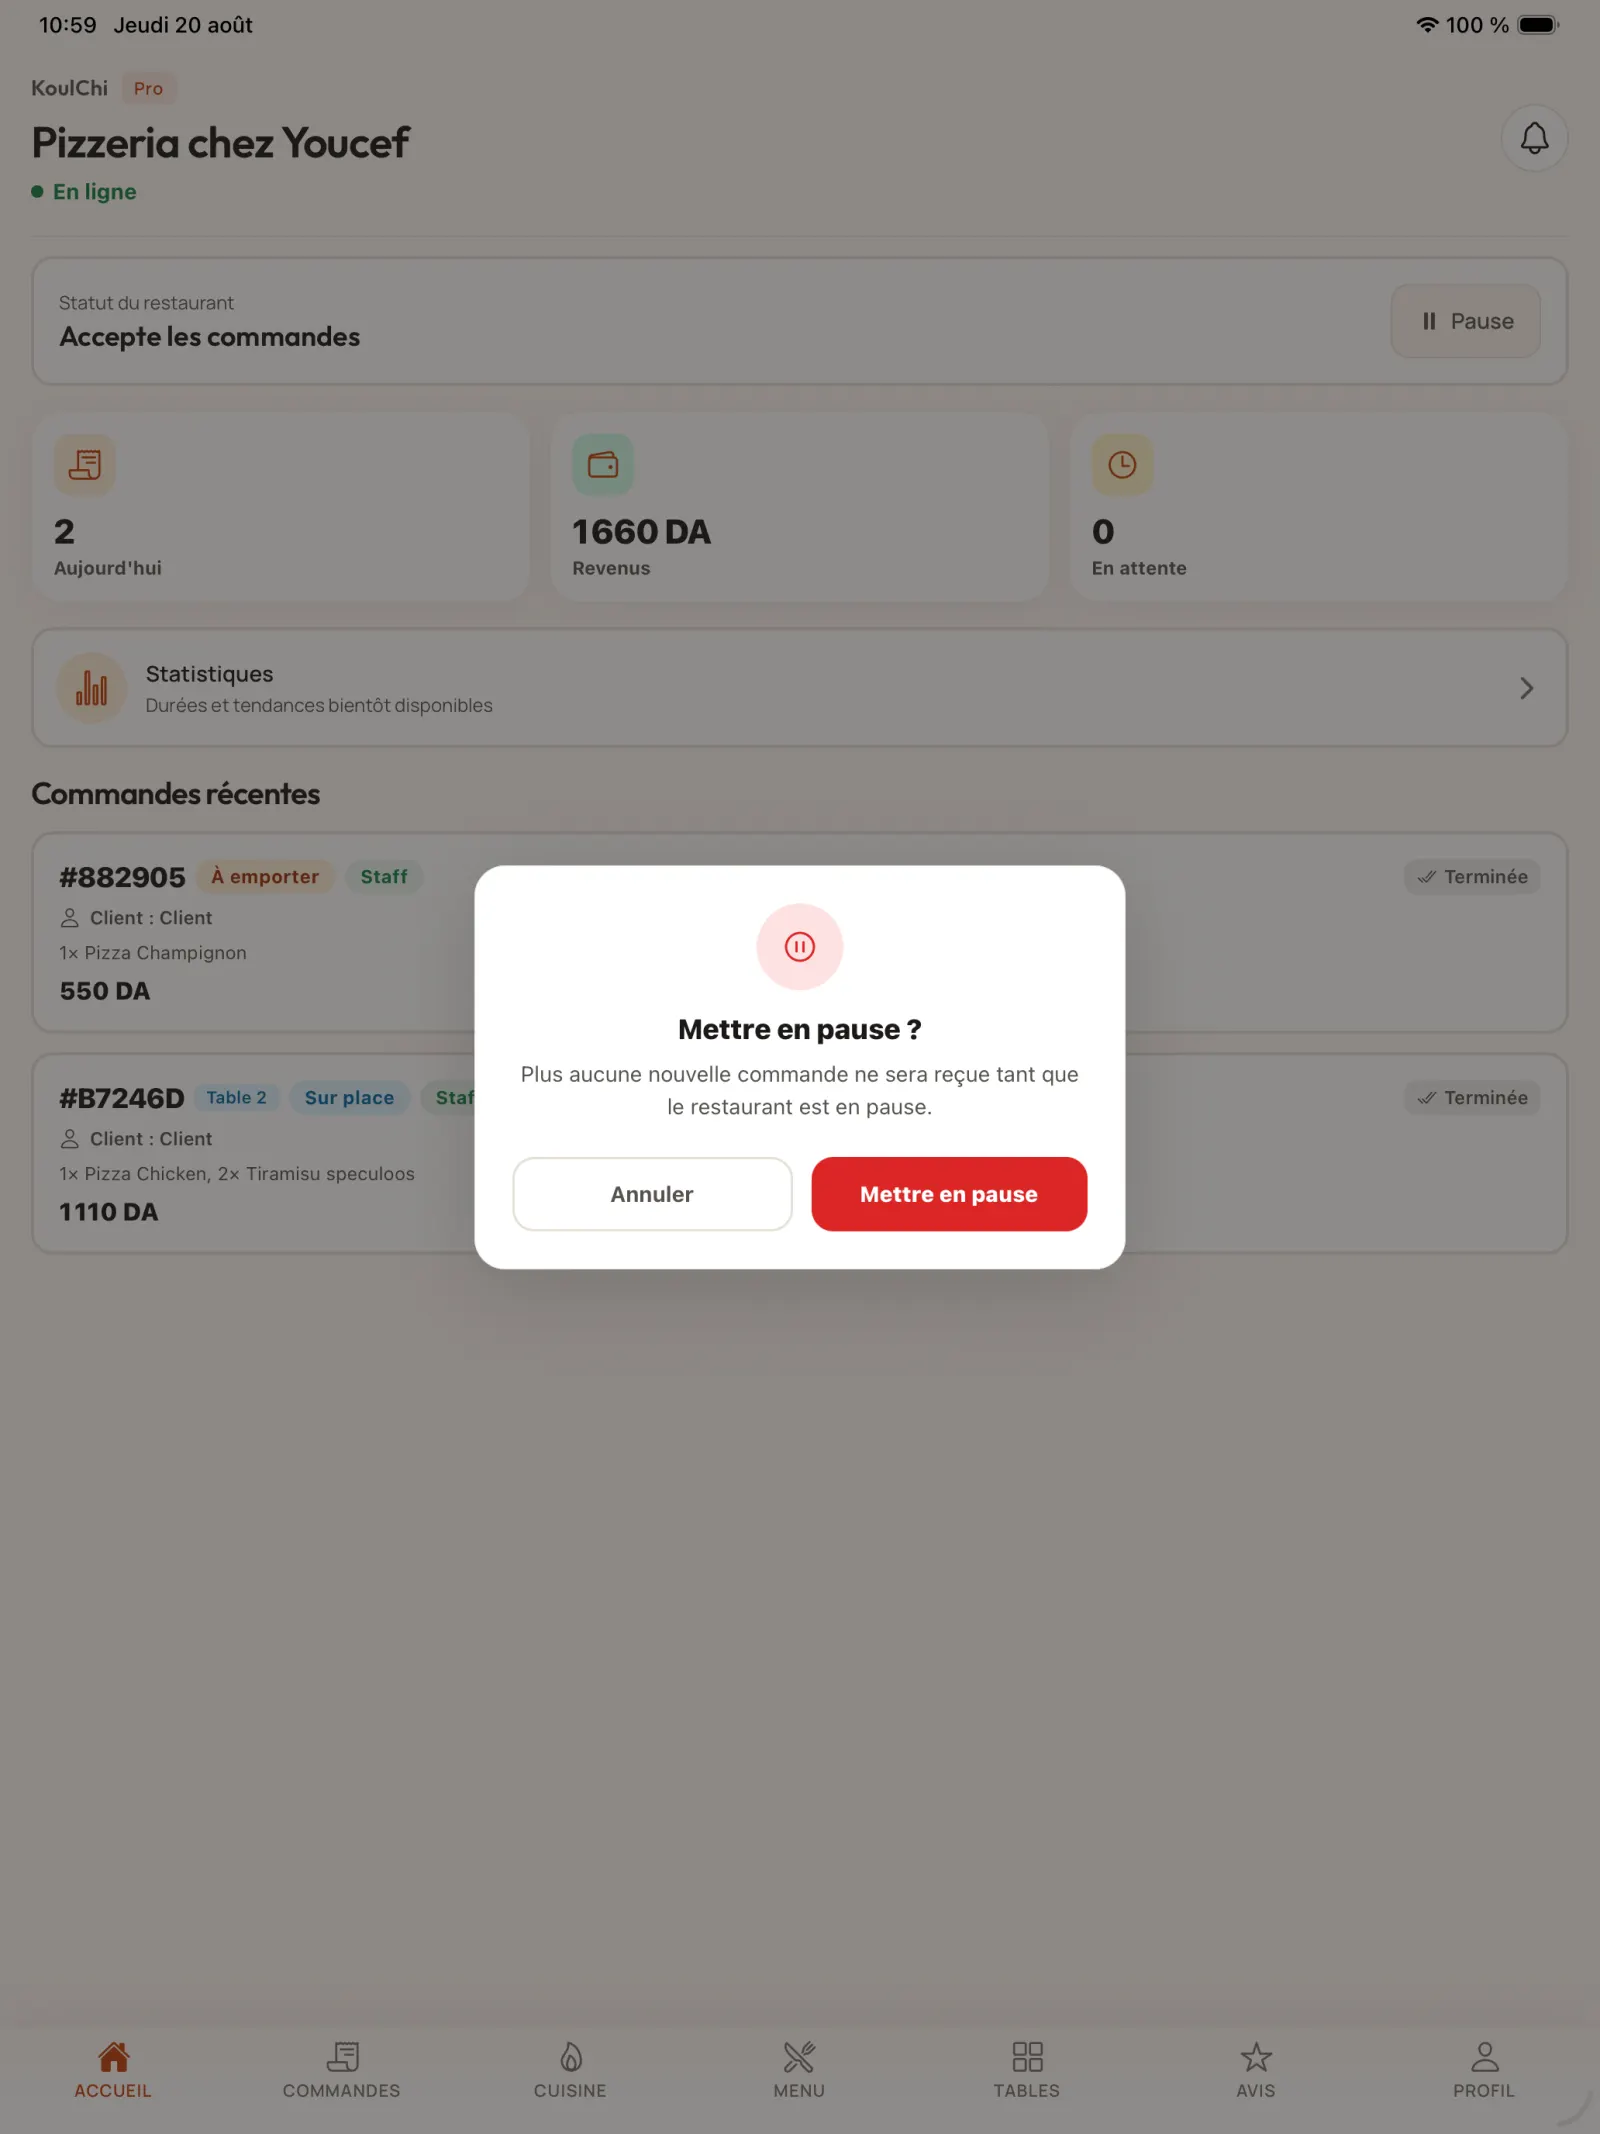
Step 18
Pause the restaurant
Use the “Pause” action to temporarily pause receiving new remote orders.
In practice. This command is particularly useful during an incident, an exceptional closure or a peak of activity that the team must resolve before accepting new remote orders.
Open full-size image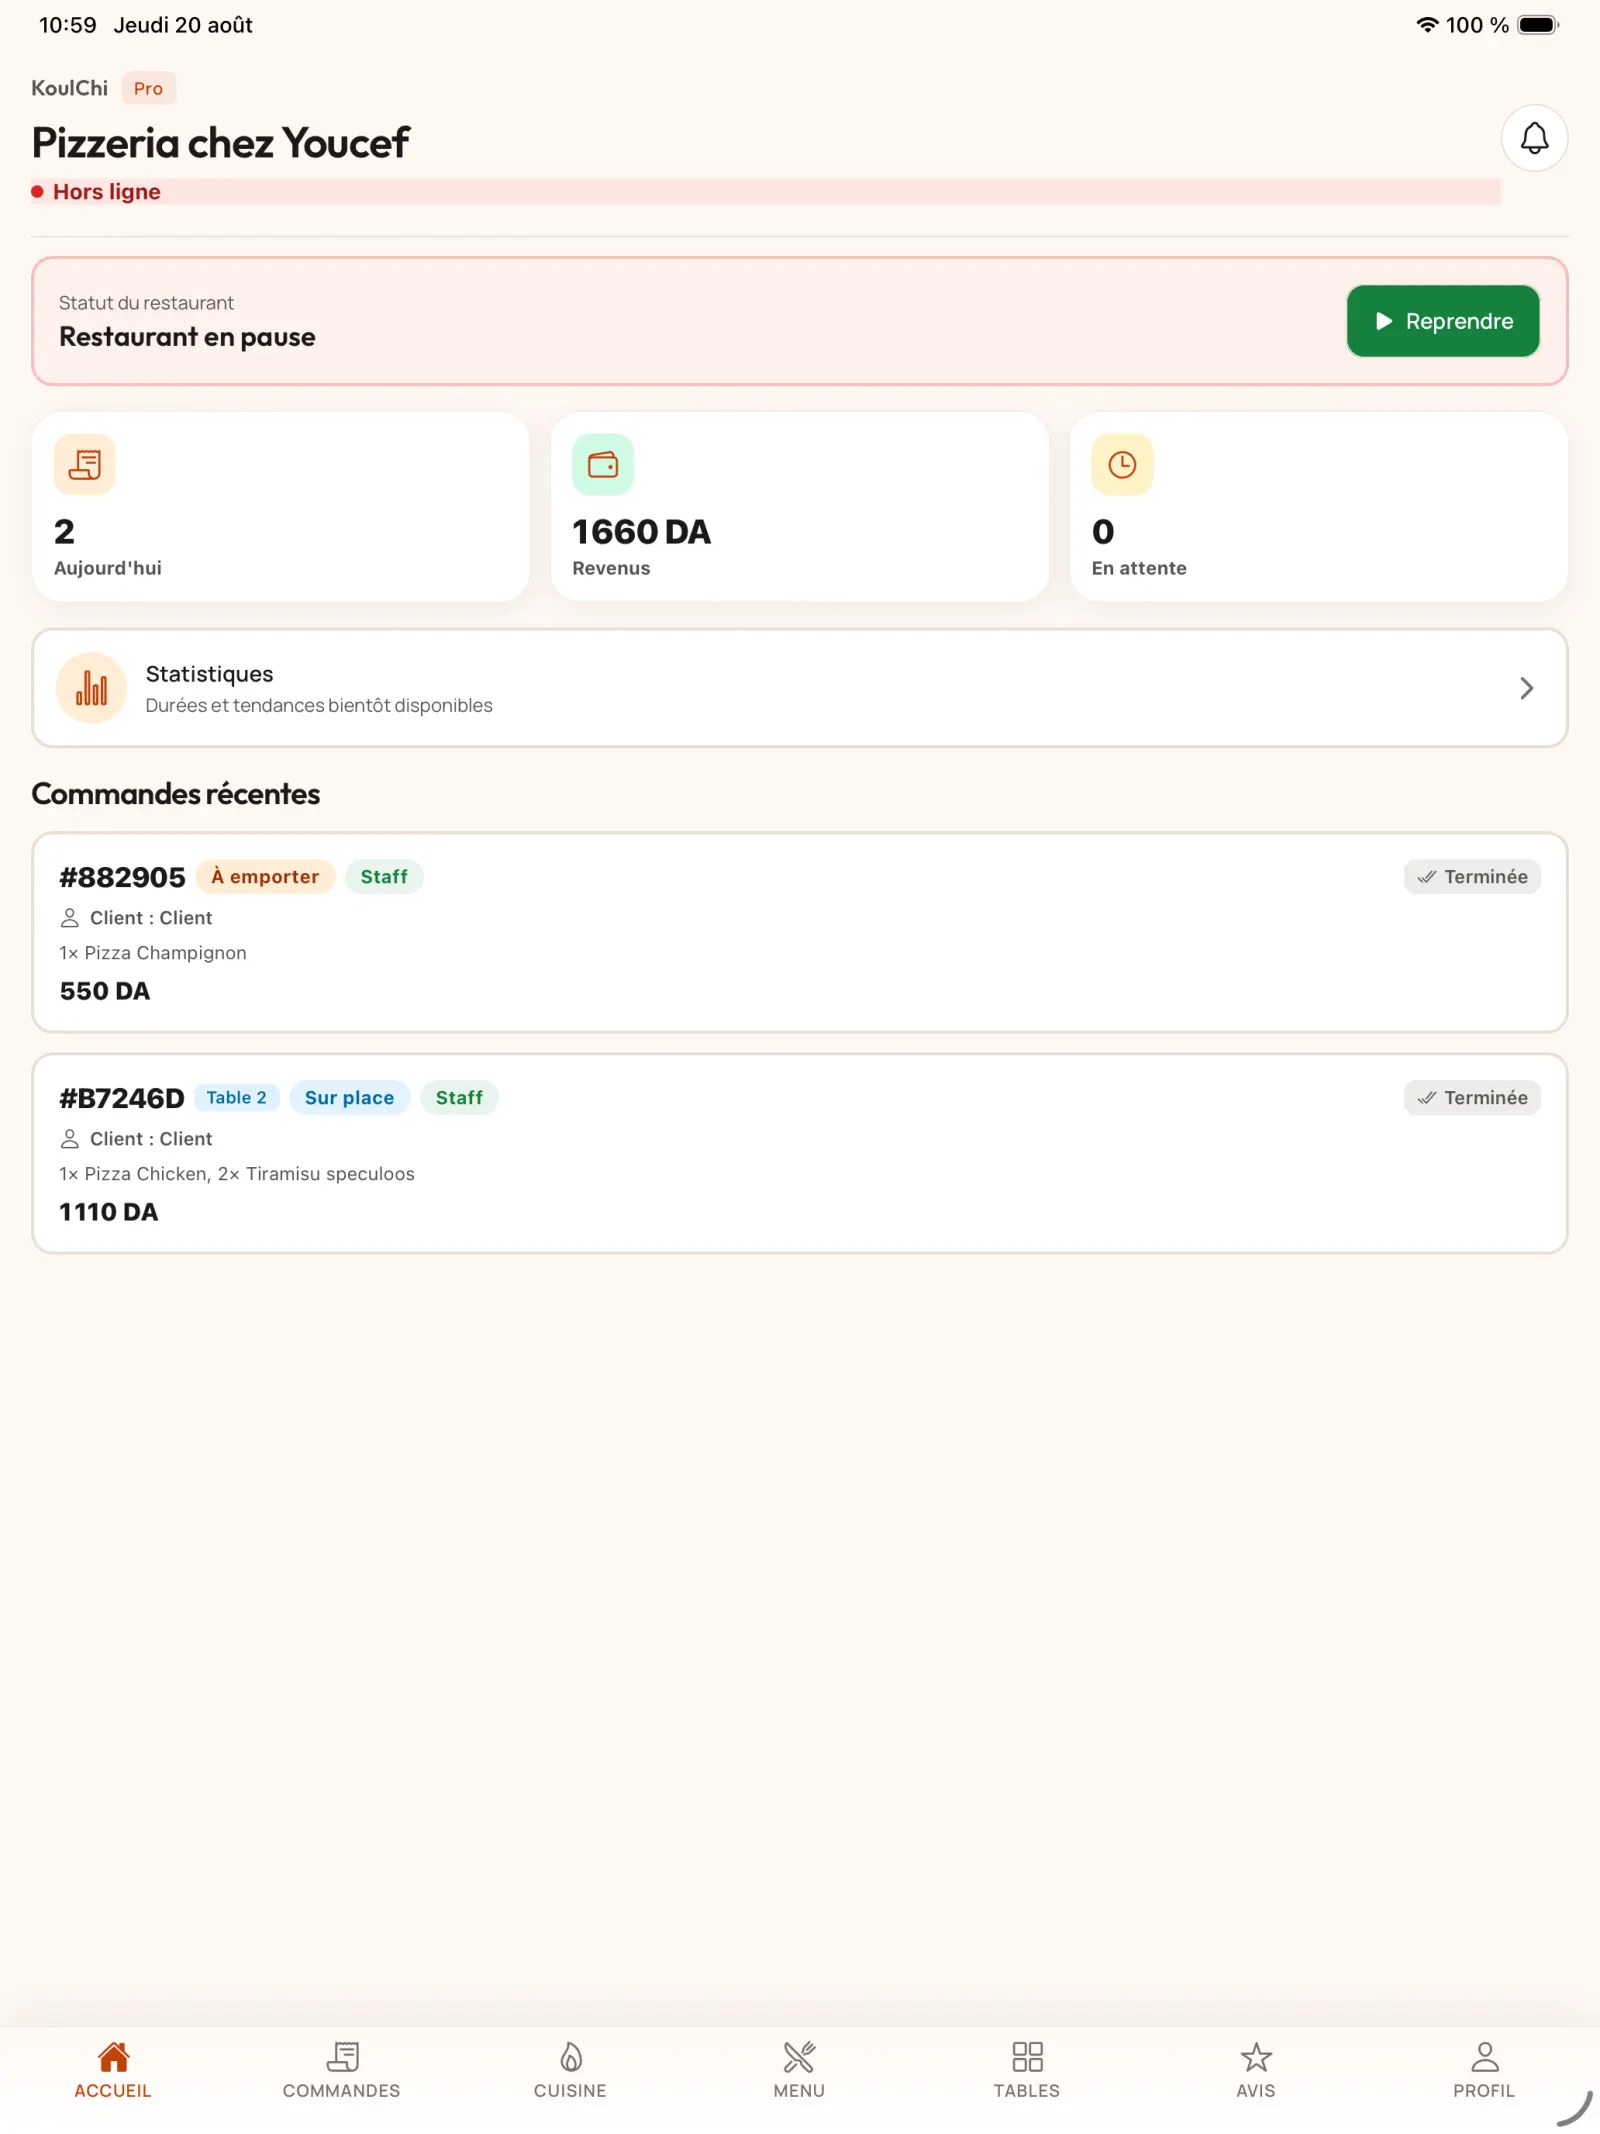
Step 19
Resume orders
Select “Resume” when the restaurant is ready to accept new orders.
Open full-size image