Guide 8 of 8
Understand the customer journey in the KoulChi application
This journey shows what the customer sees in KoulChi and how each step stays in sync with the team on KoulChi Pro.
The screenshots show the French interface; the layout and features are the same in every language.
Documentation navigation
Chapter 1
Find a restaurant
The information provided by the restaurateur feeds the map, the filters and the restaurant page visible to users.
Step 1
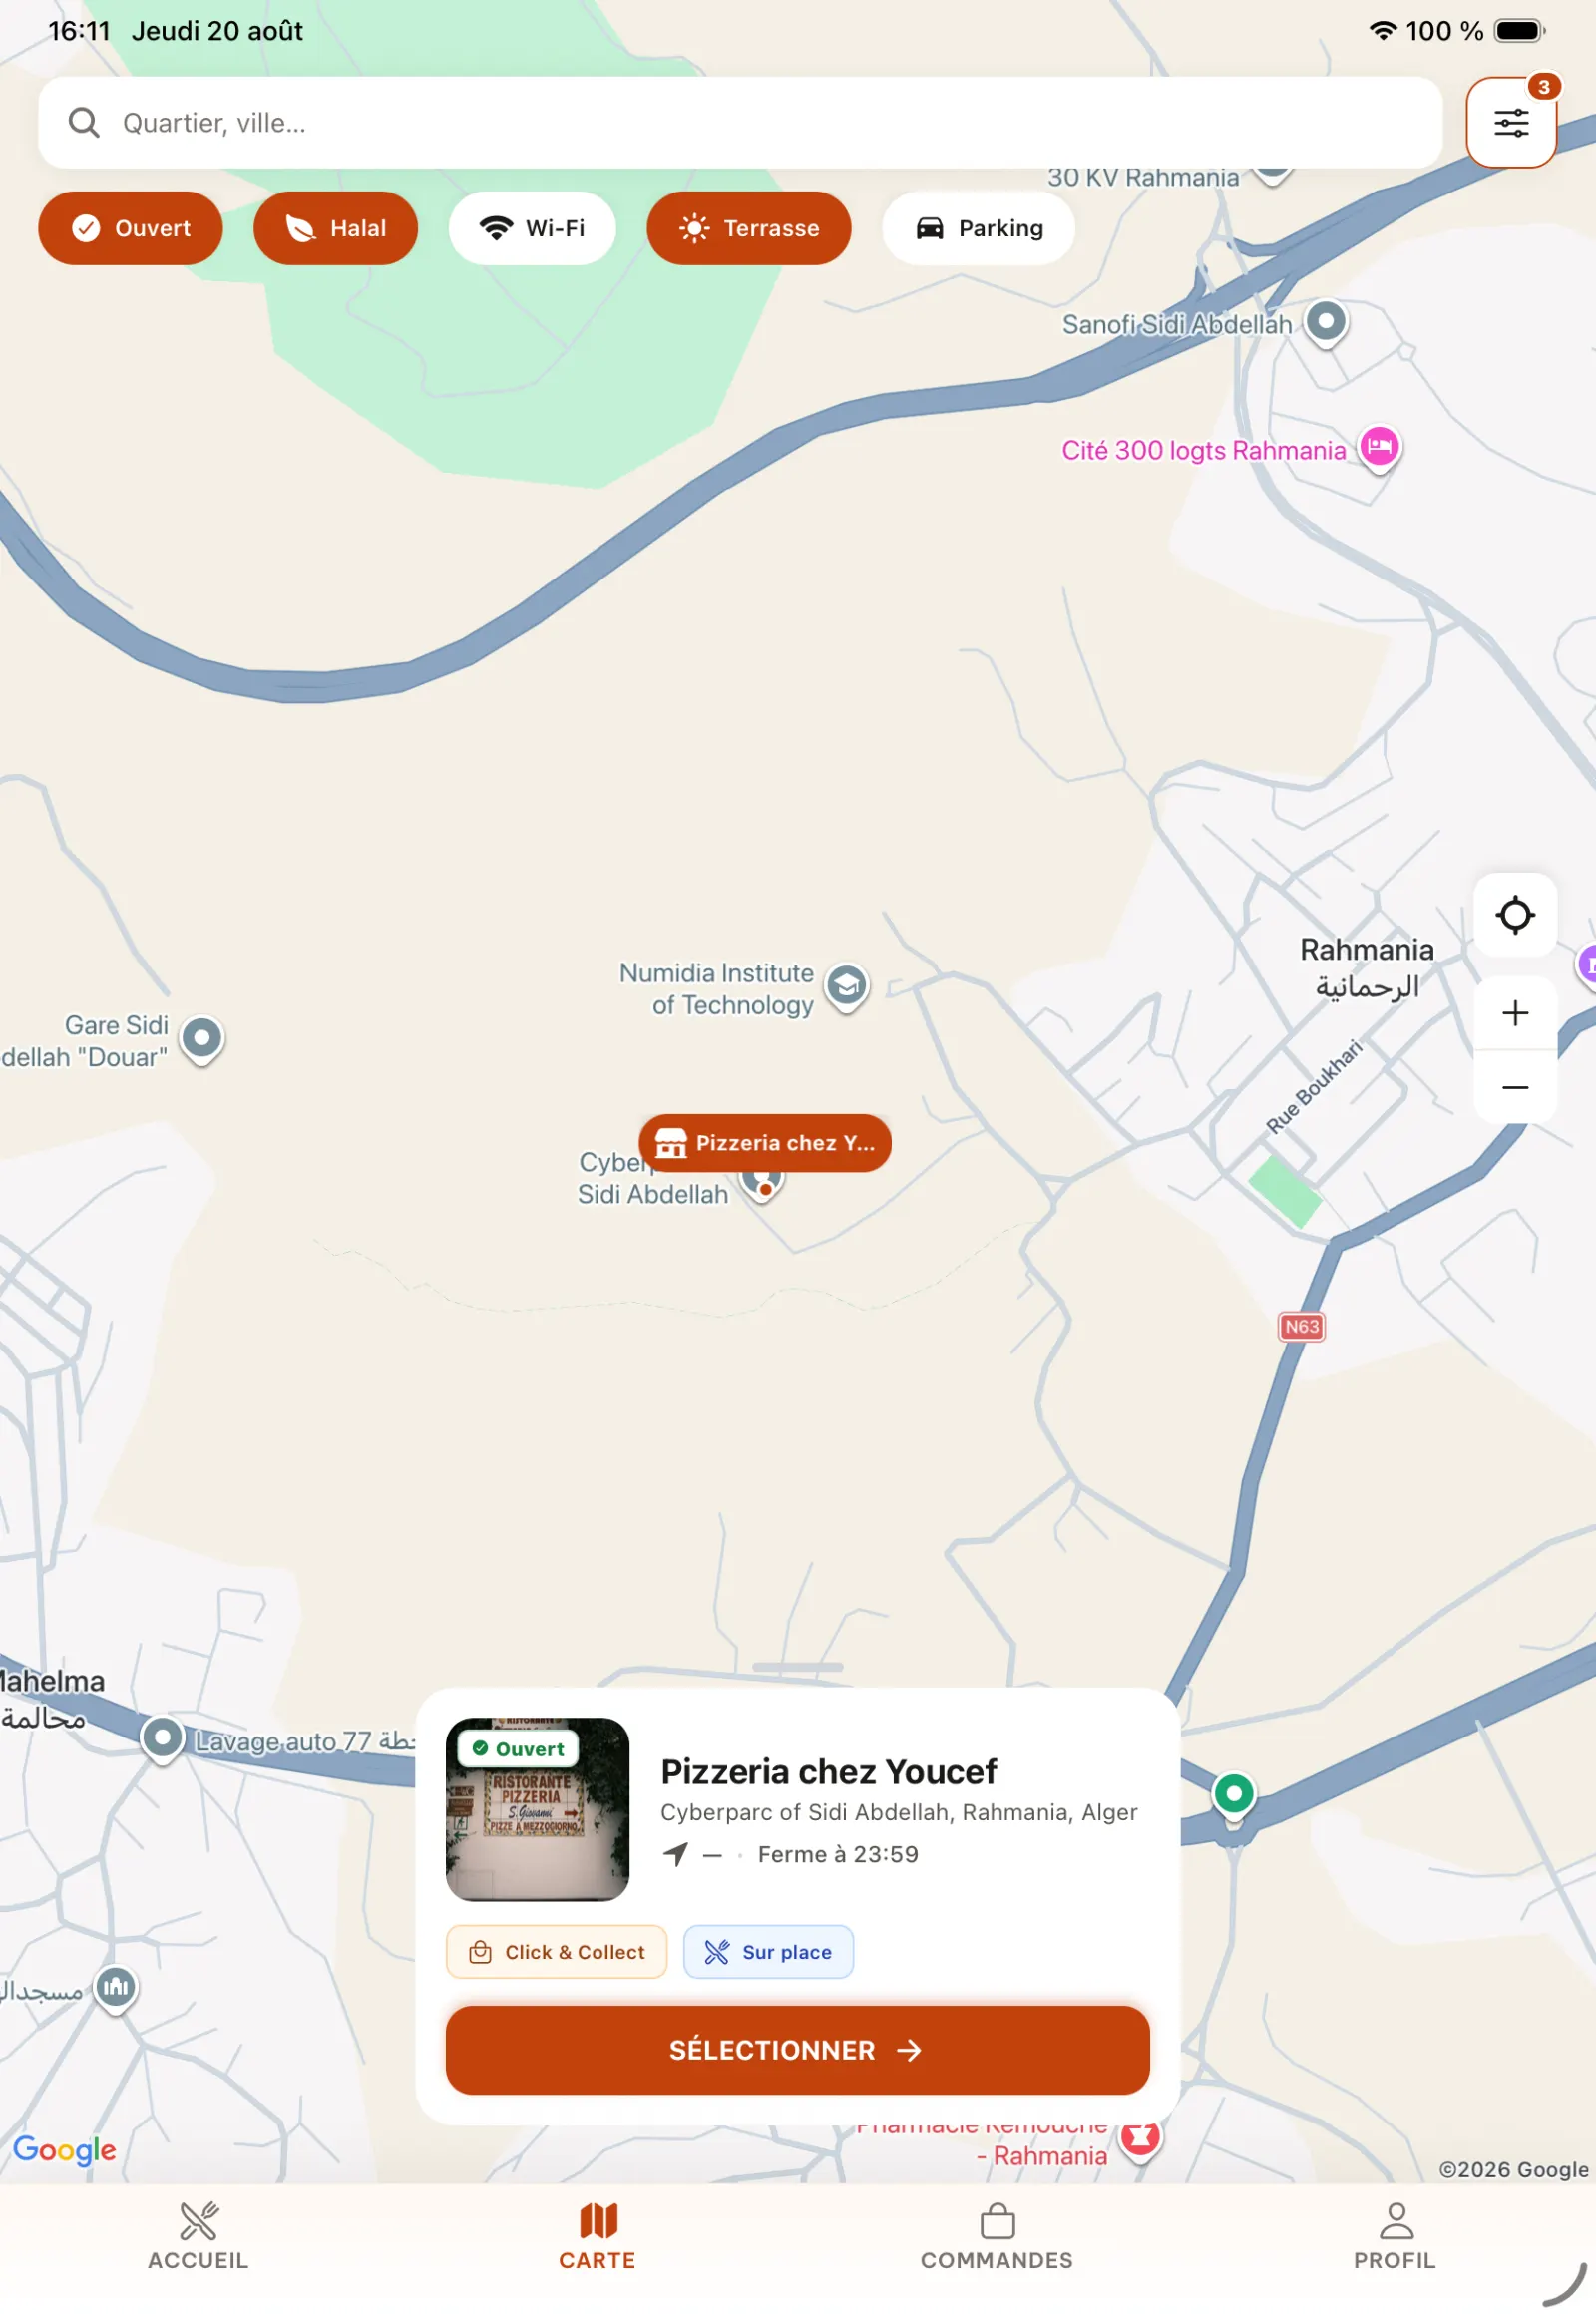
Explore restaurants on the map
The map shows the available establishments. The filters use in particular the type of cuisine and the services indicated in KoulChi Pro.
In practice. Filters are based on information entered by the merchant: type of cuisine, Wi-Fi, terrace, services or other available criteria. A well-informed profile therefore increases the opportunities to appear in a relevant search.
Open full-size image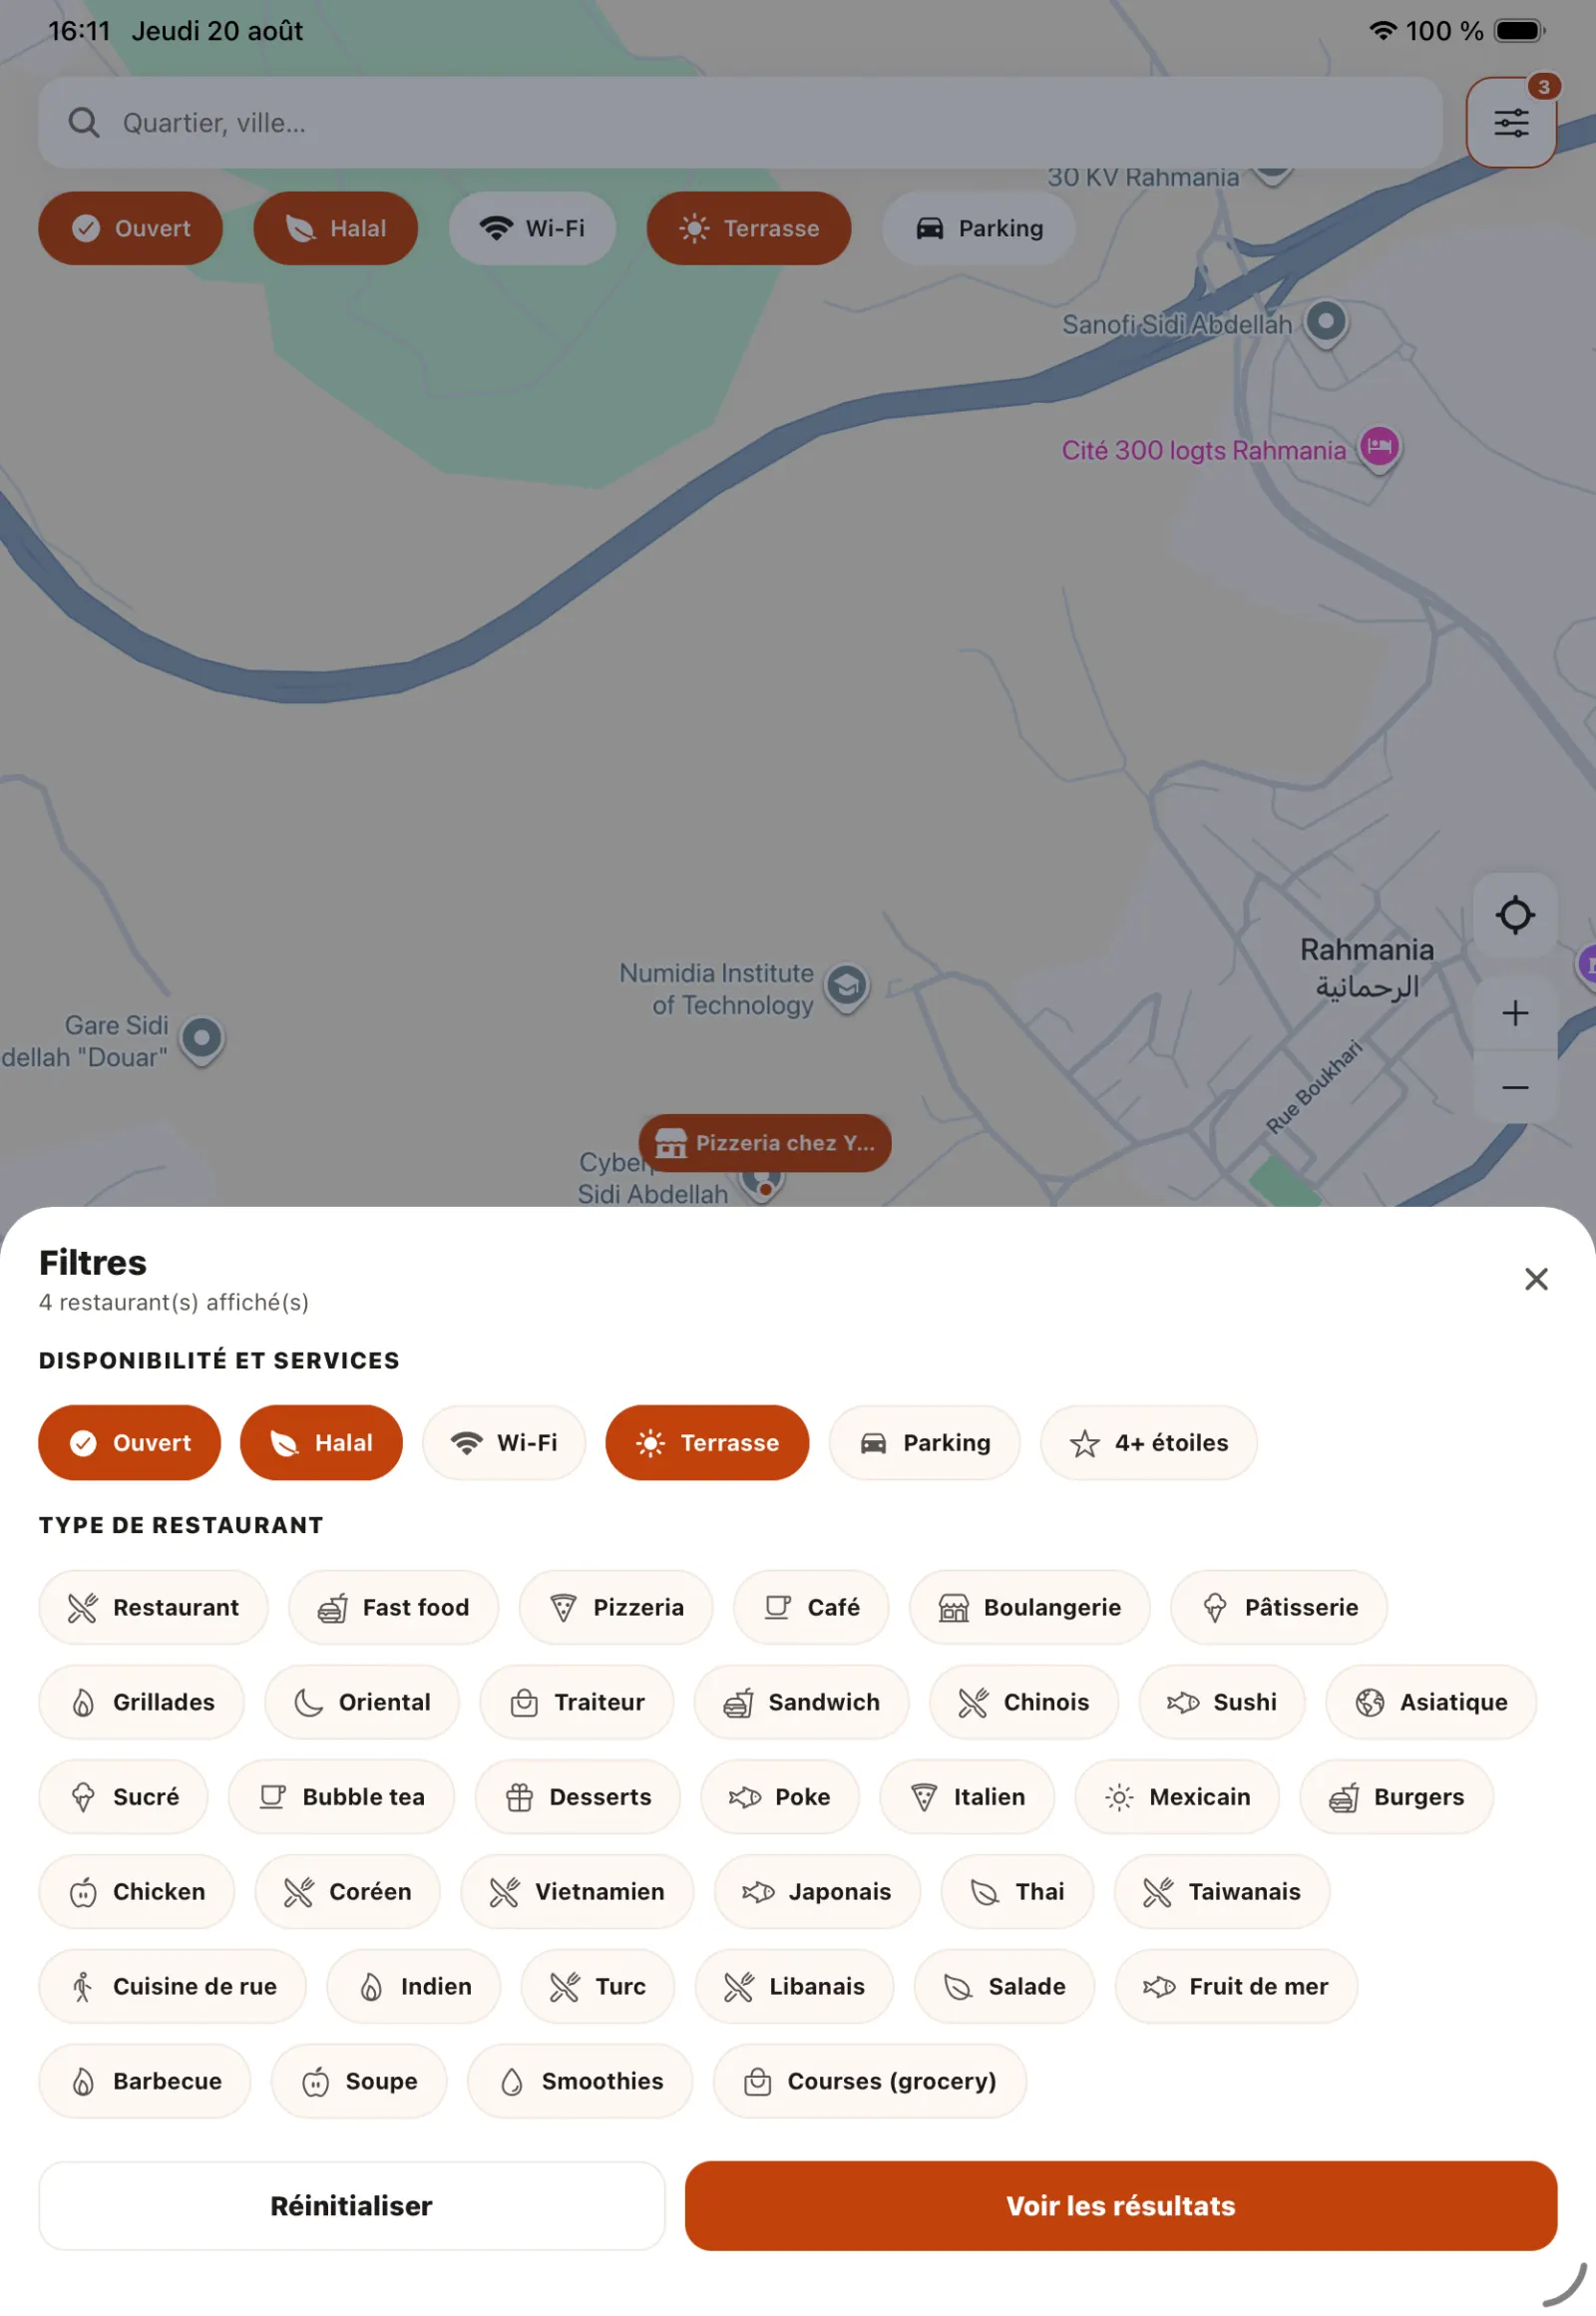
Step 2
Open search filters
The customer can refine the results according to the criteria proposed by the application.
Open full-size image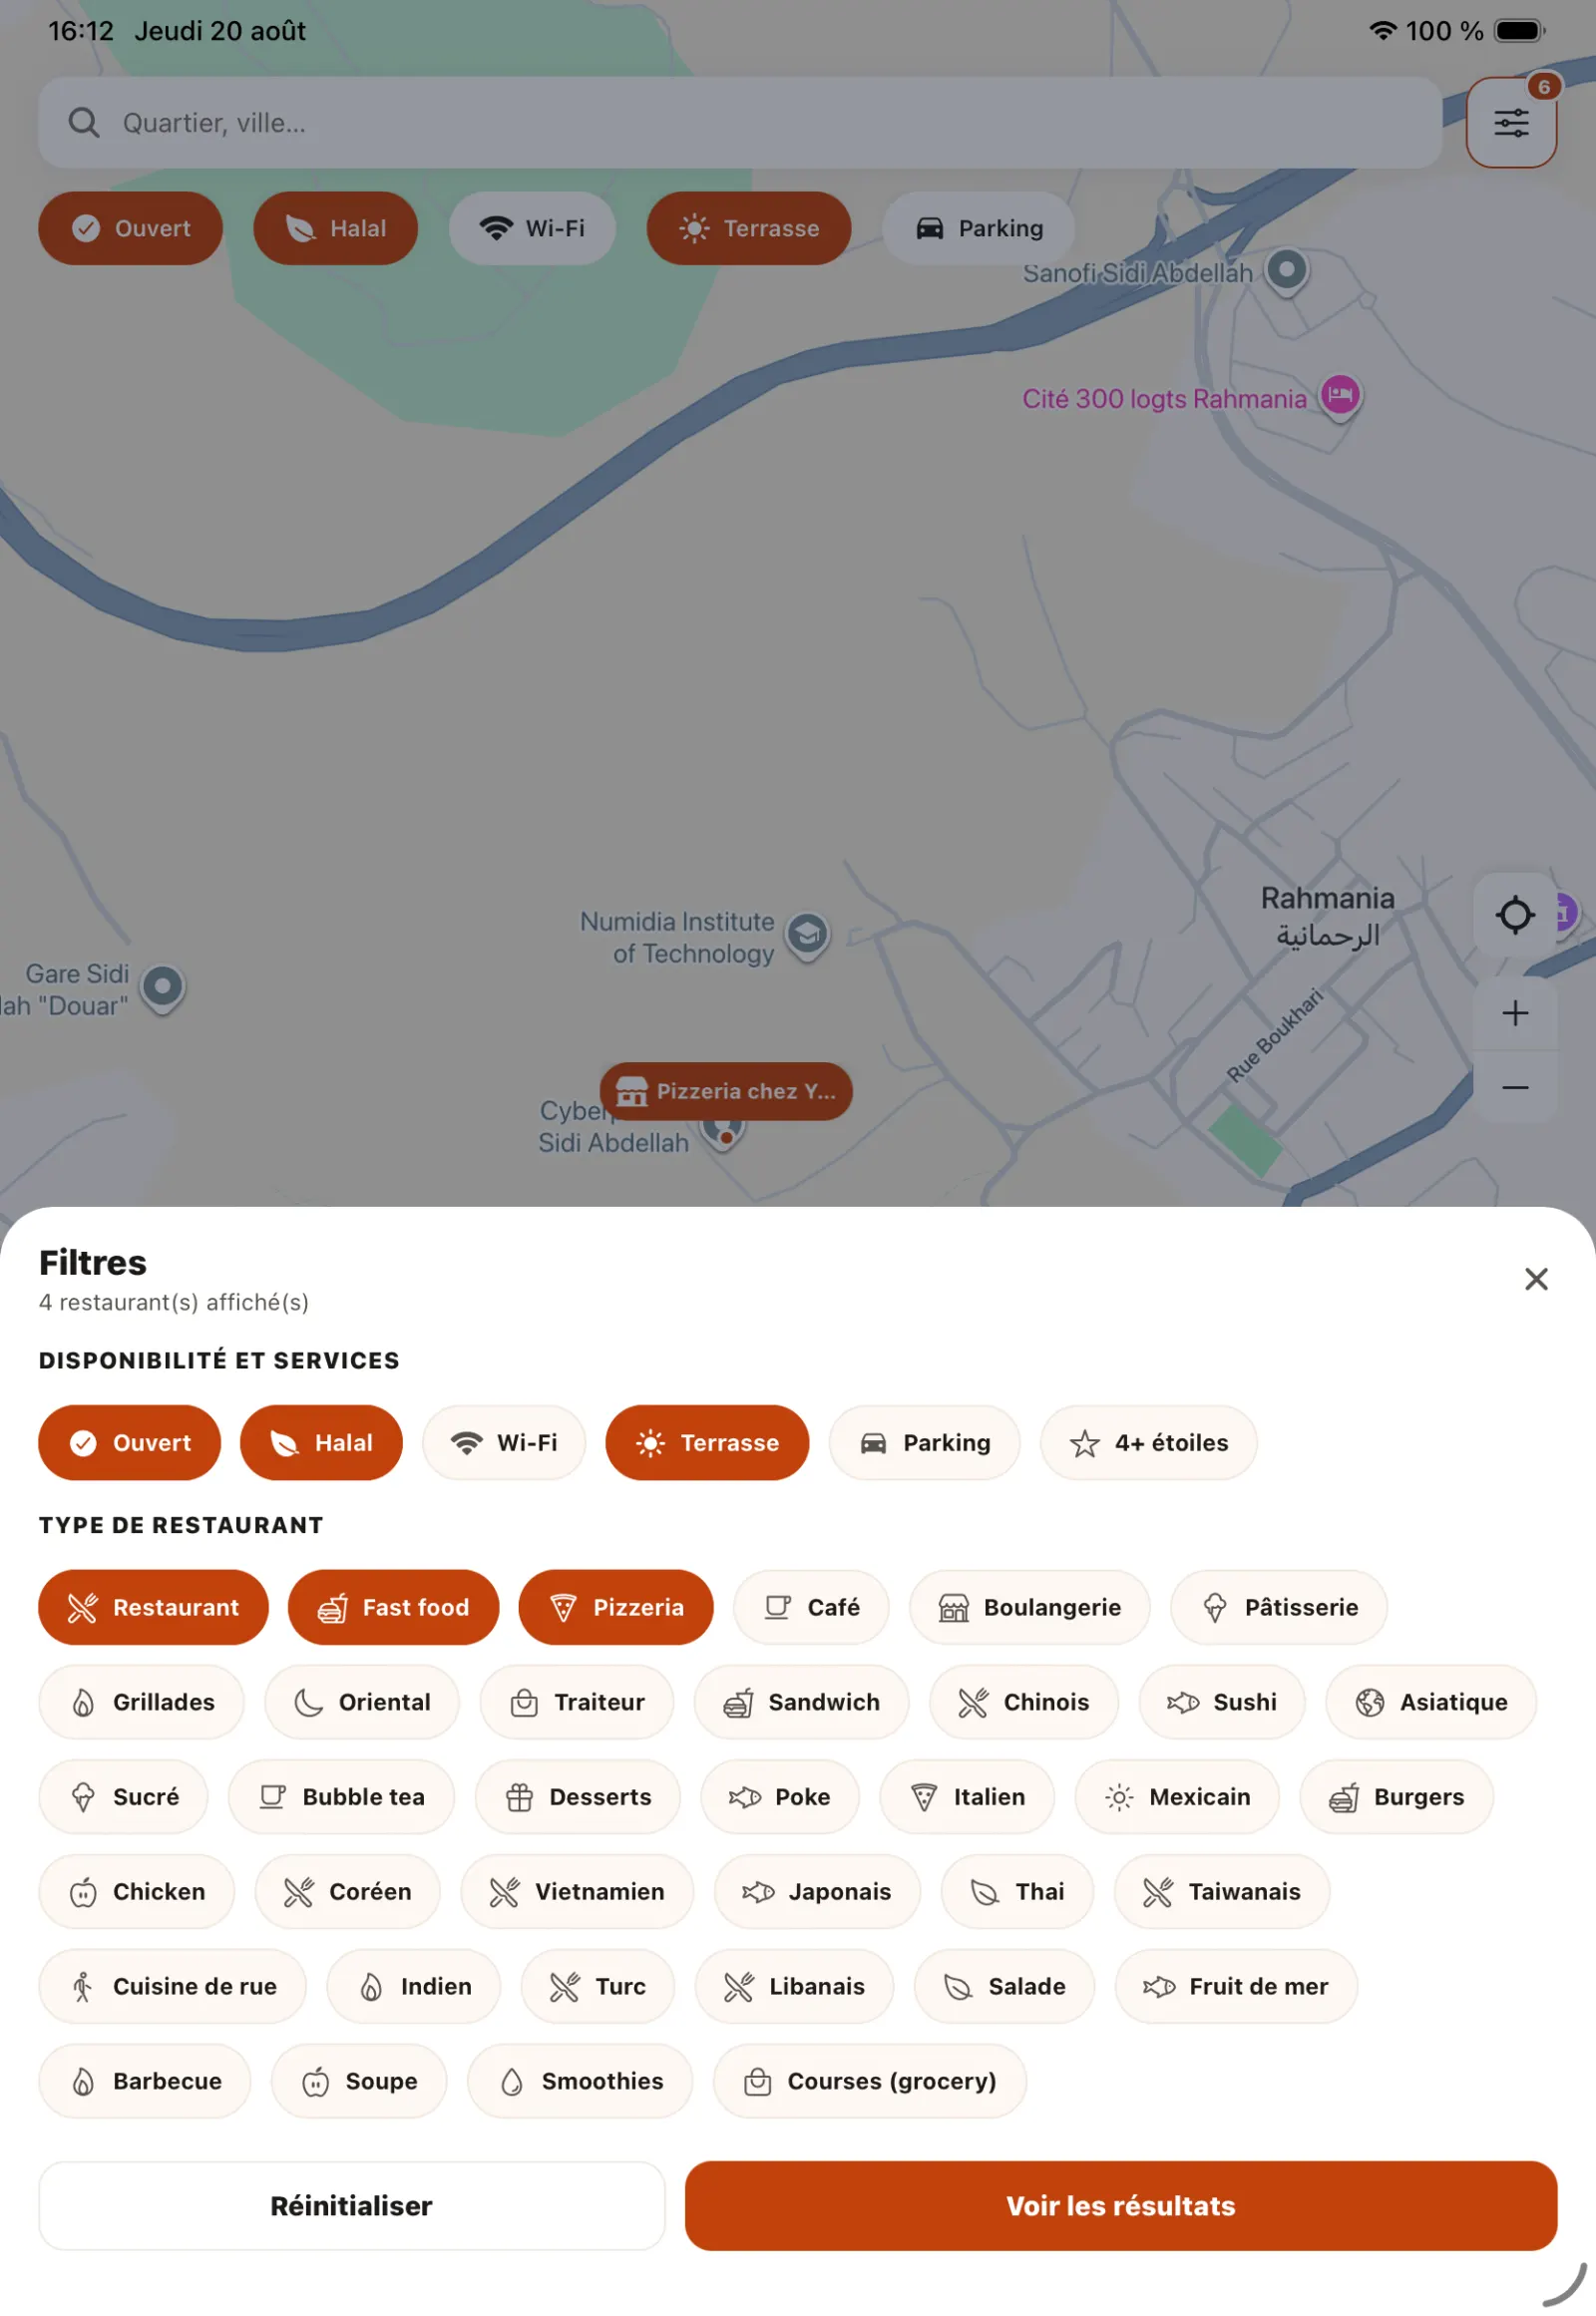
Step 3
Apply the criteria
A combination of filters makes it possible to find an establishment that meets expectations more quickly.
Open full-size image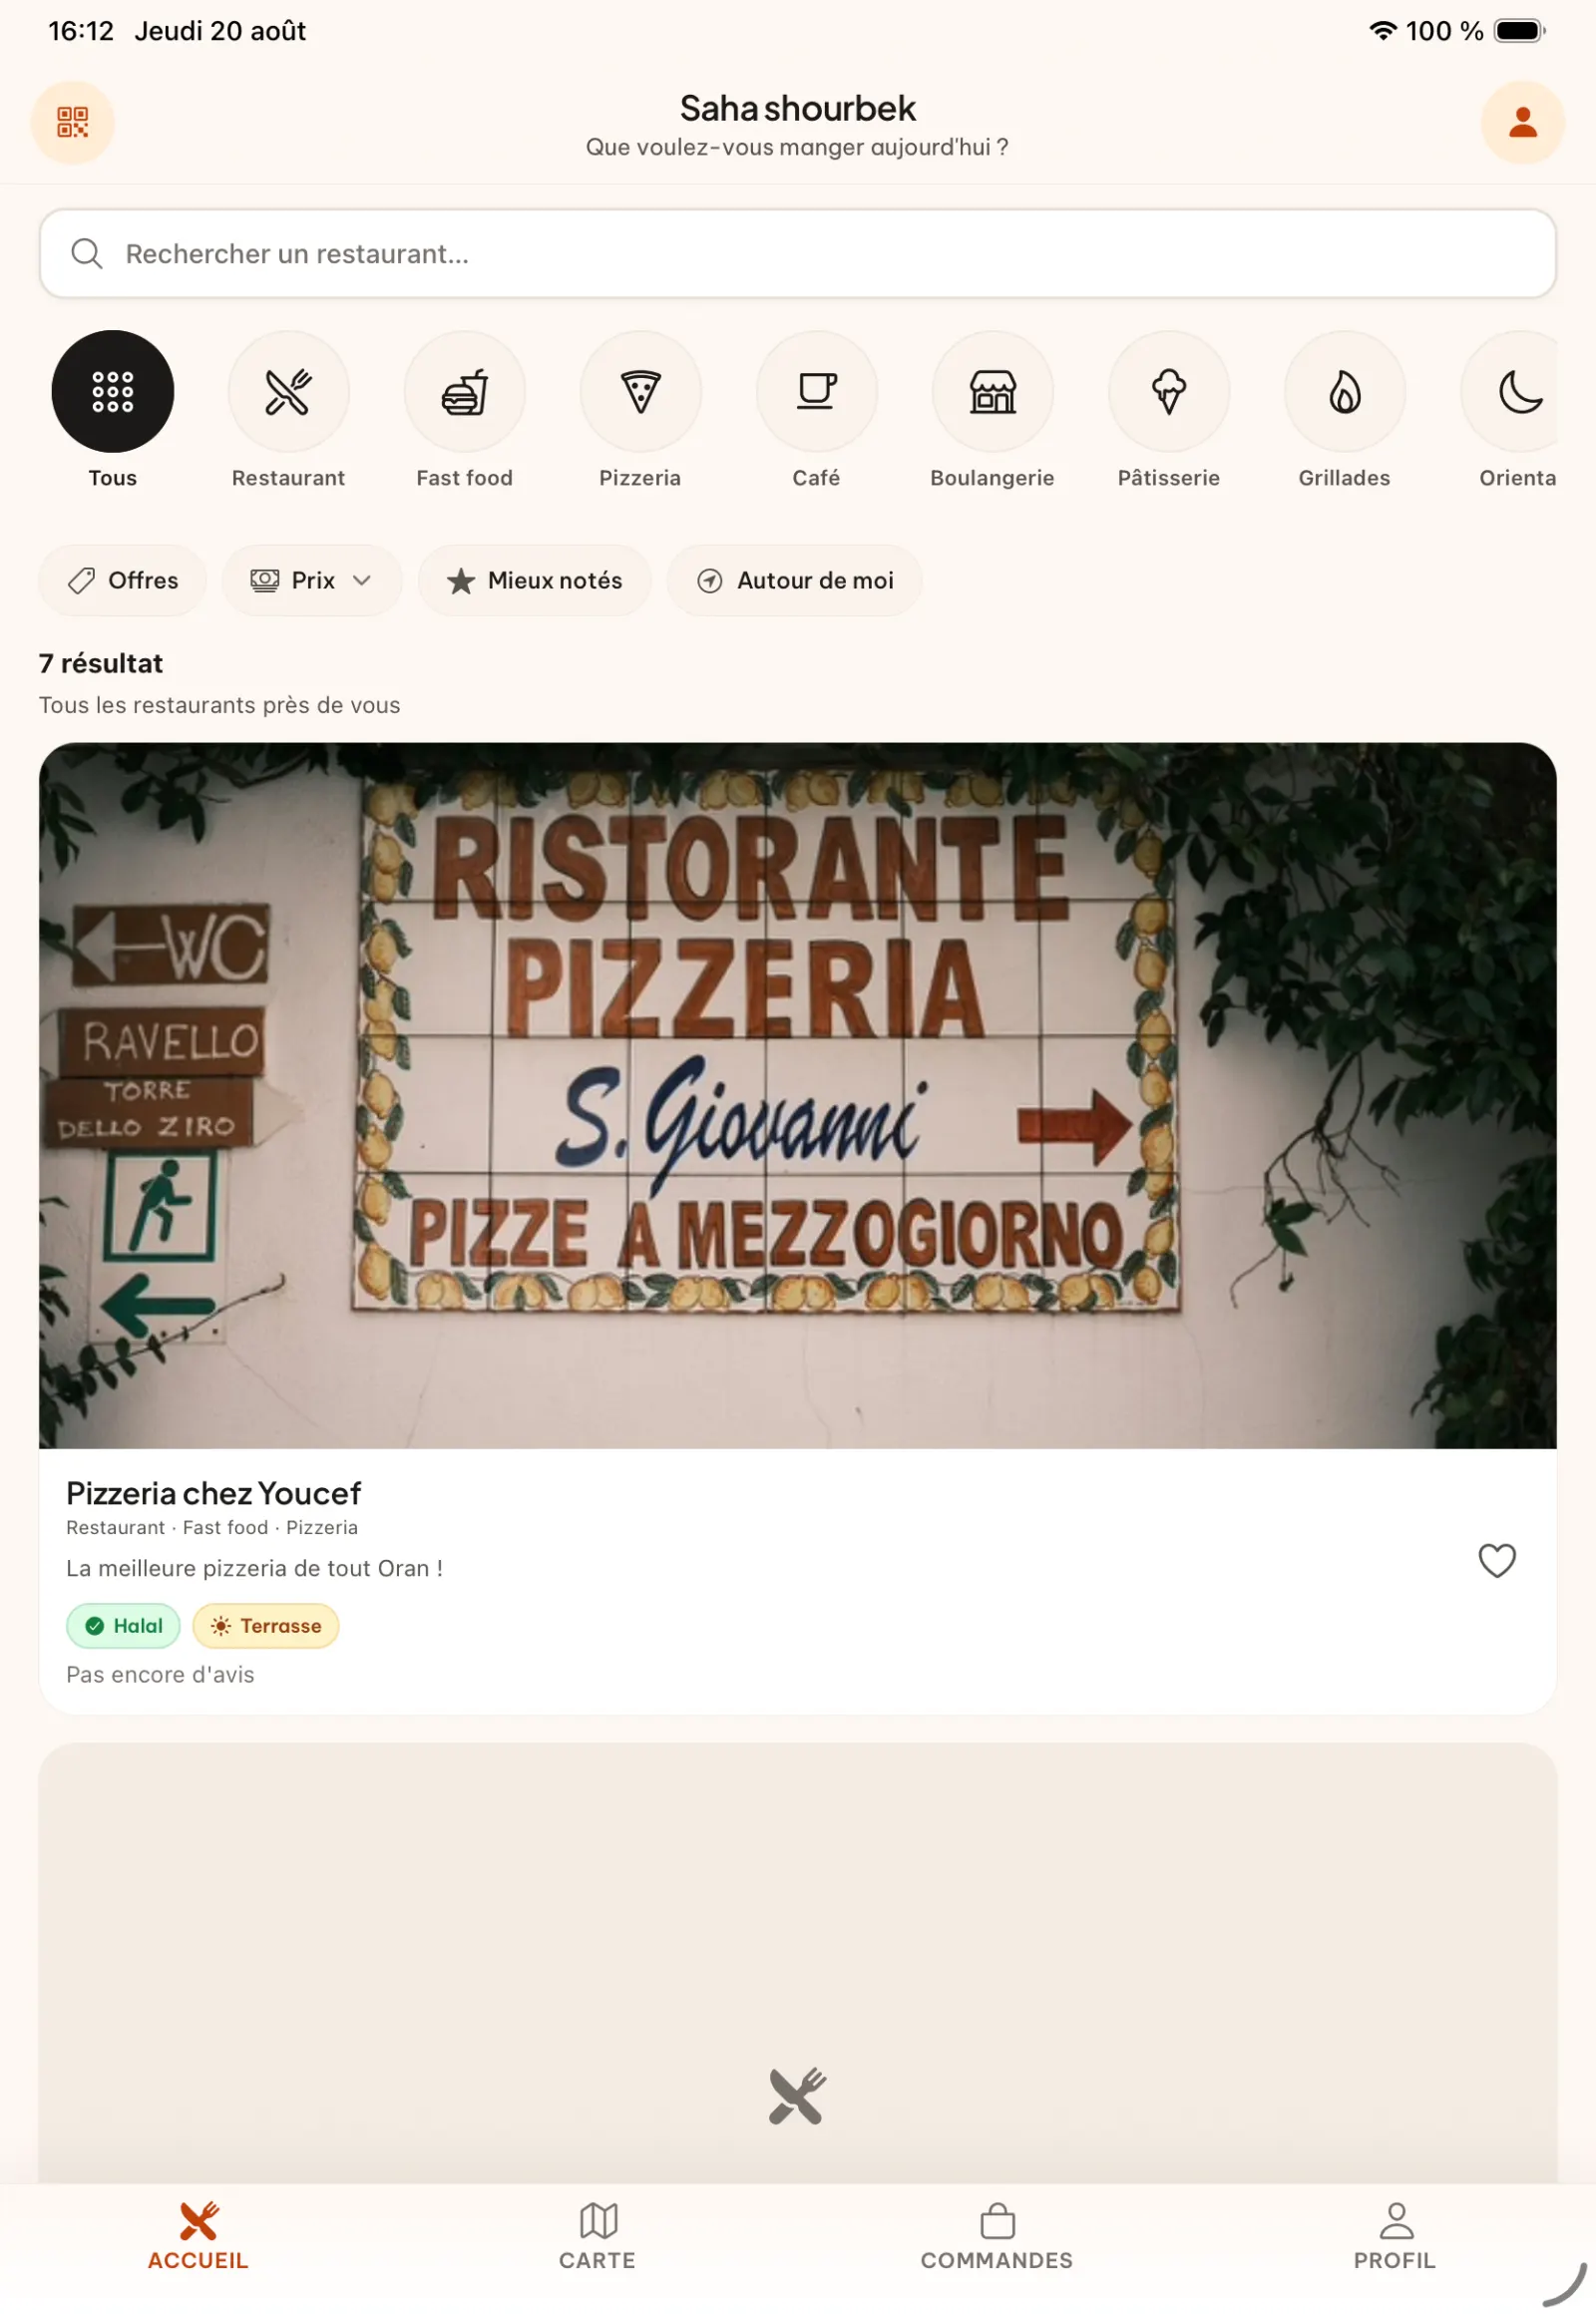
Step 4
Use the list and scanner
The “Around Me” view shows nearby restaurants and different sorts. The QR button opens the scanner to directly access a KoulChi restaurant page.
In practice. “Around Me” mode facilitates local discovery. Conversely, the QR scanner eliminates the search: the code placed on a table or at the counter directly opens your restaurant page.
Open full-size image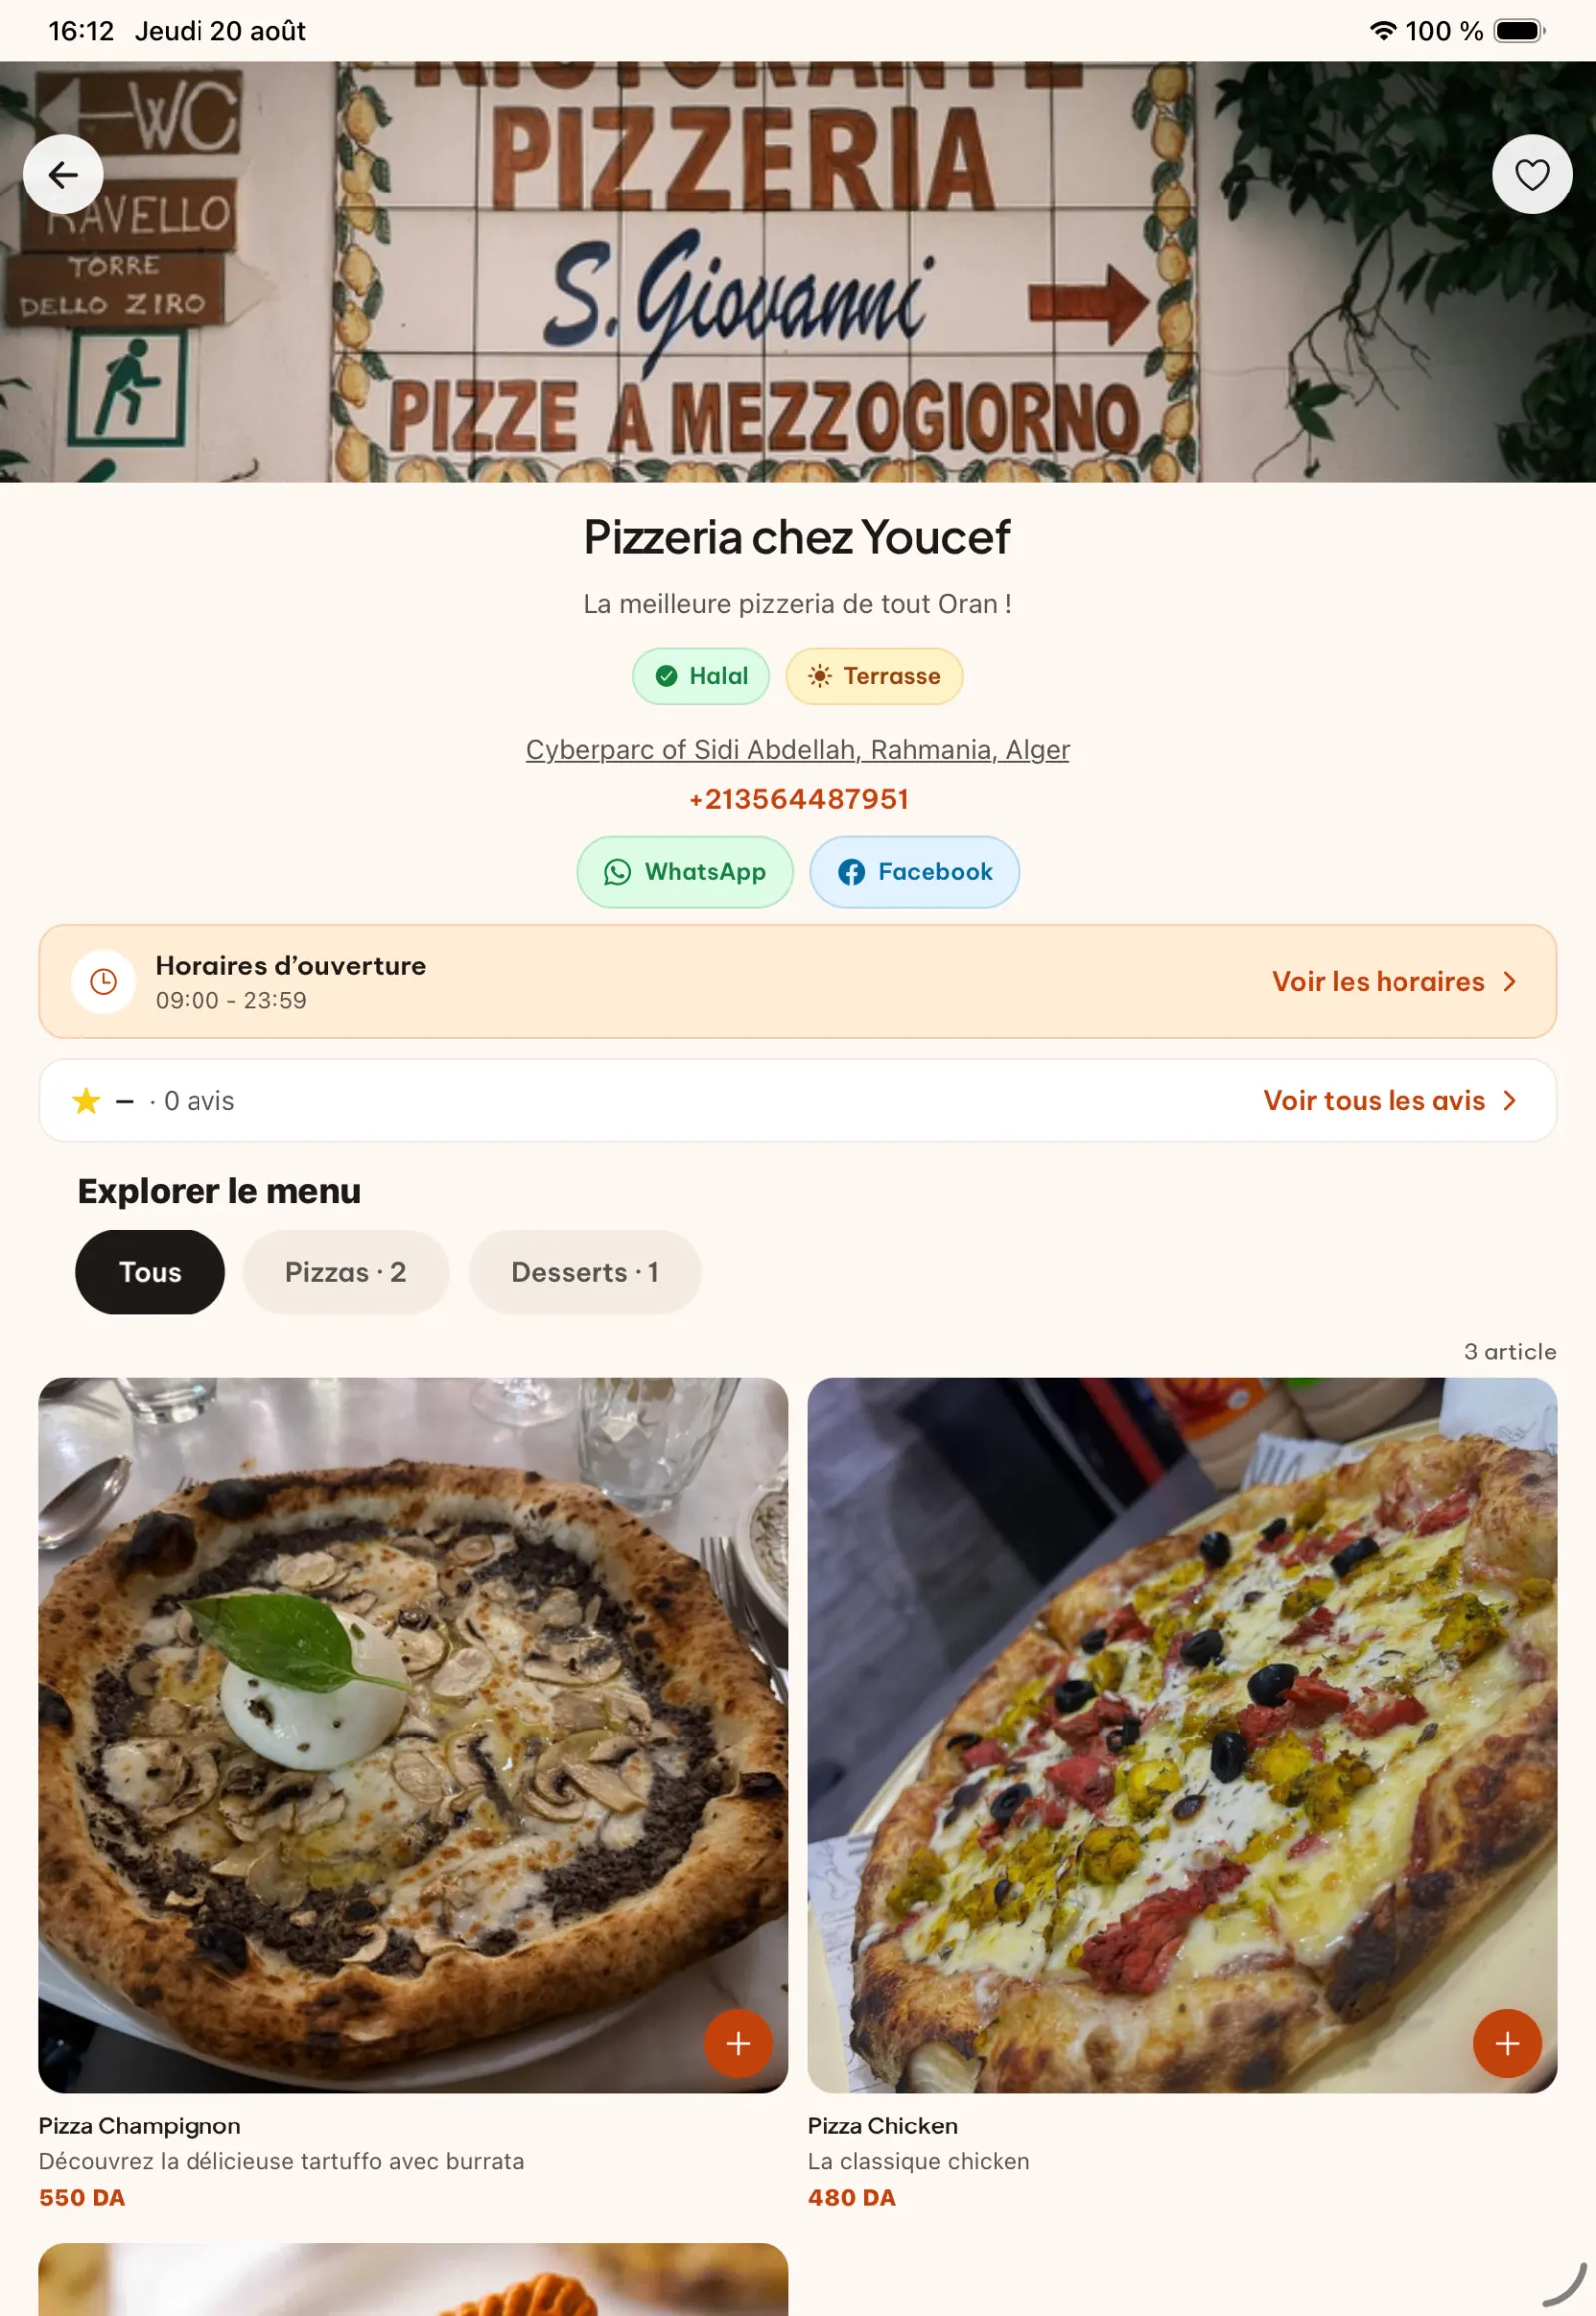
Step 5
Consult the restaurant details
The customer finds hours, address, contacts, description, categories and products. He can also add the restaurant to his favourites.
In practice. The customer can directly open your WhatsApp and your Facebook page, consult your opening hours, your address, your telephone number and your description, browse the categories then add the restaurant to their favourites. Your social networks thus become a visible part of your KoulChi presence.
Open full-size image
Chapter 2
Build the basket
The customer catalogue applies the categories, options and suggestions prepared by the restaurant.
Step 6
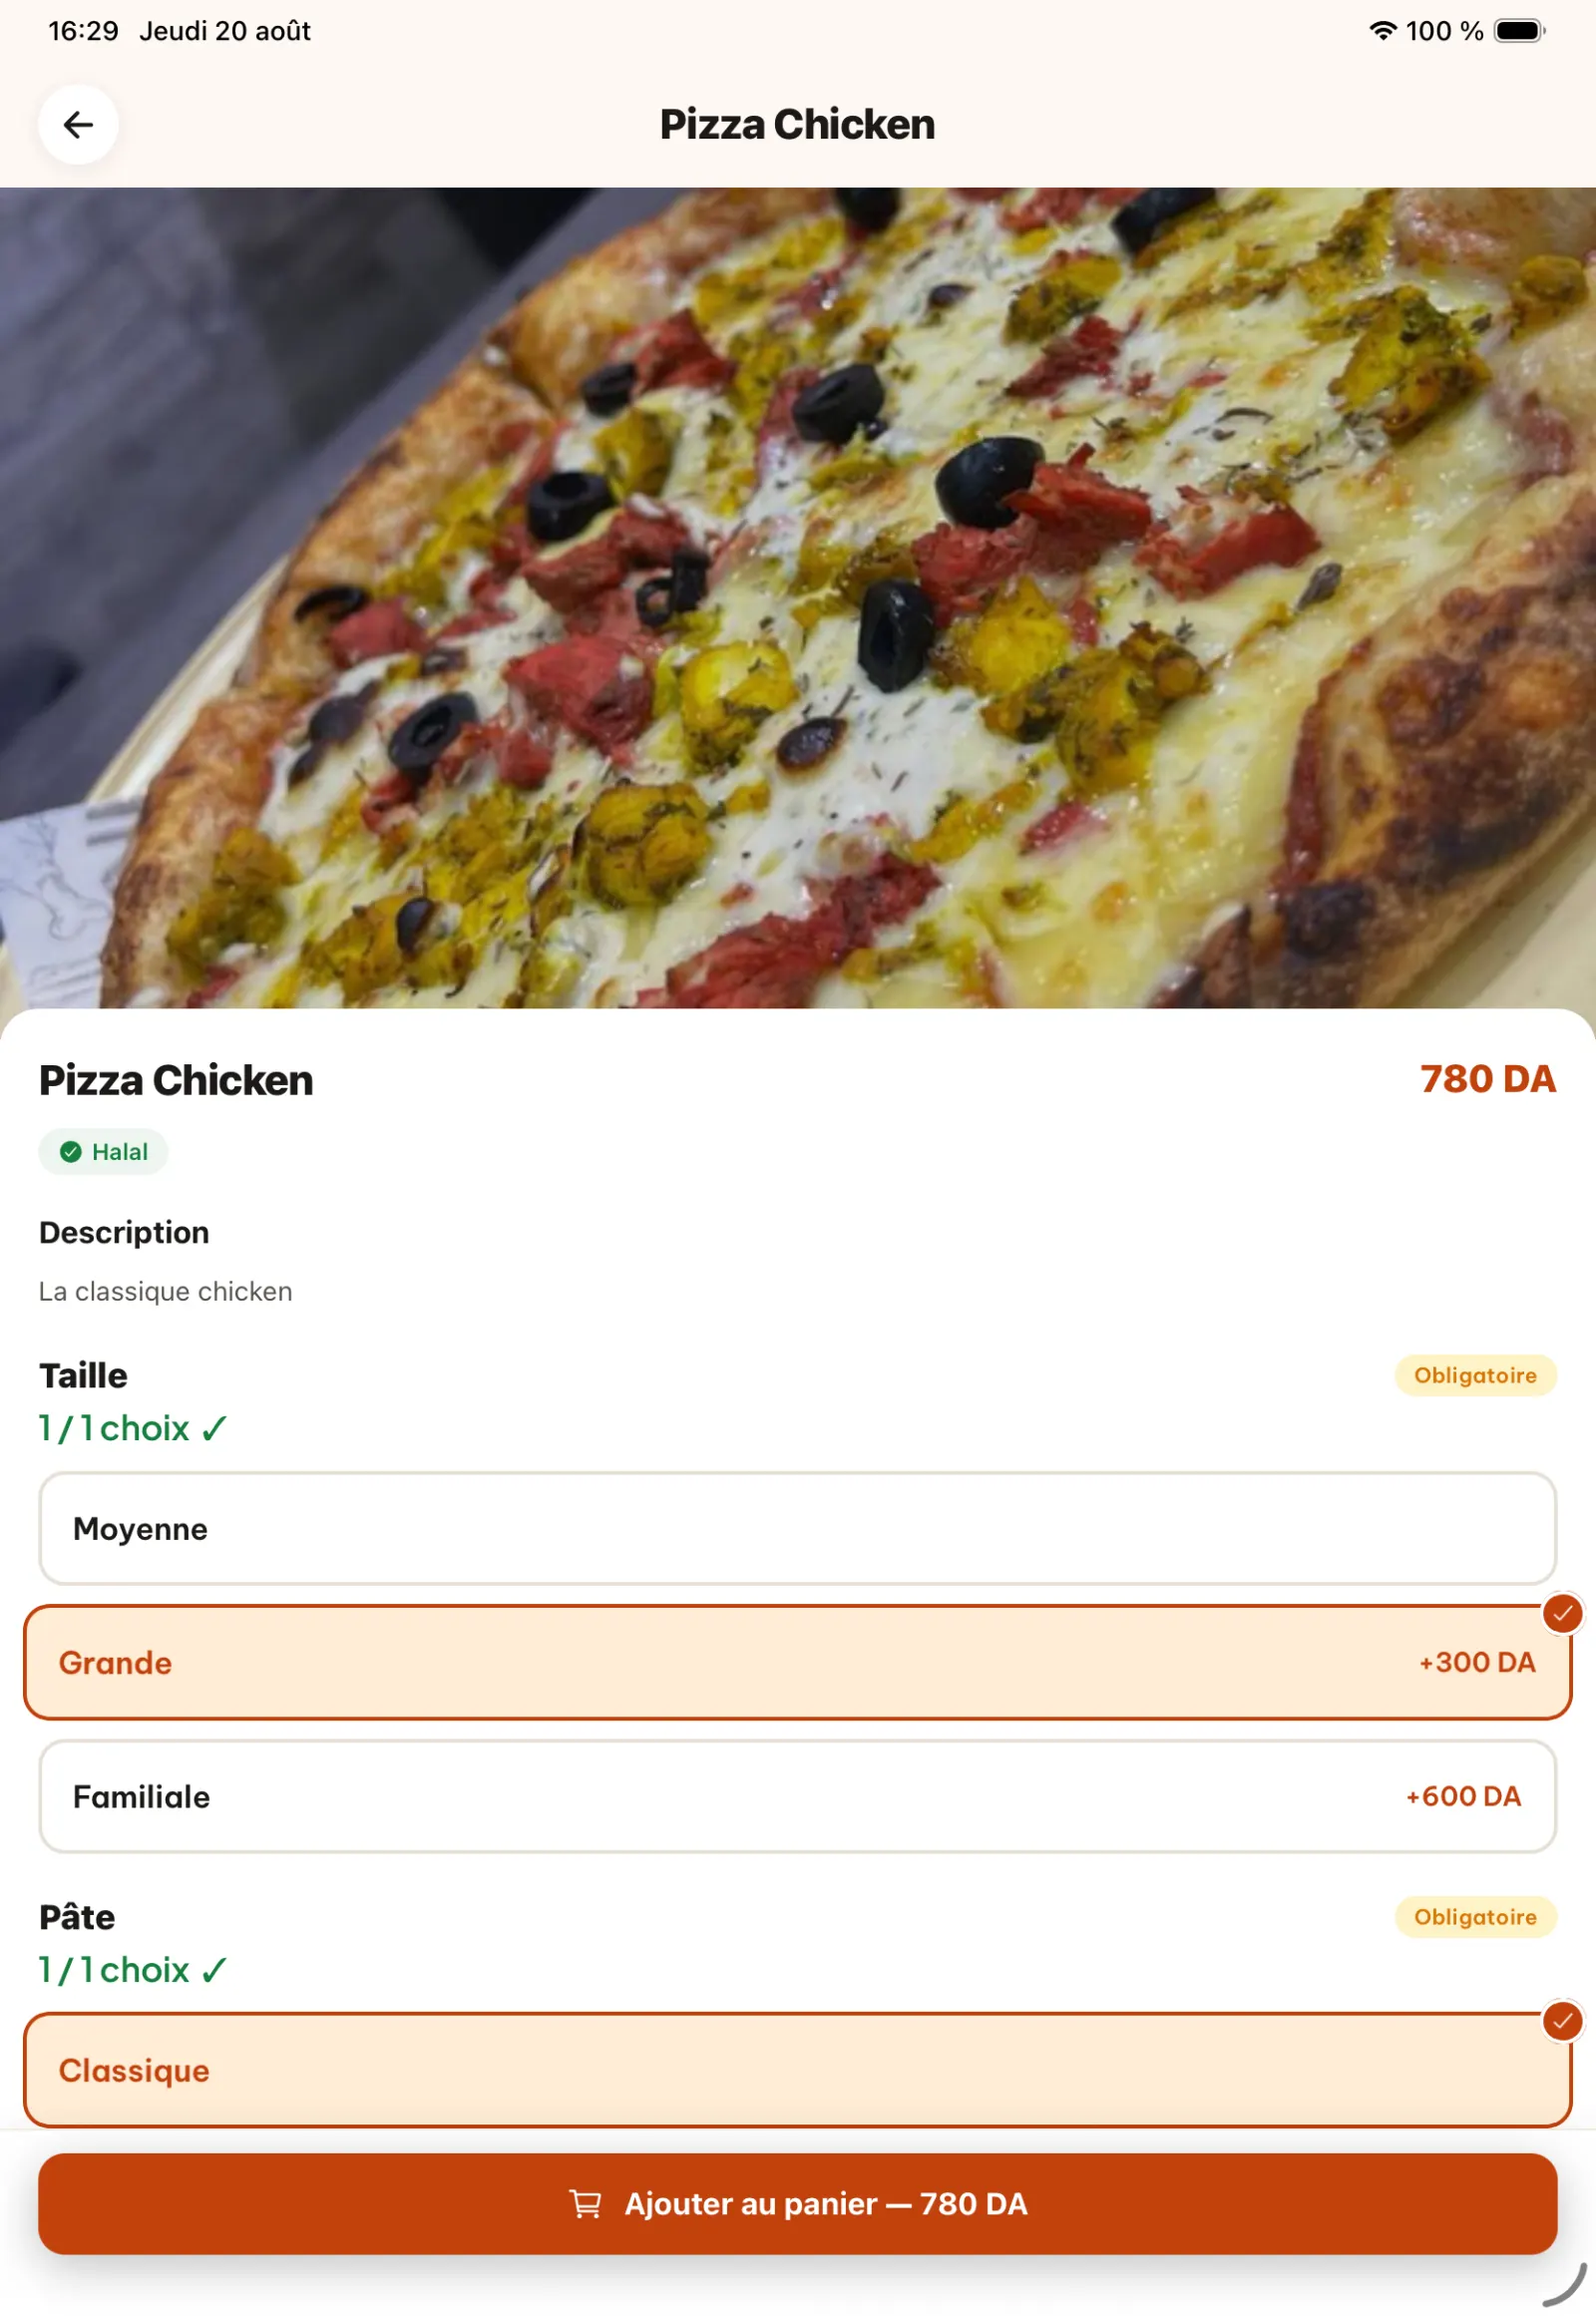
Personalise a first product
The customer selects the available options, then adds the product to their cart.
Open full-size image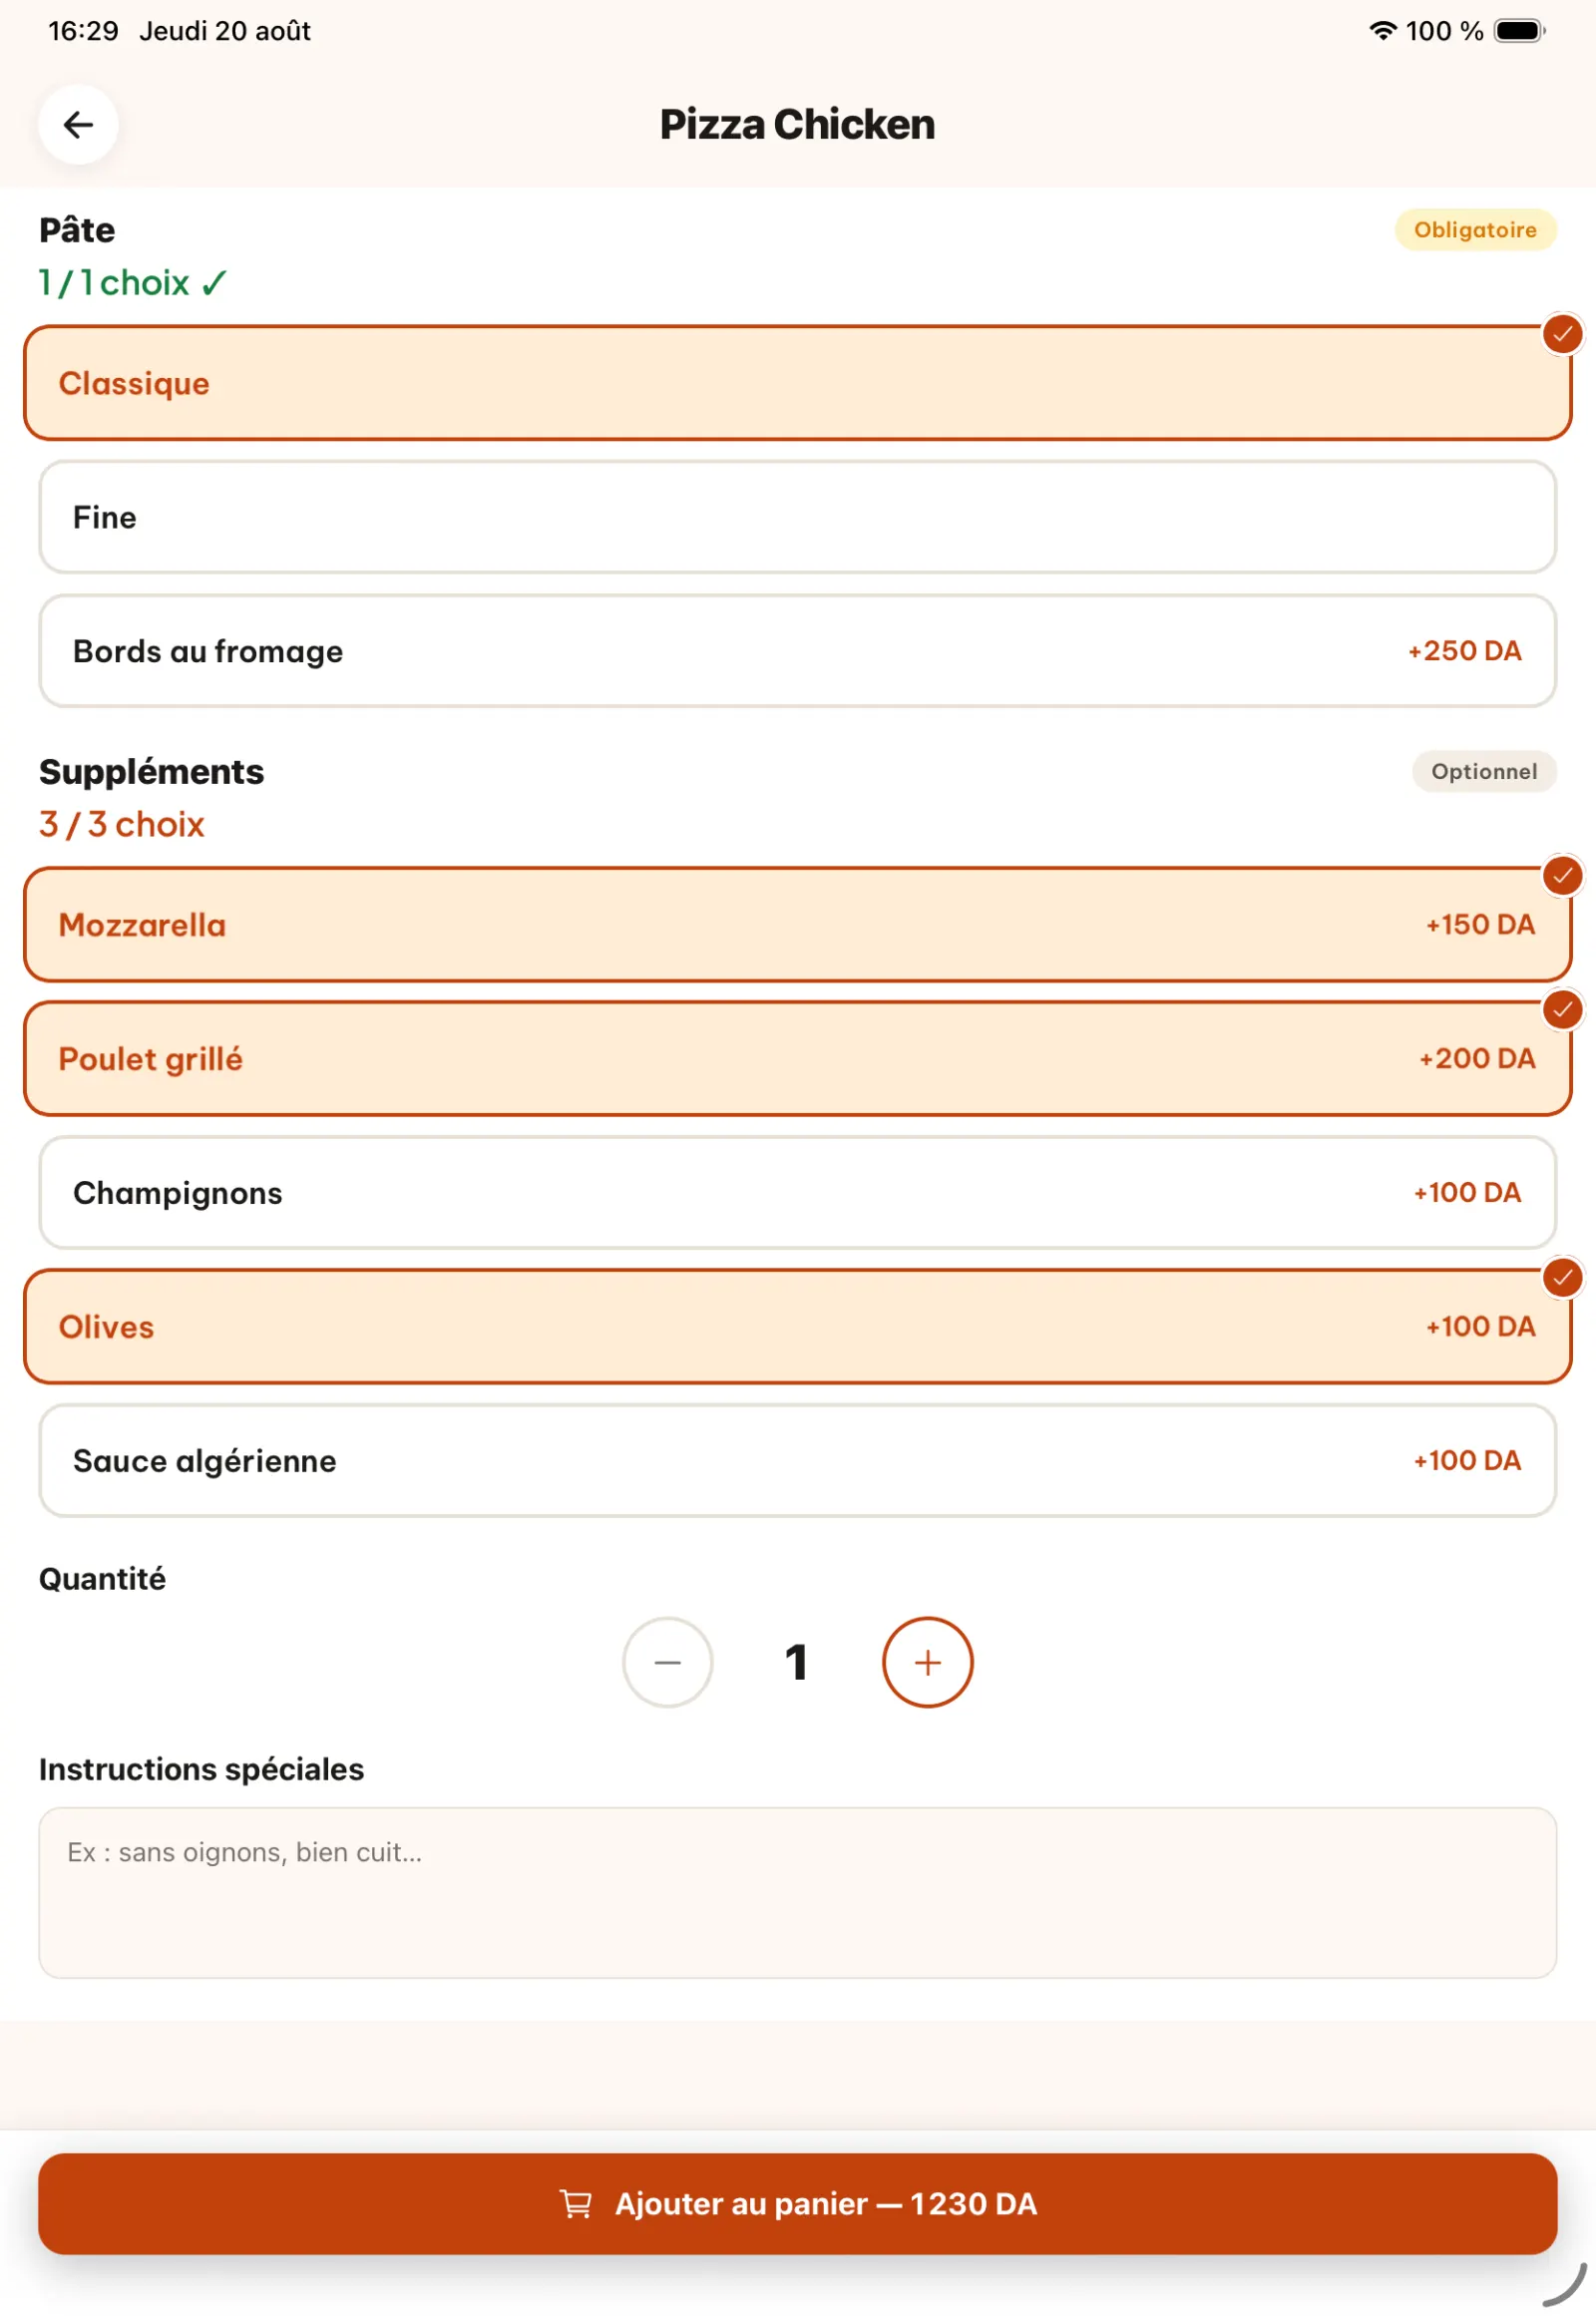
Step 7
Check personalisation
The product summary displays the choices made before continuing with the order.
Open full-size image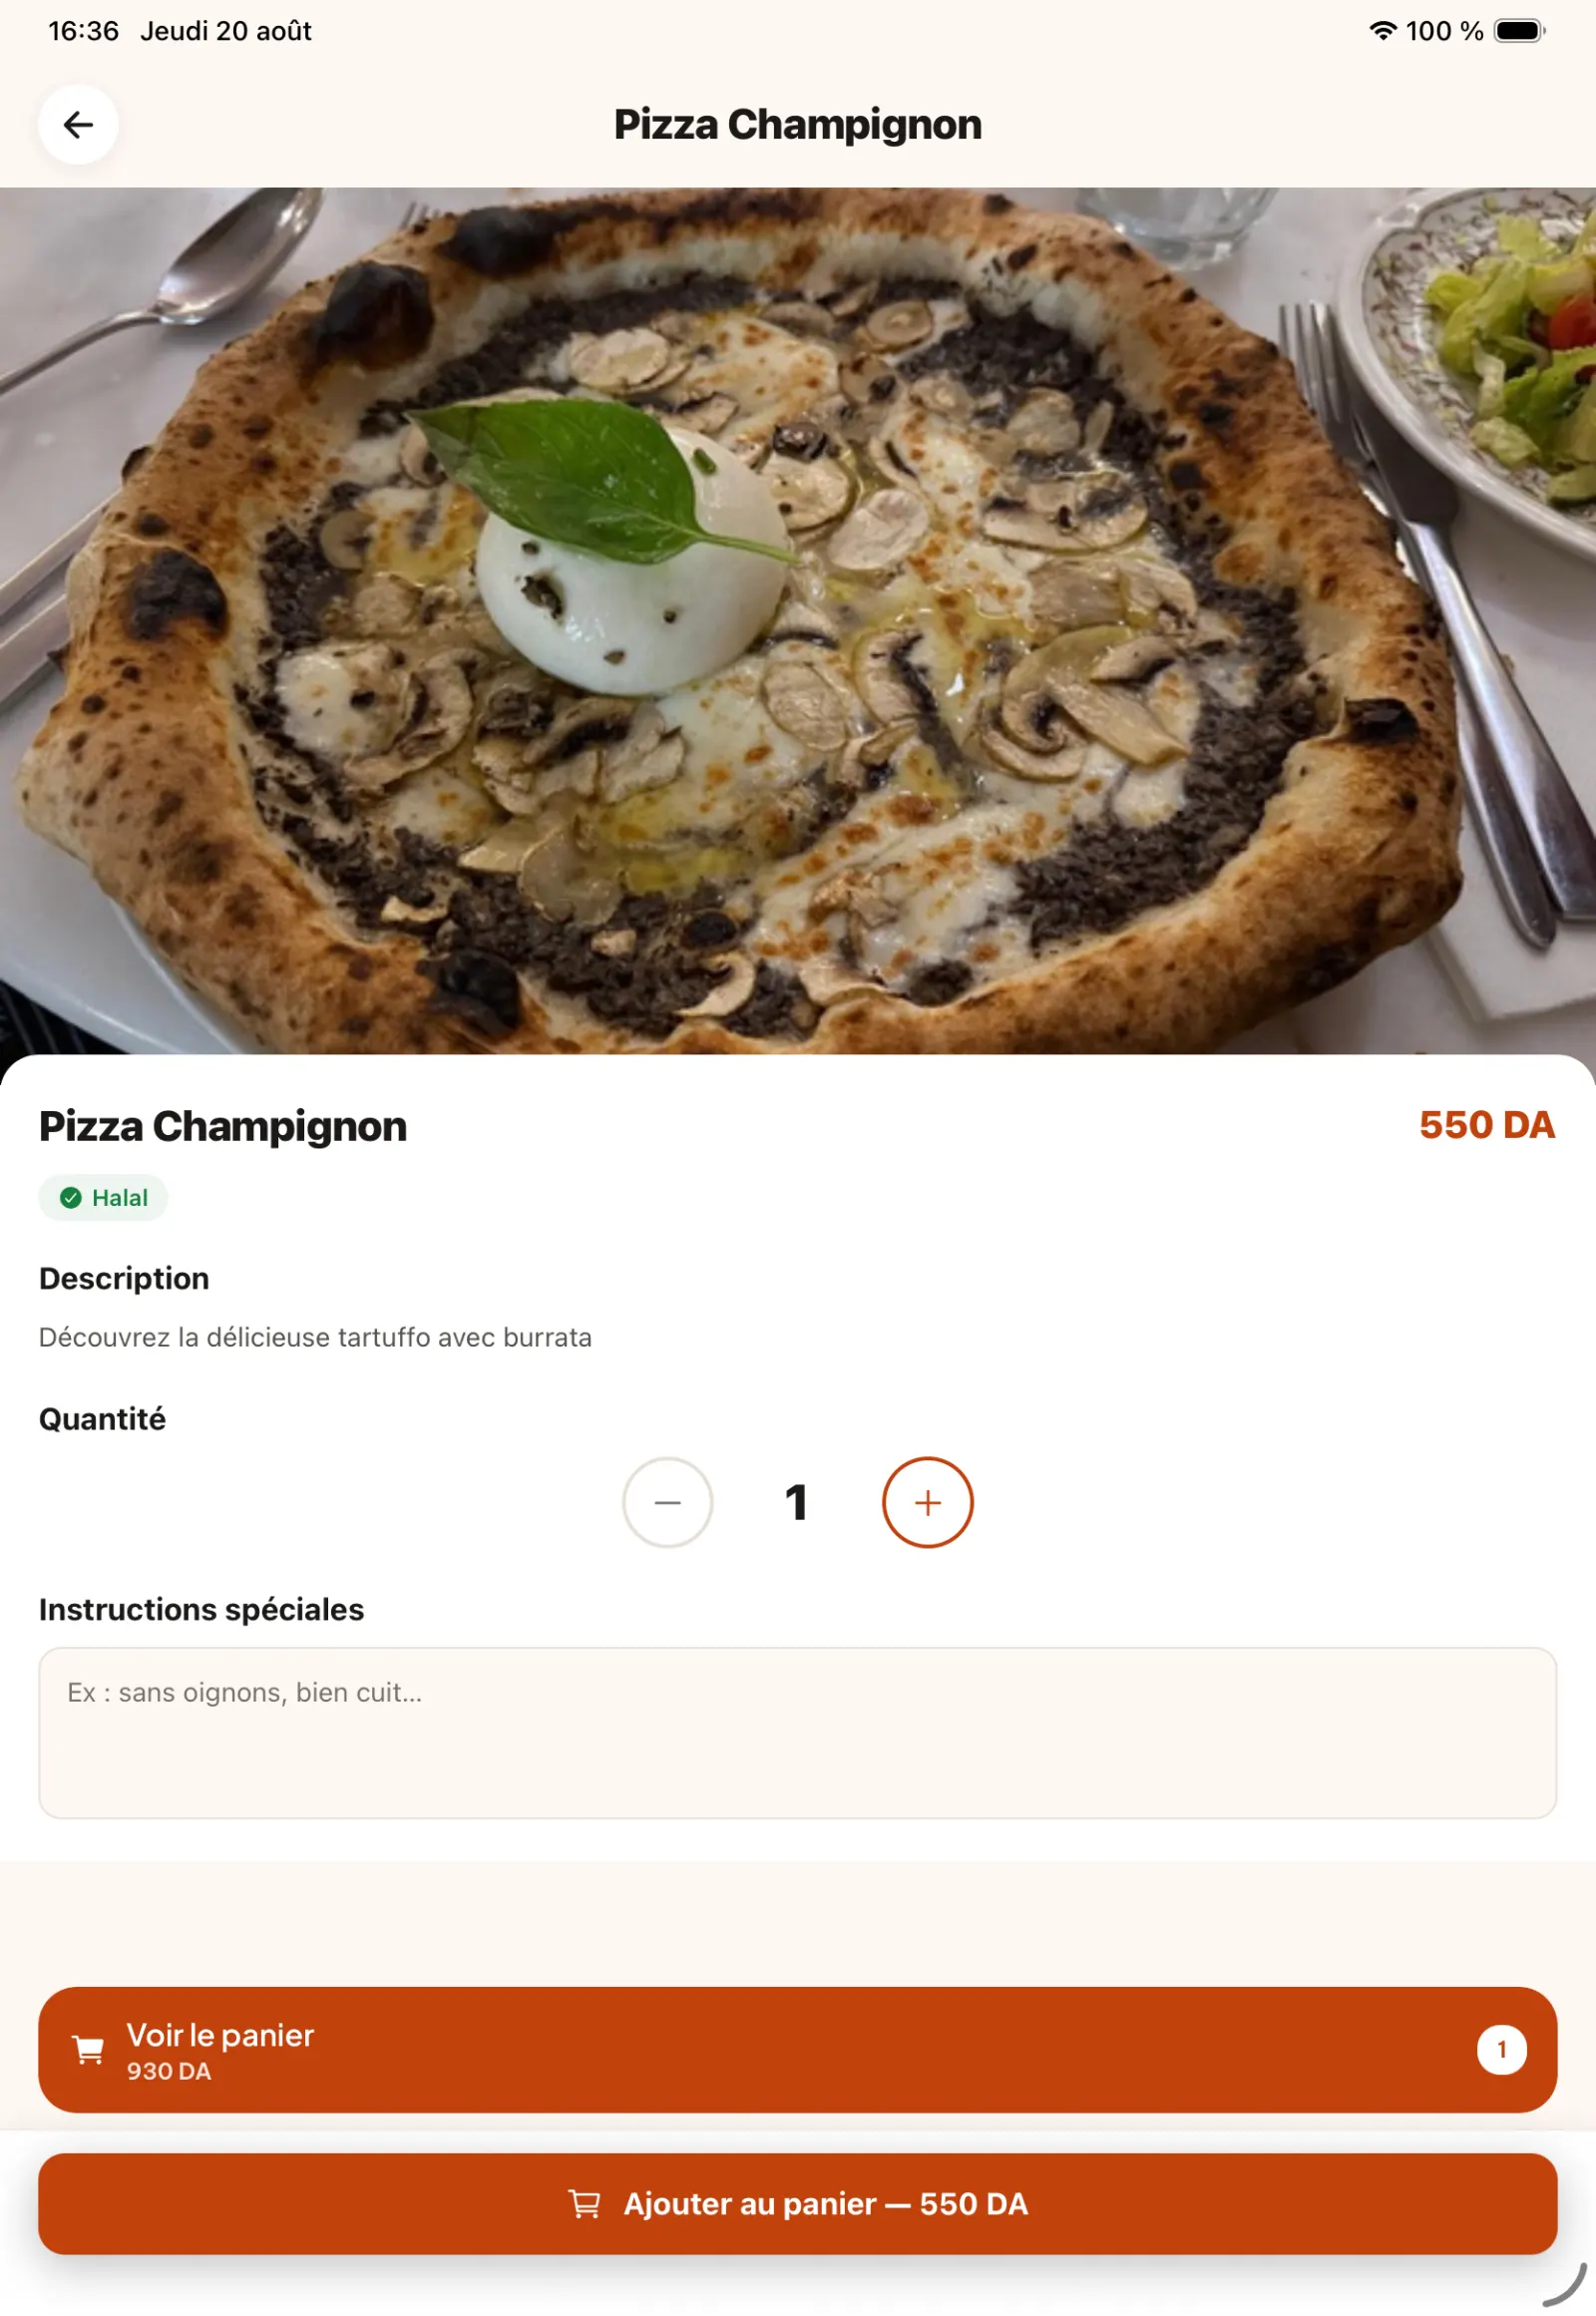
Step 8
Add another product
The customer composes a second item then joins the basket.
Open full-size image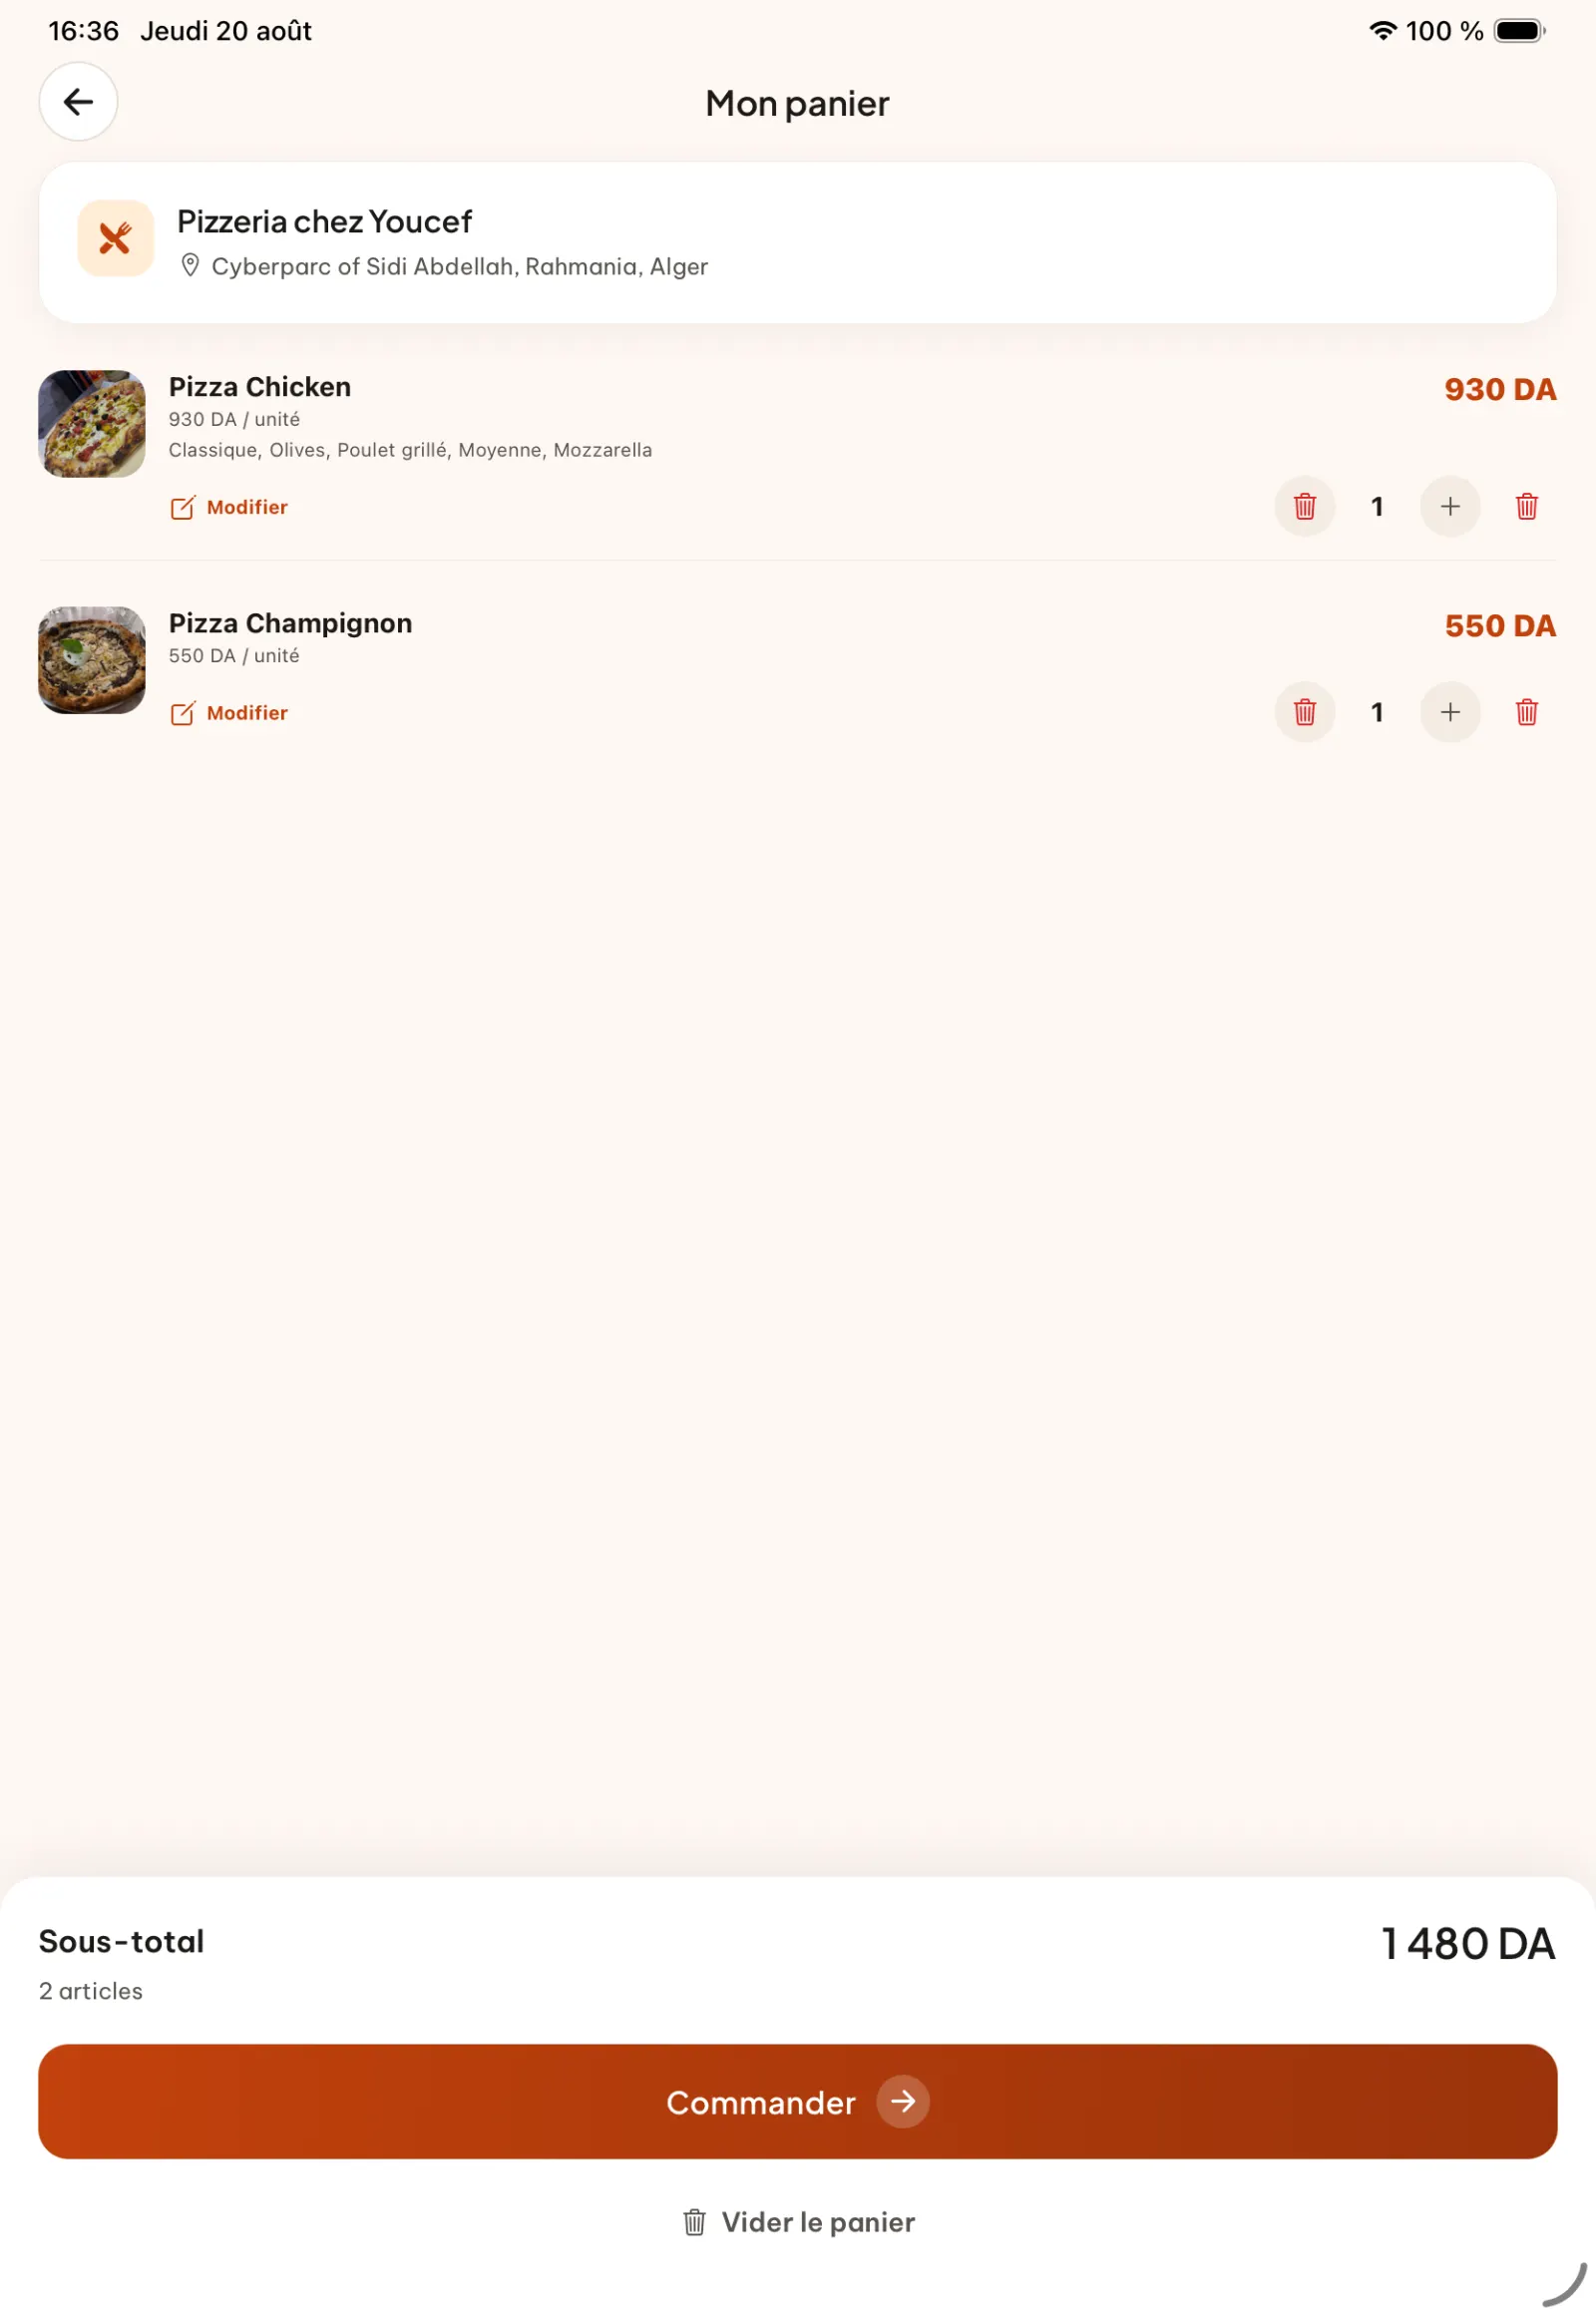
Step 9
Review the basket
The basket brings together the items, options, quantities and amounts before validation.
Open full-size image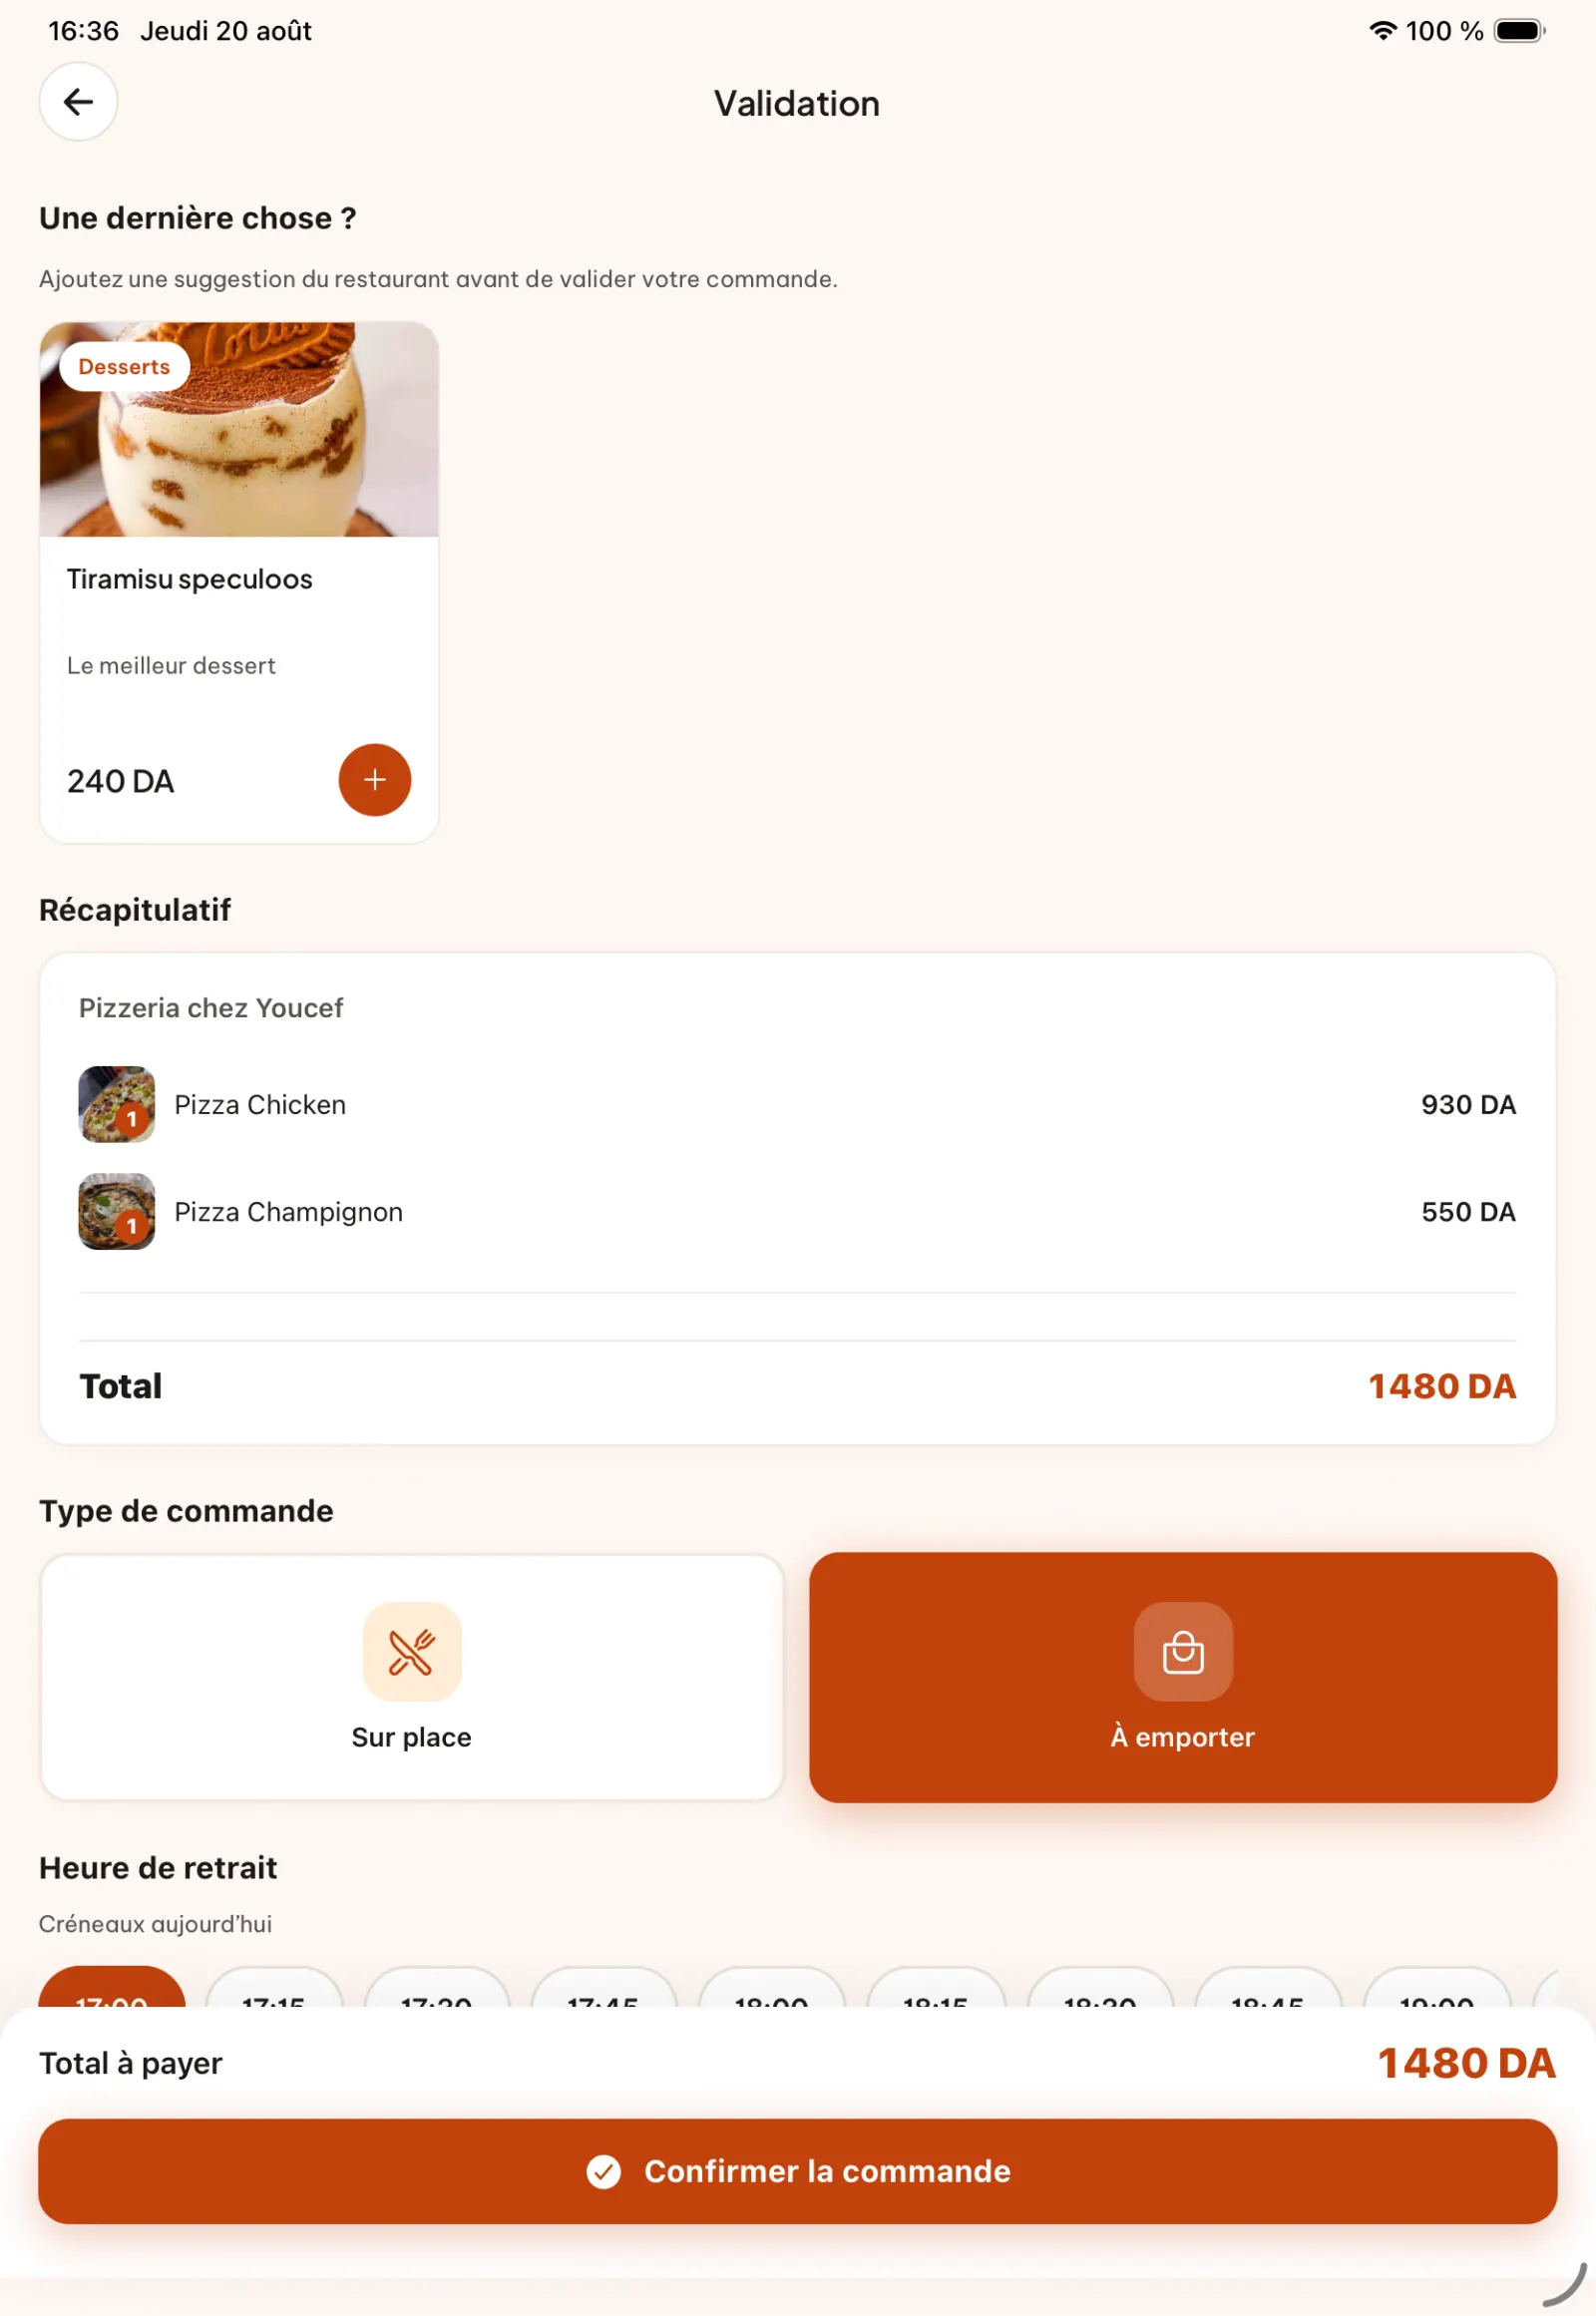
Step 10
Discover a suggestion
KoulChi displays the add-on product configured by the restaurant before payment.
In practice. The tiramisu displayed here is the product configured earlier in “Suggestion for payment”. This continuity concretely shows how a decision taken in KoulChi Pro becomes a commercial proposition visible to the customer.
Open full-size image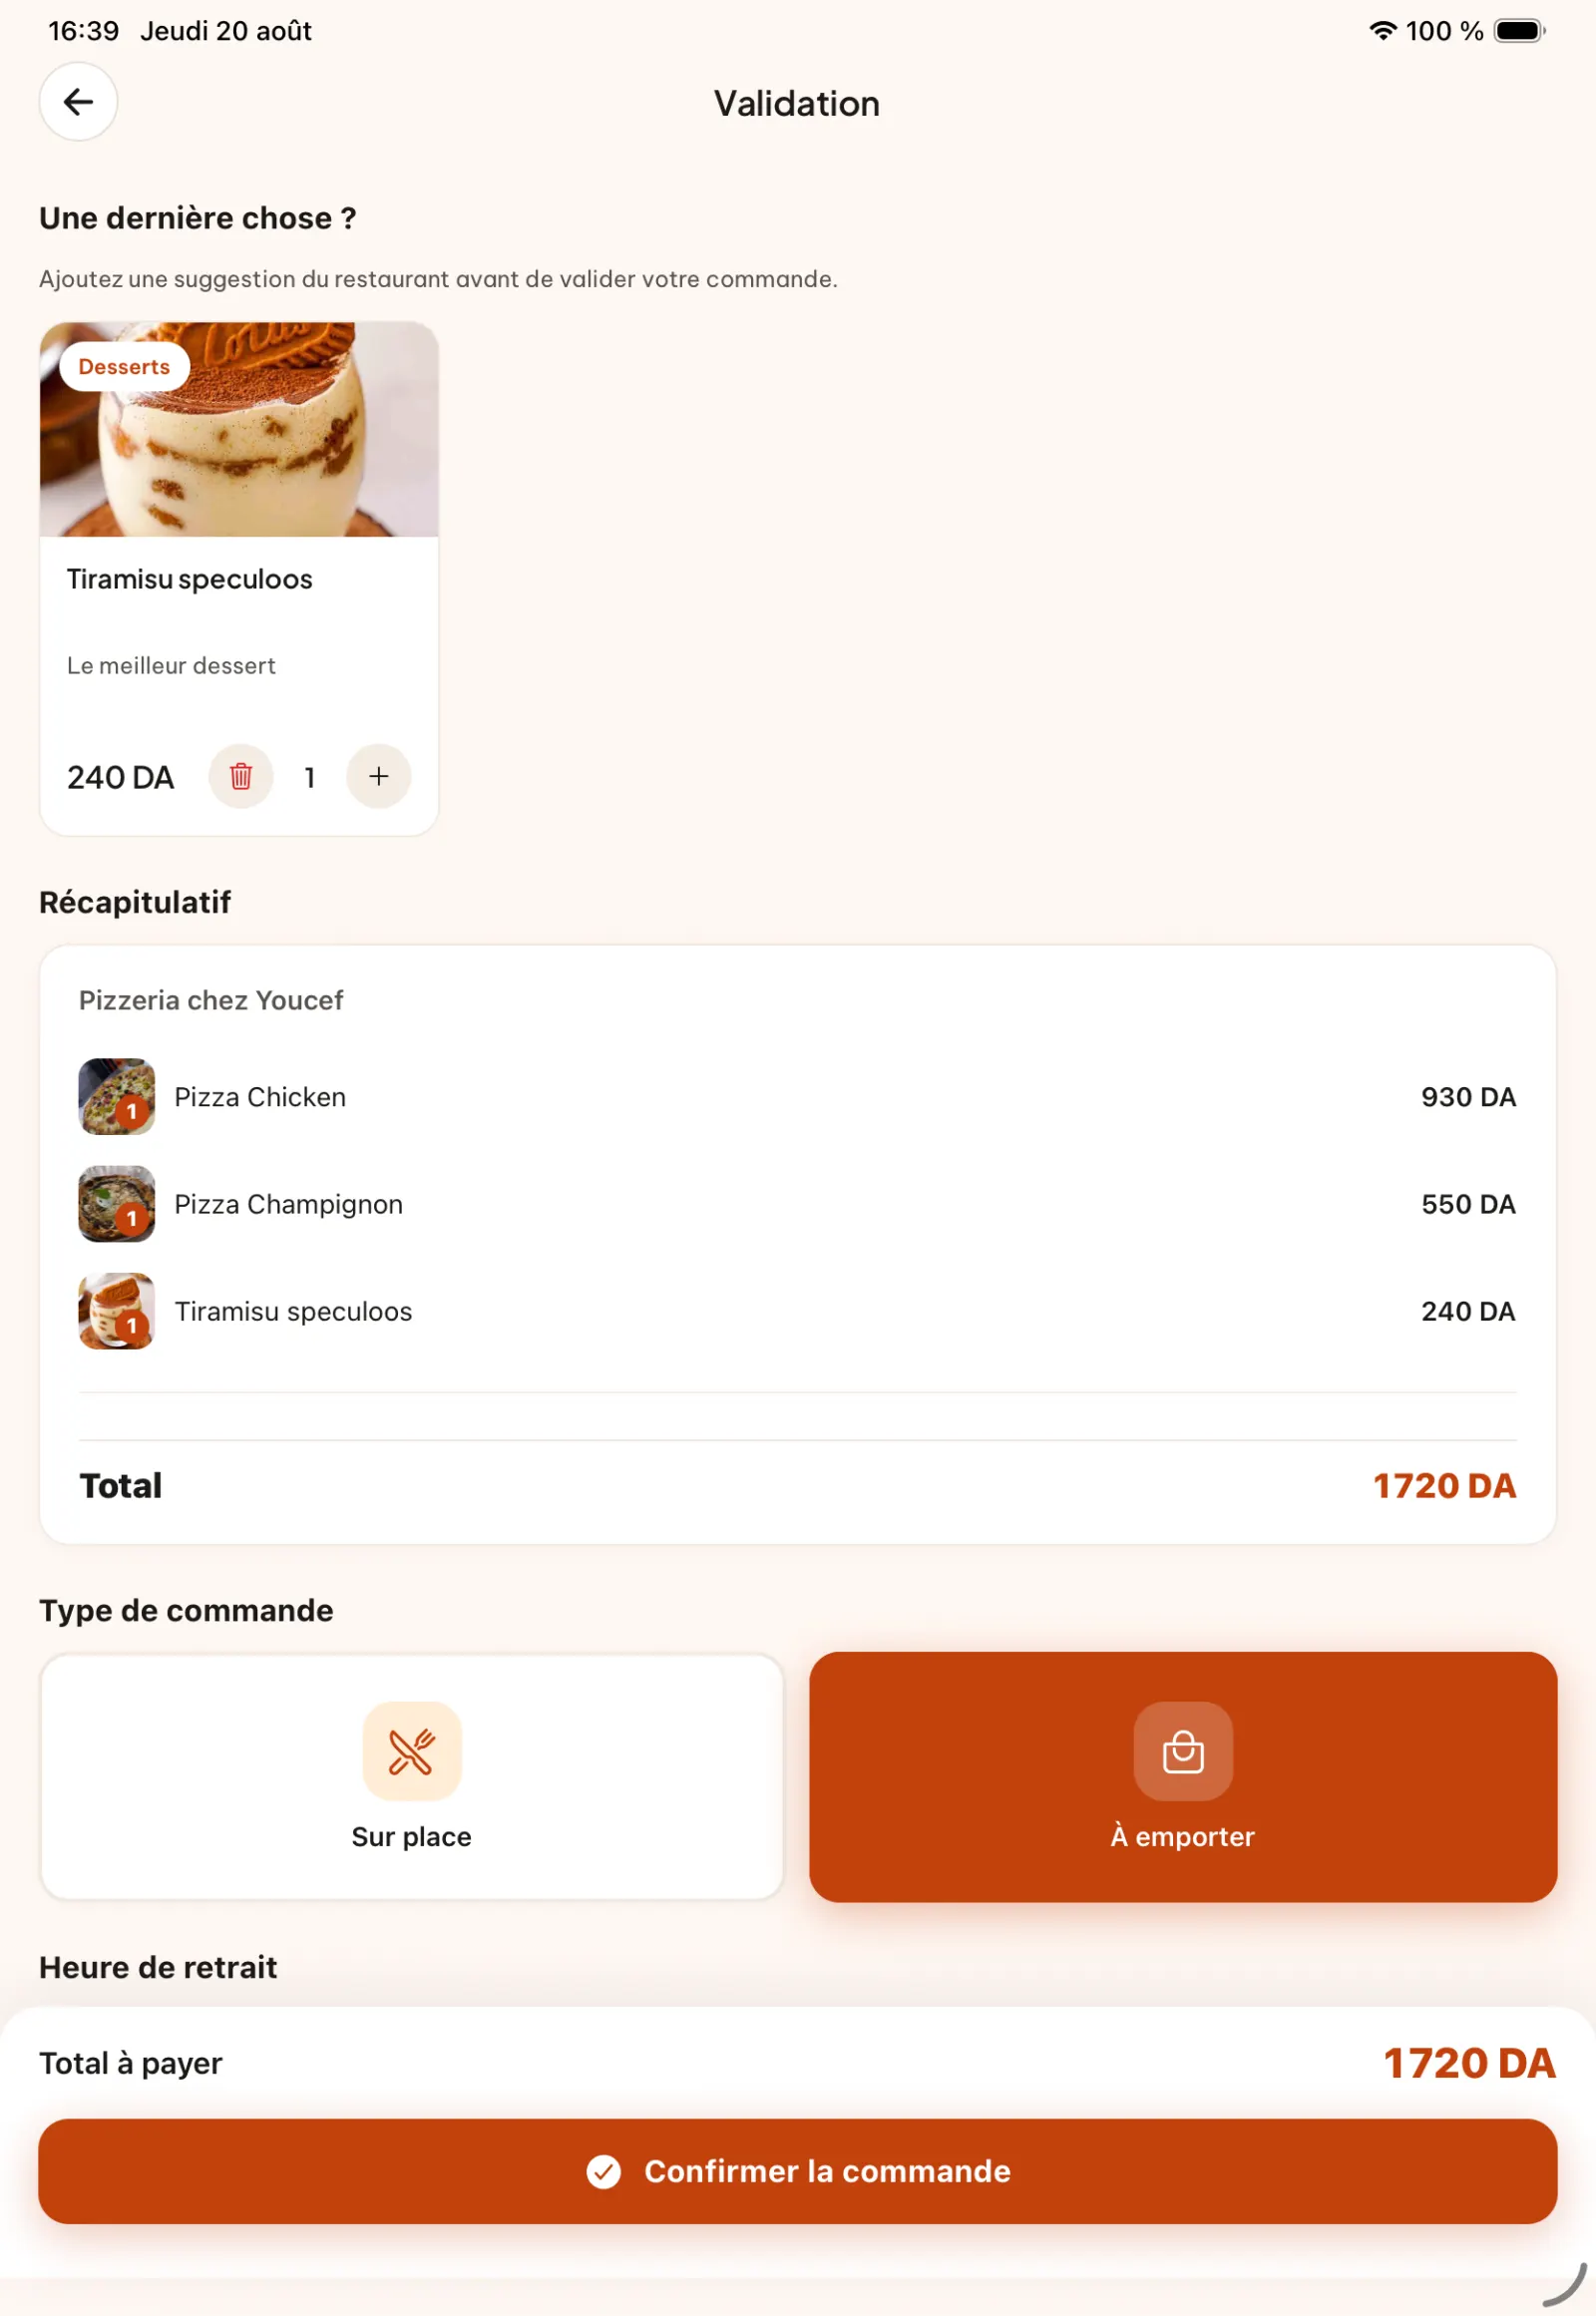
Step 11
Add suggested product
The customer accepts the suggestion and finds the additional product in his basket.
Open full-size image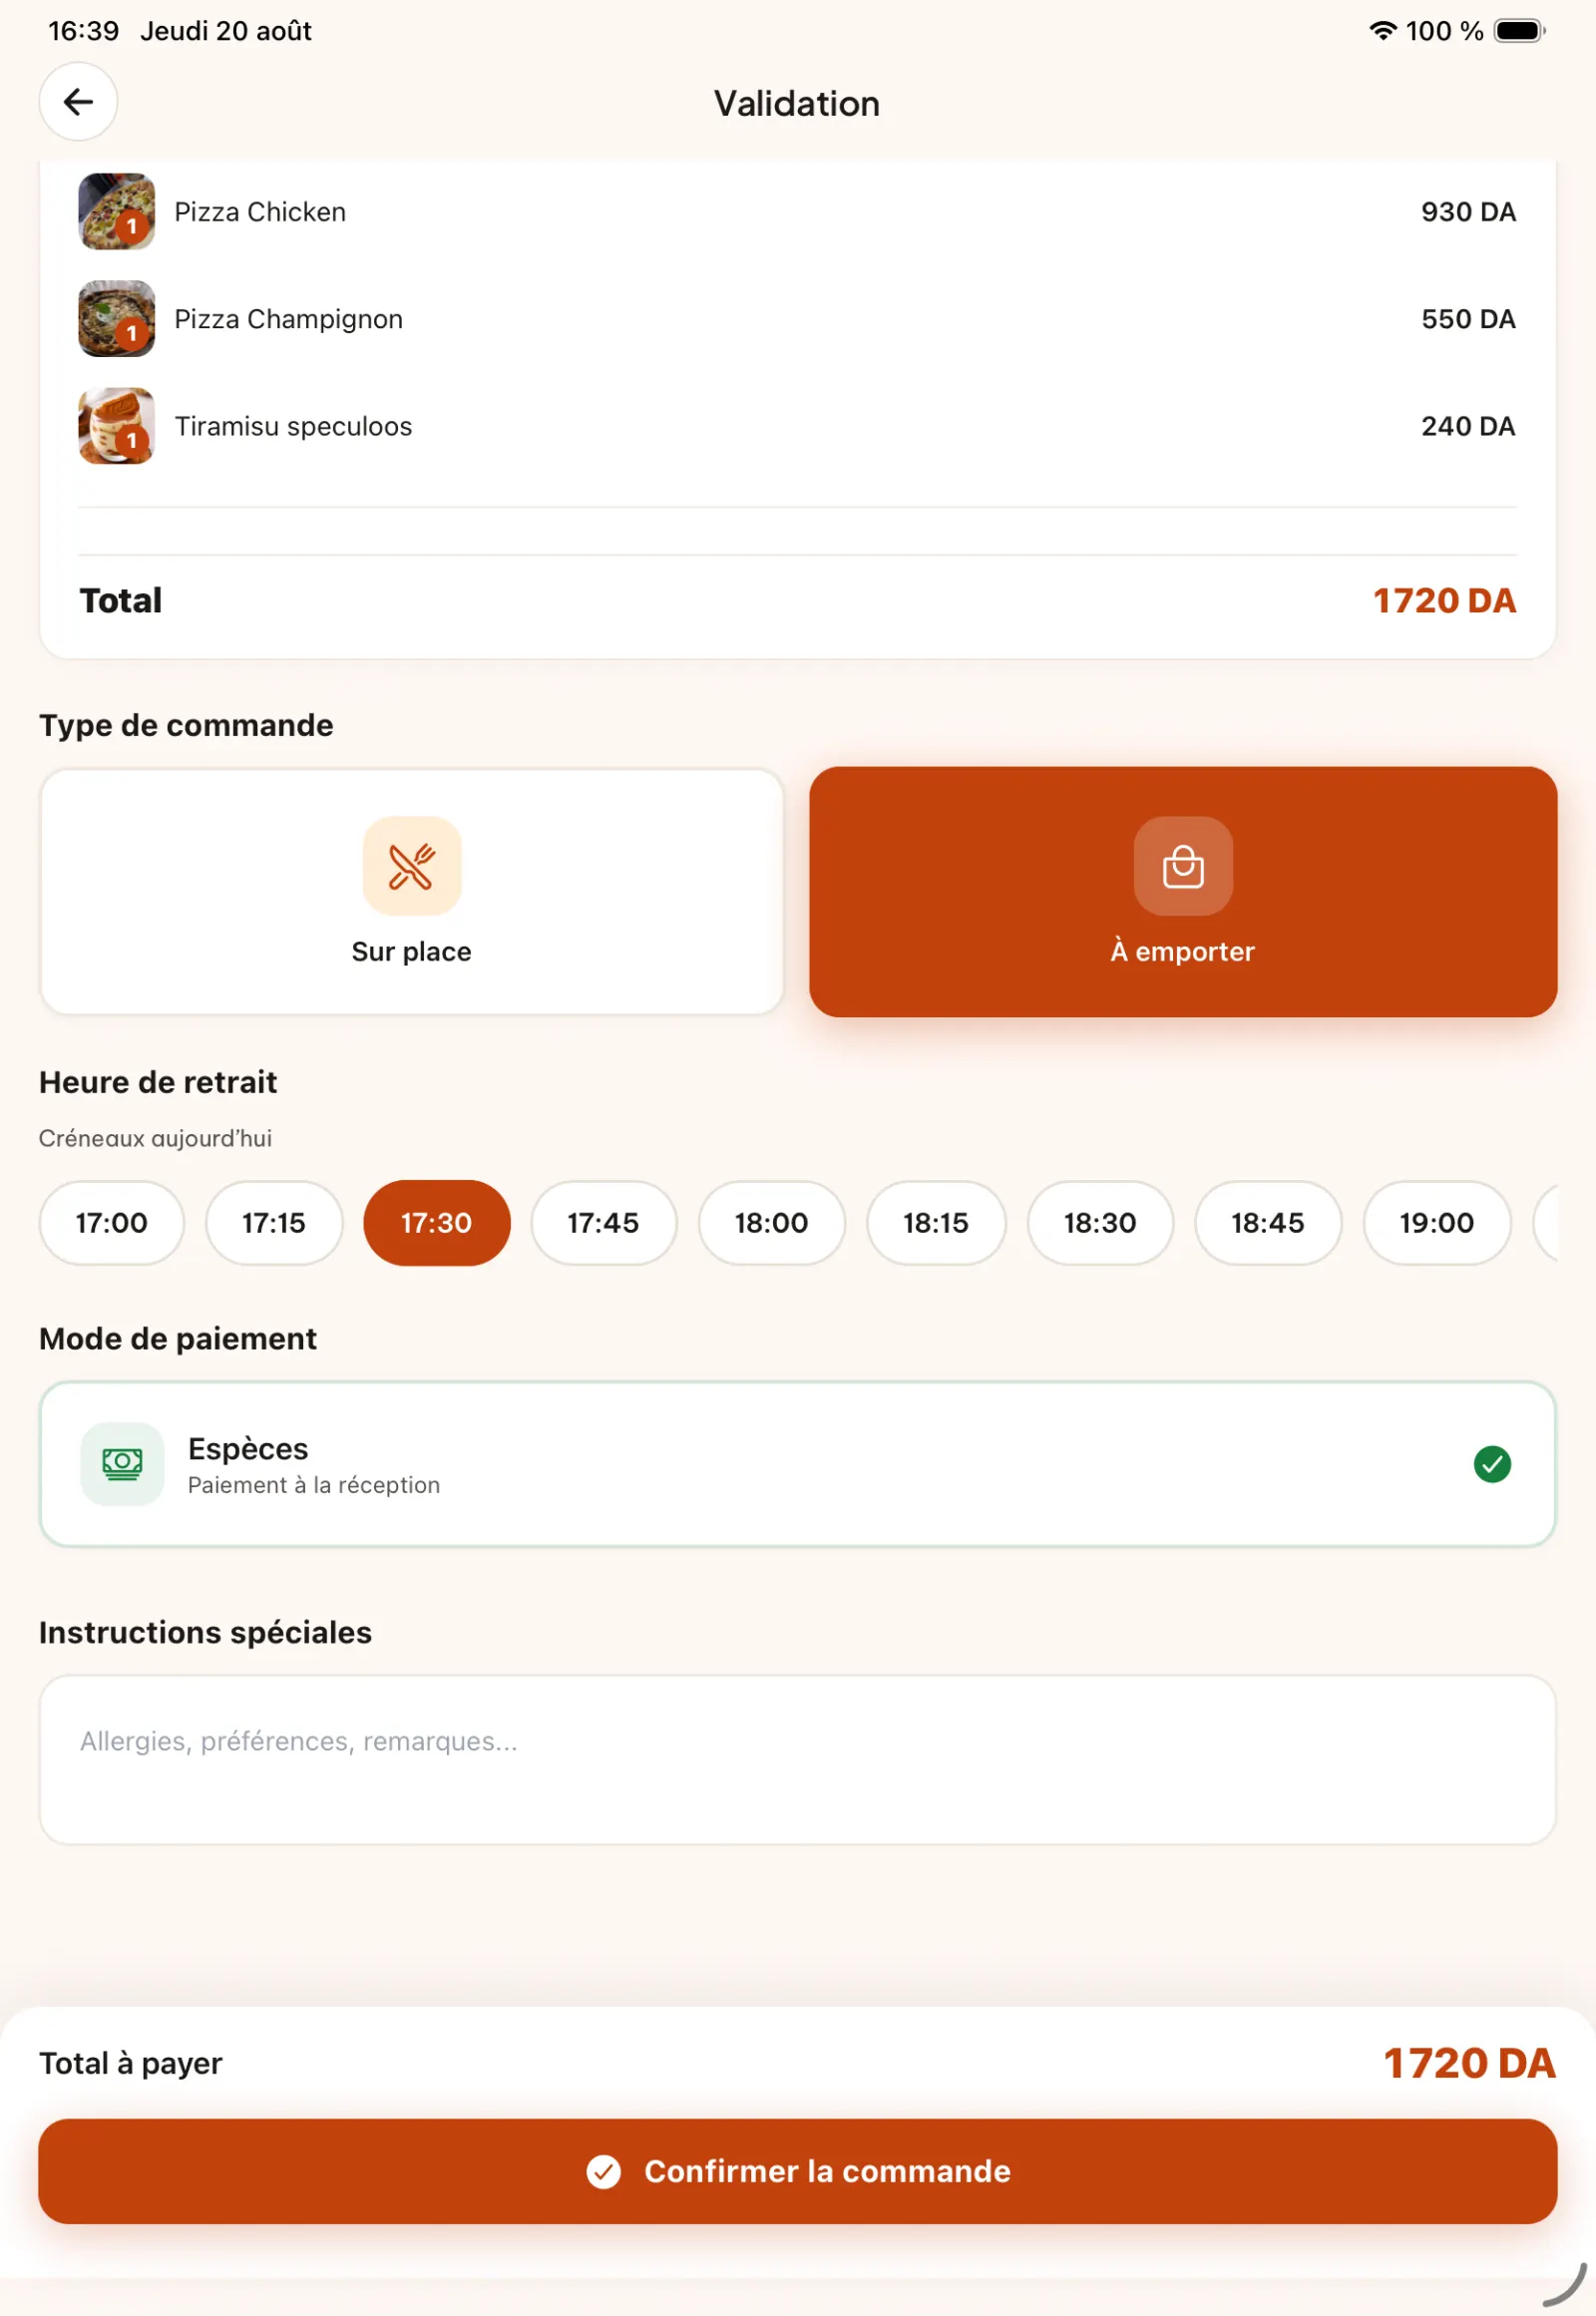
Step 12
Choose the service type and time
He selects “Dine in” or “Take away”, then chooses the slot offered for his order.
In practice. Close to a university or office area, customers can order before their break and choose the pickup time. The kitchen begins preparations before the rush, arrivals are better distributed and the passage to the counter becomes more fluid.
Open full-size image
Chapter 3
Follow the preparation and collect the order
The customer and the restaurant see the same progression, from the initial request to the pickup confirmation.
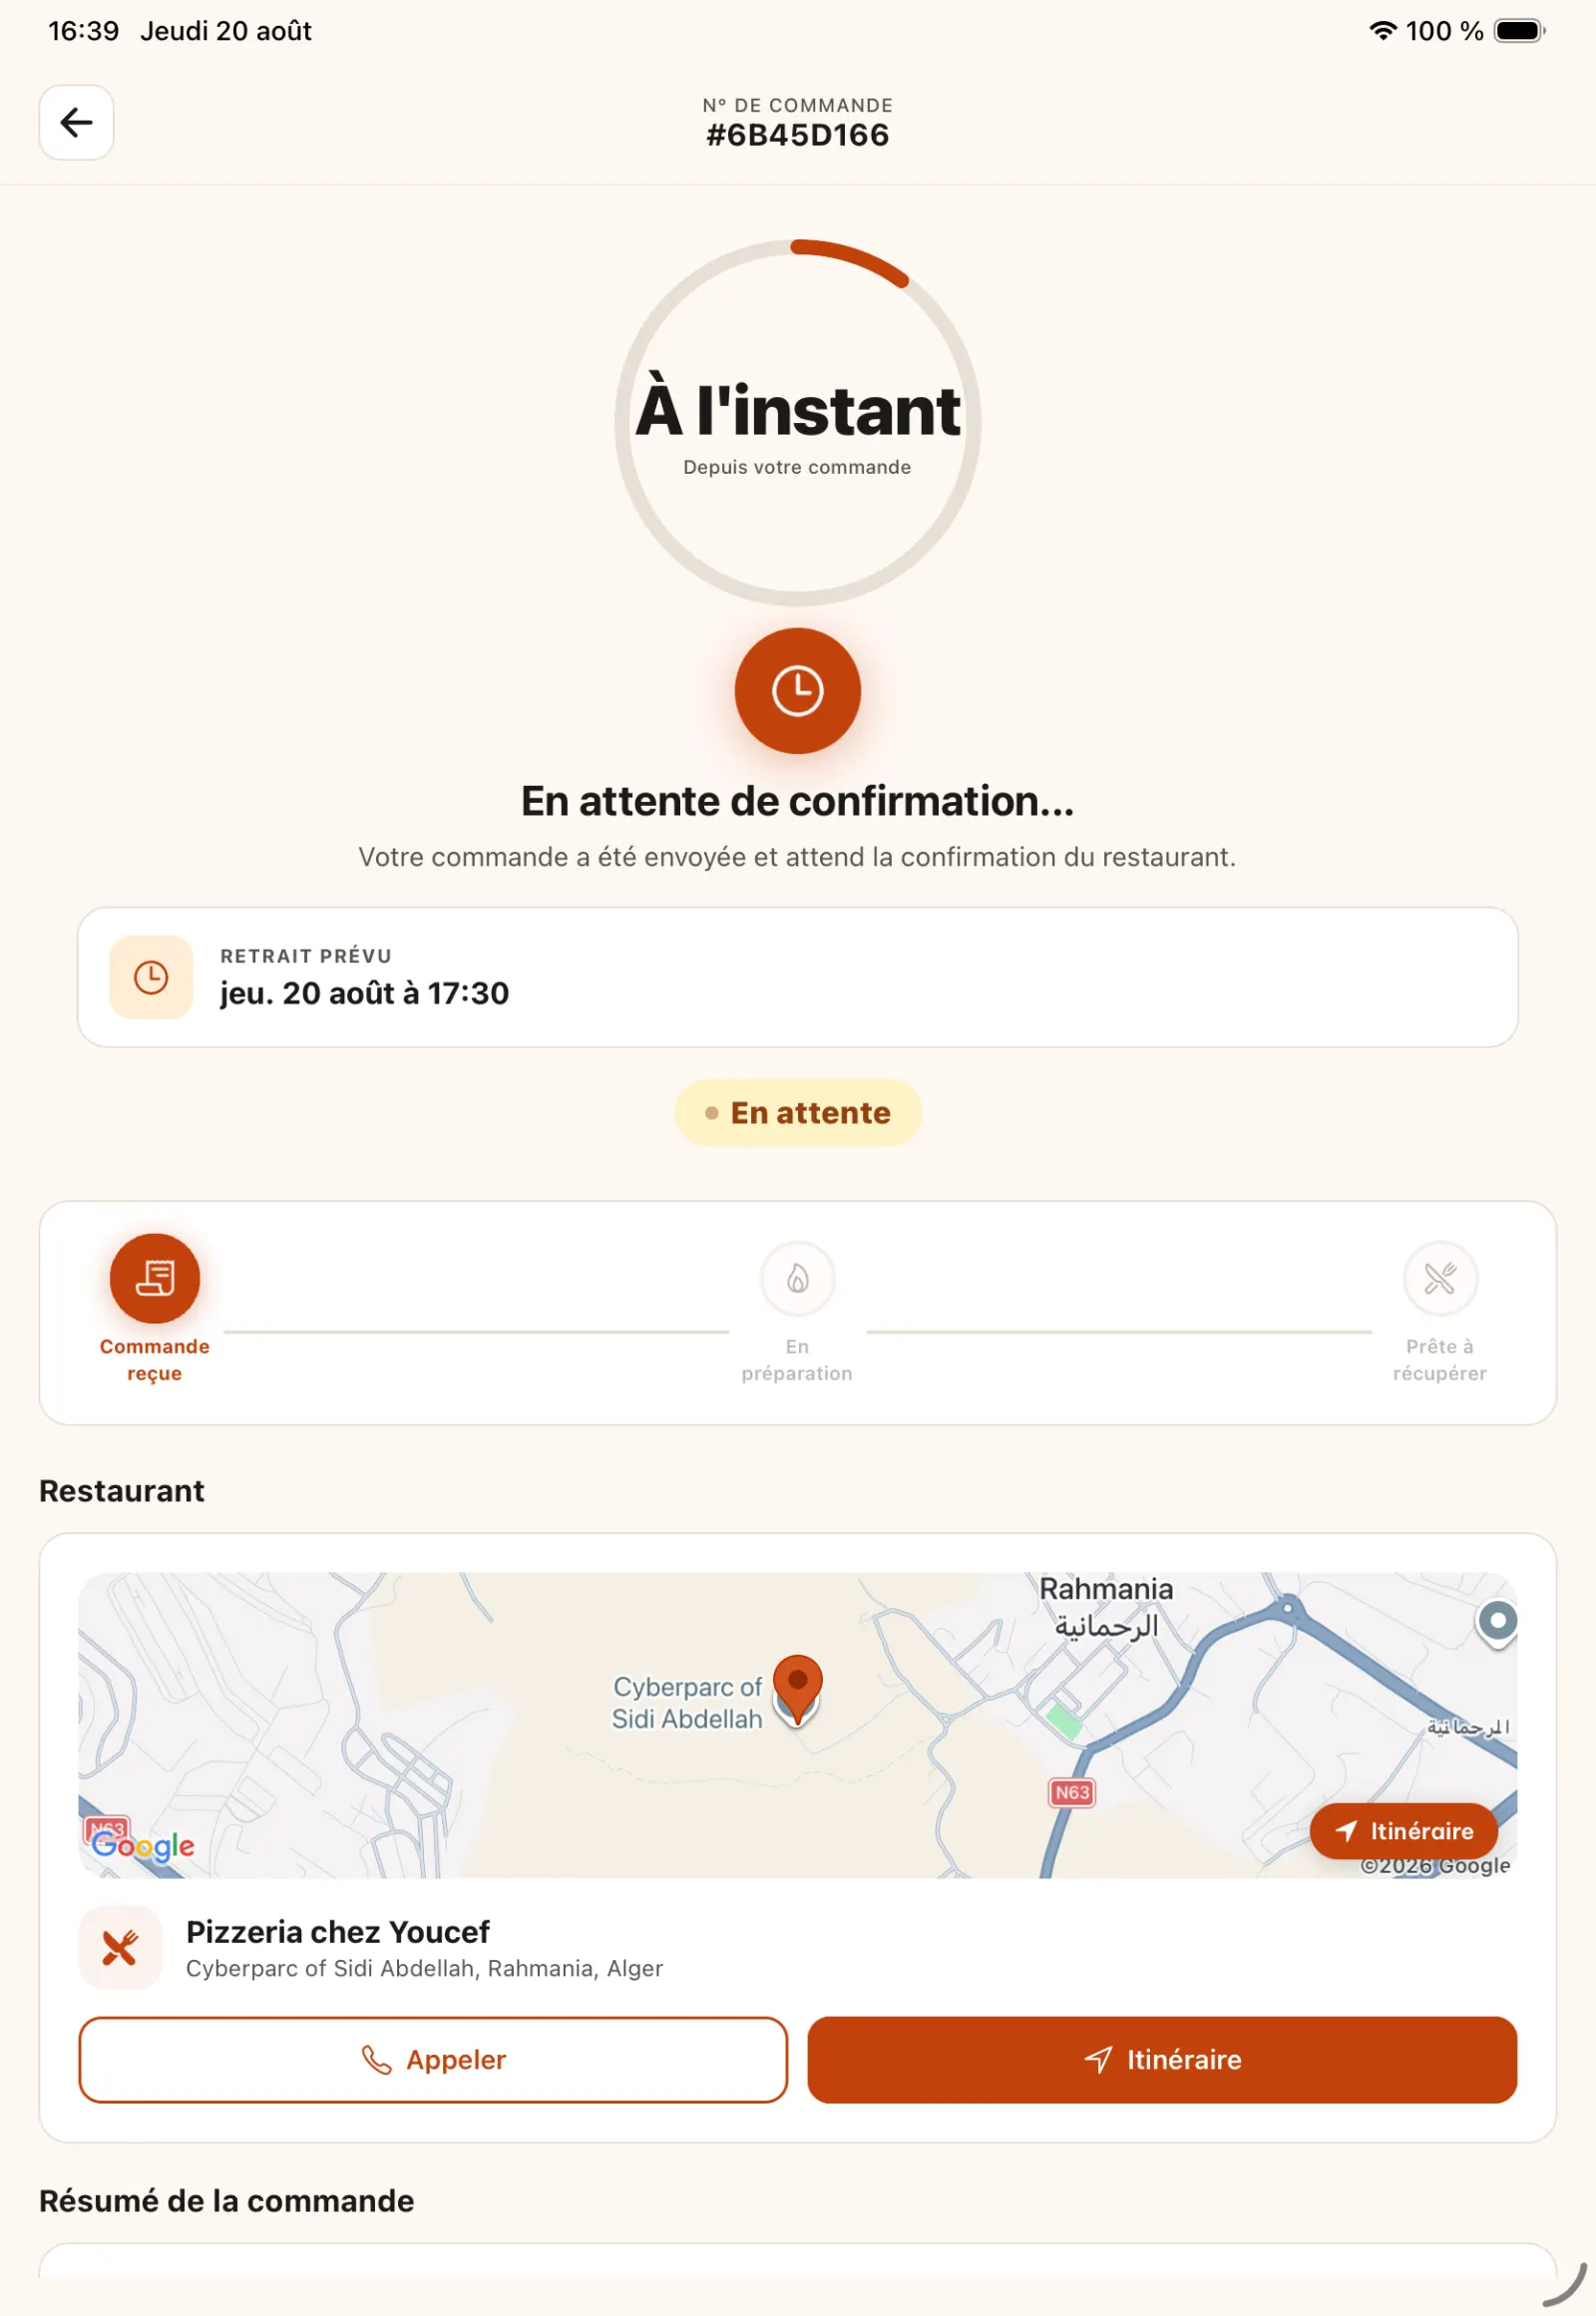
Step 13
Confirm mobile order
After validation, the application displays the progress and reference of the order.
Open full-size image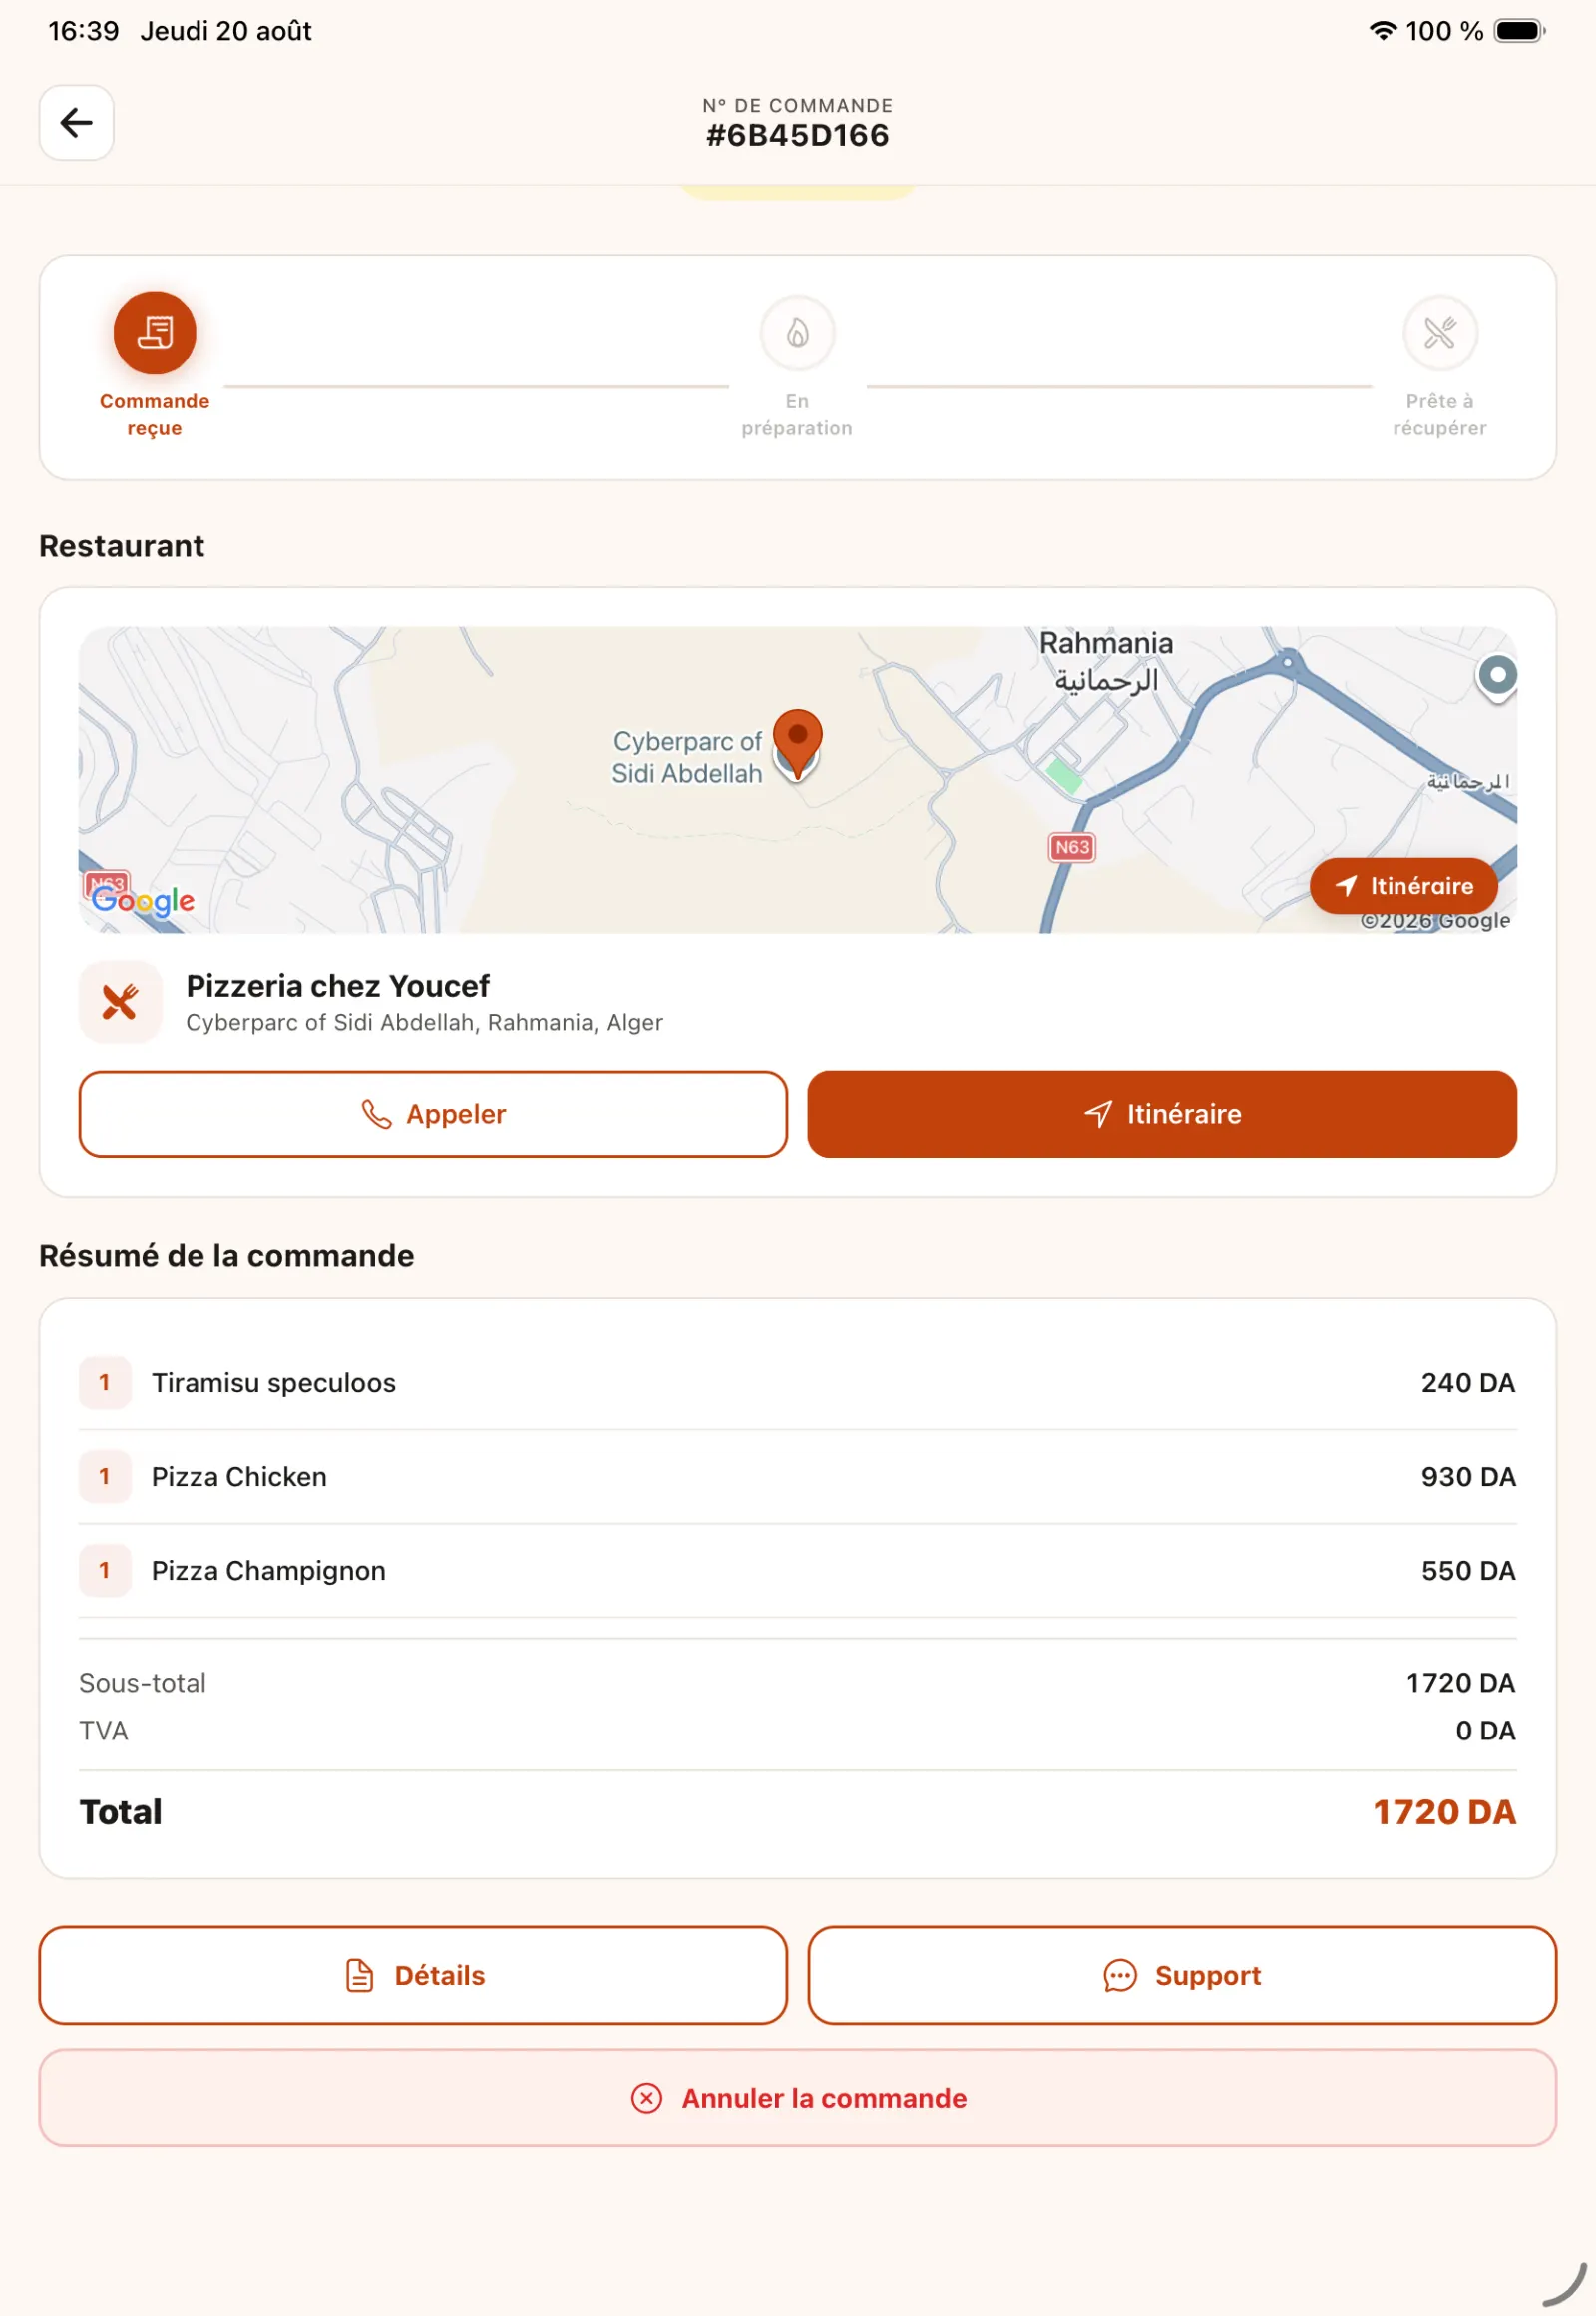
Step 14
View details
The customer finds the ordered items and can cancel as long as the restaurant has not yet accepted the request.
Open full-size image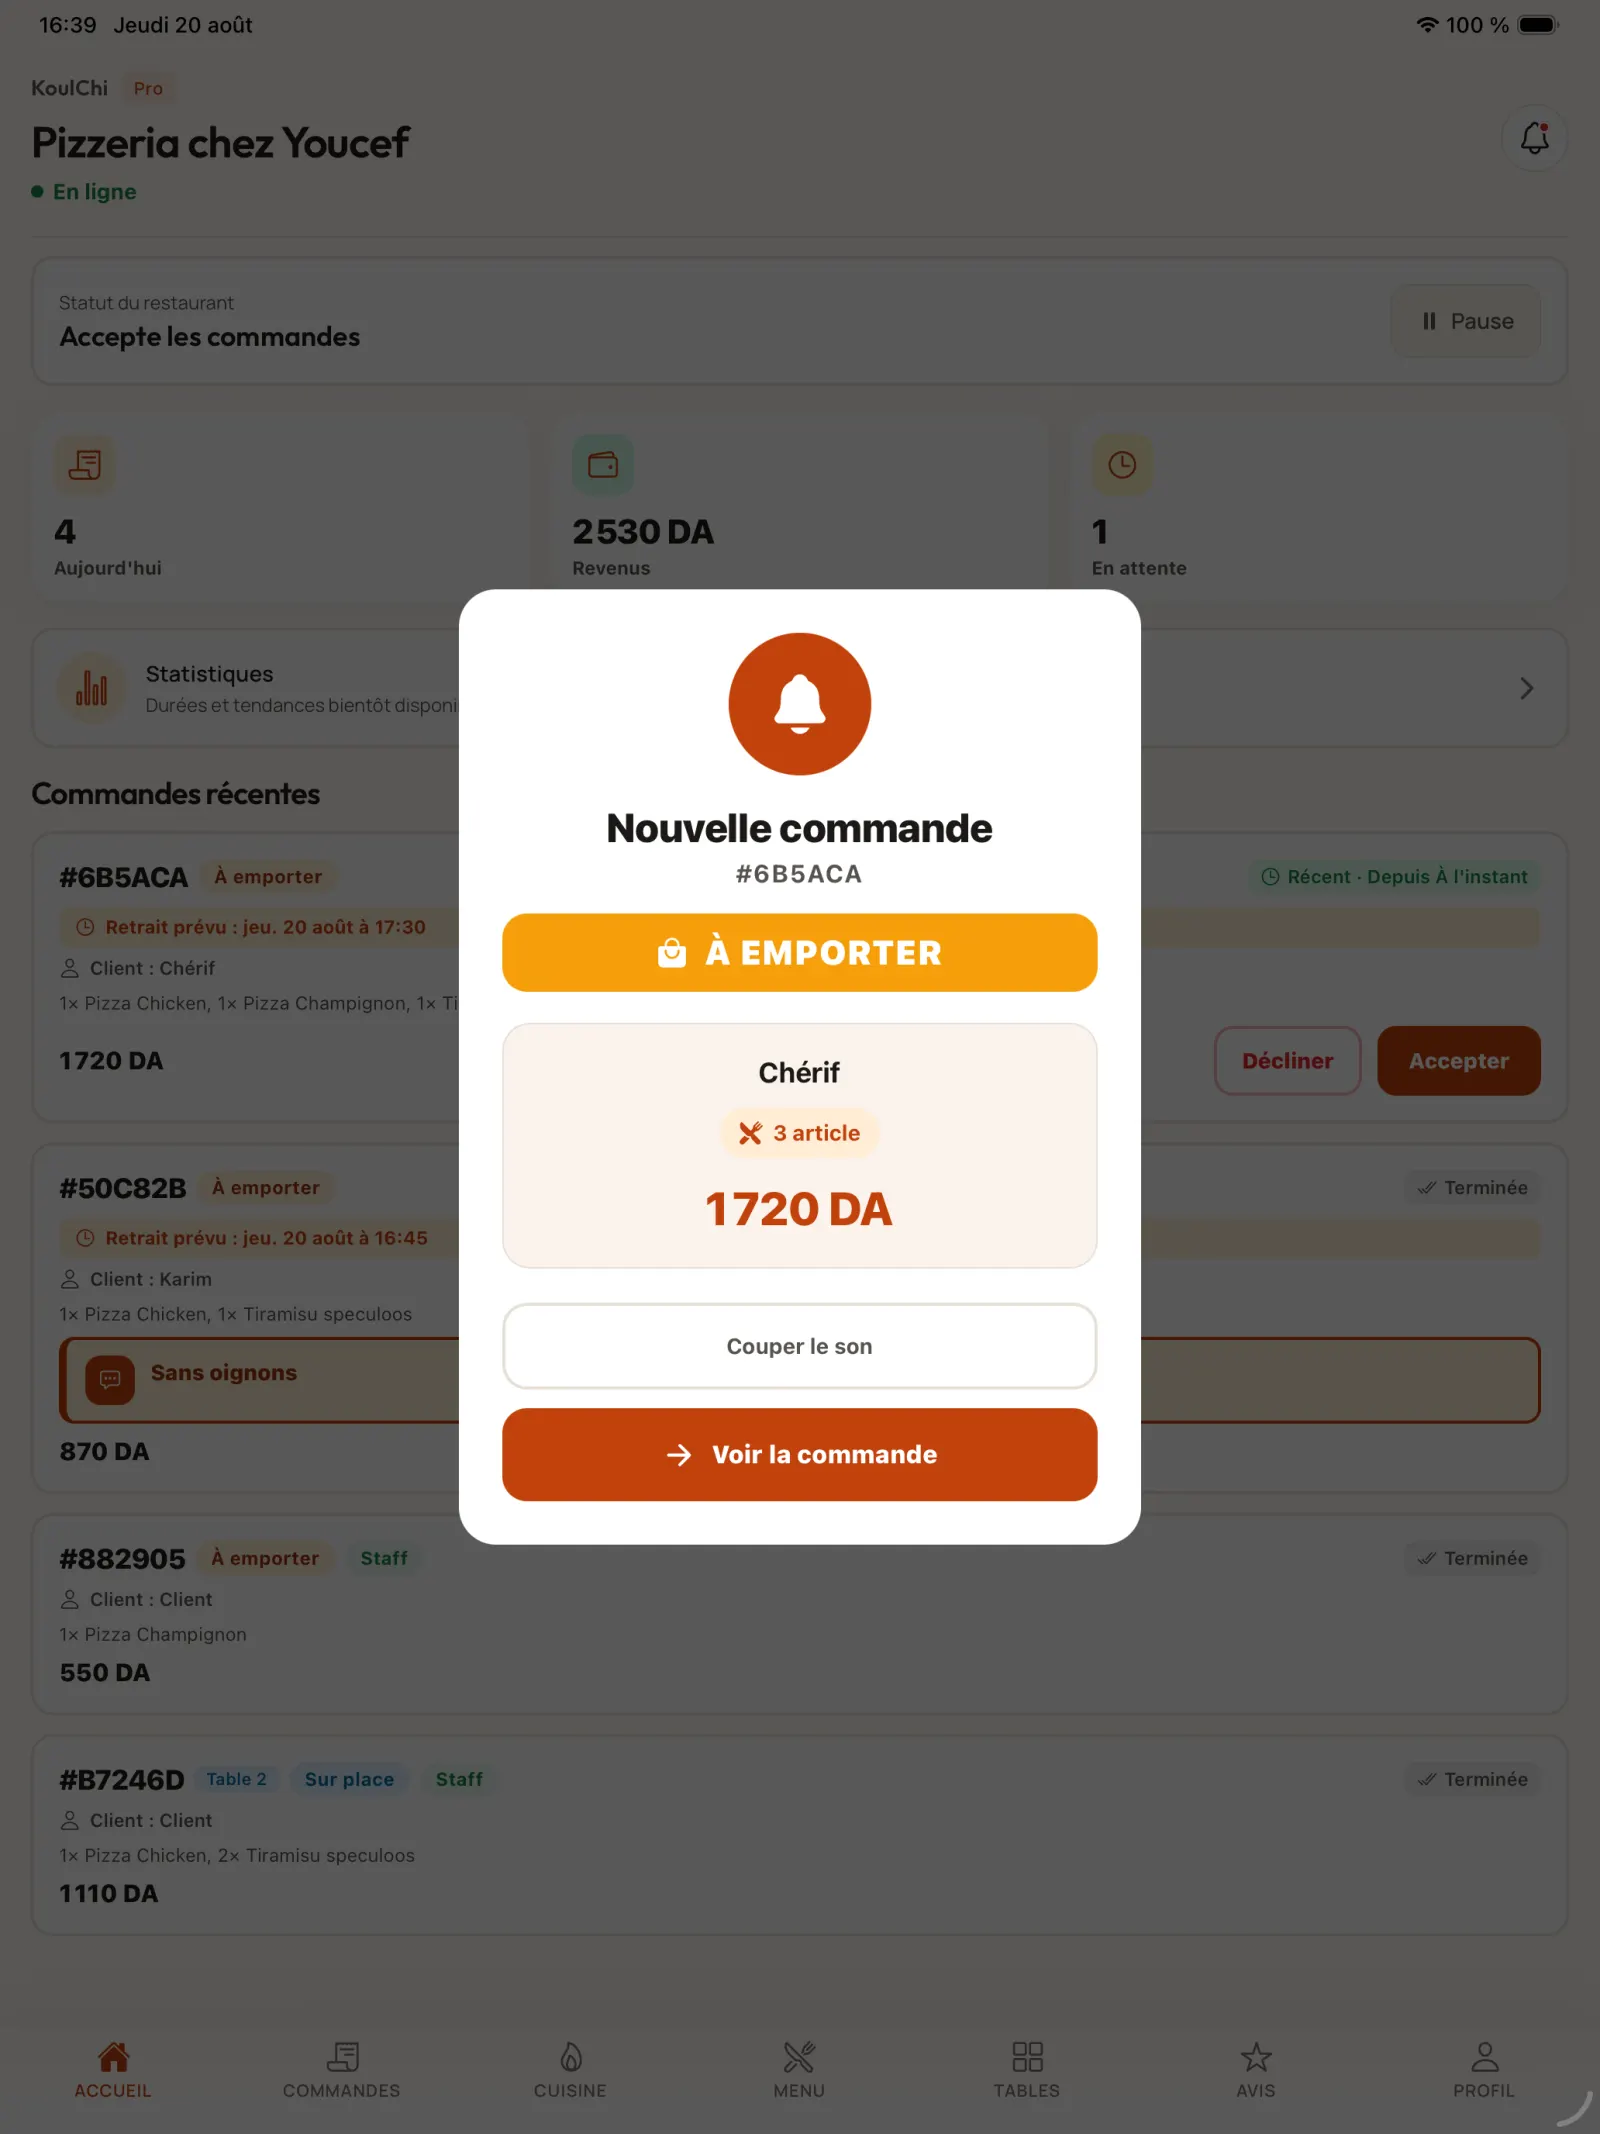
Step 15
Receive the order in KoulChi Pro
The restaurant owner is notified that a new order has been placed from the KoulChi application.
Open full-size image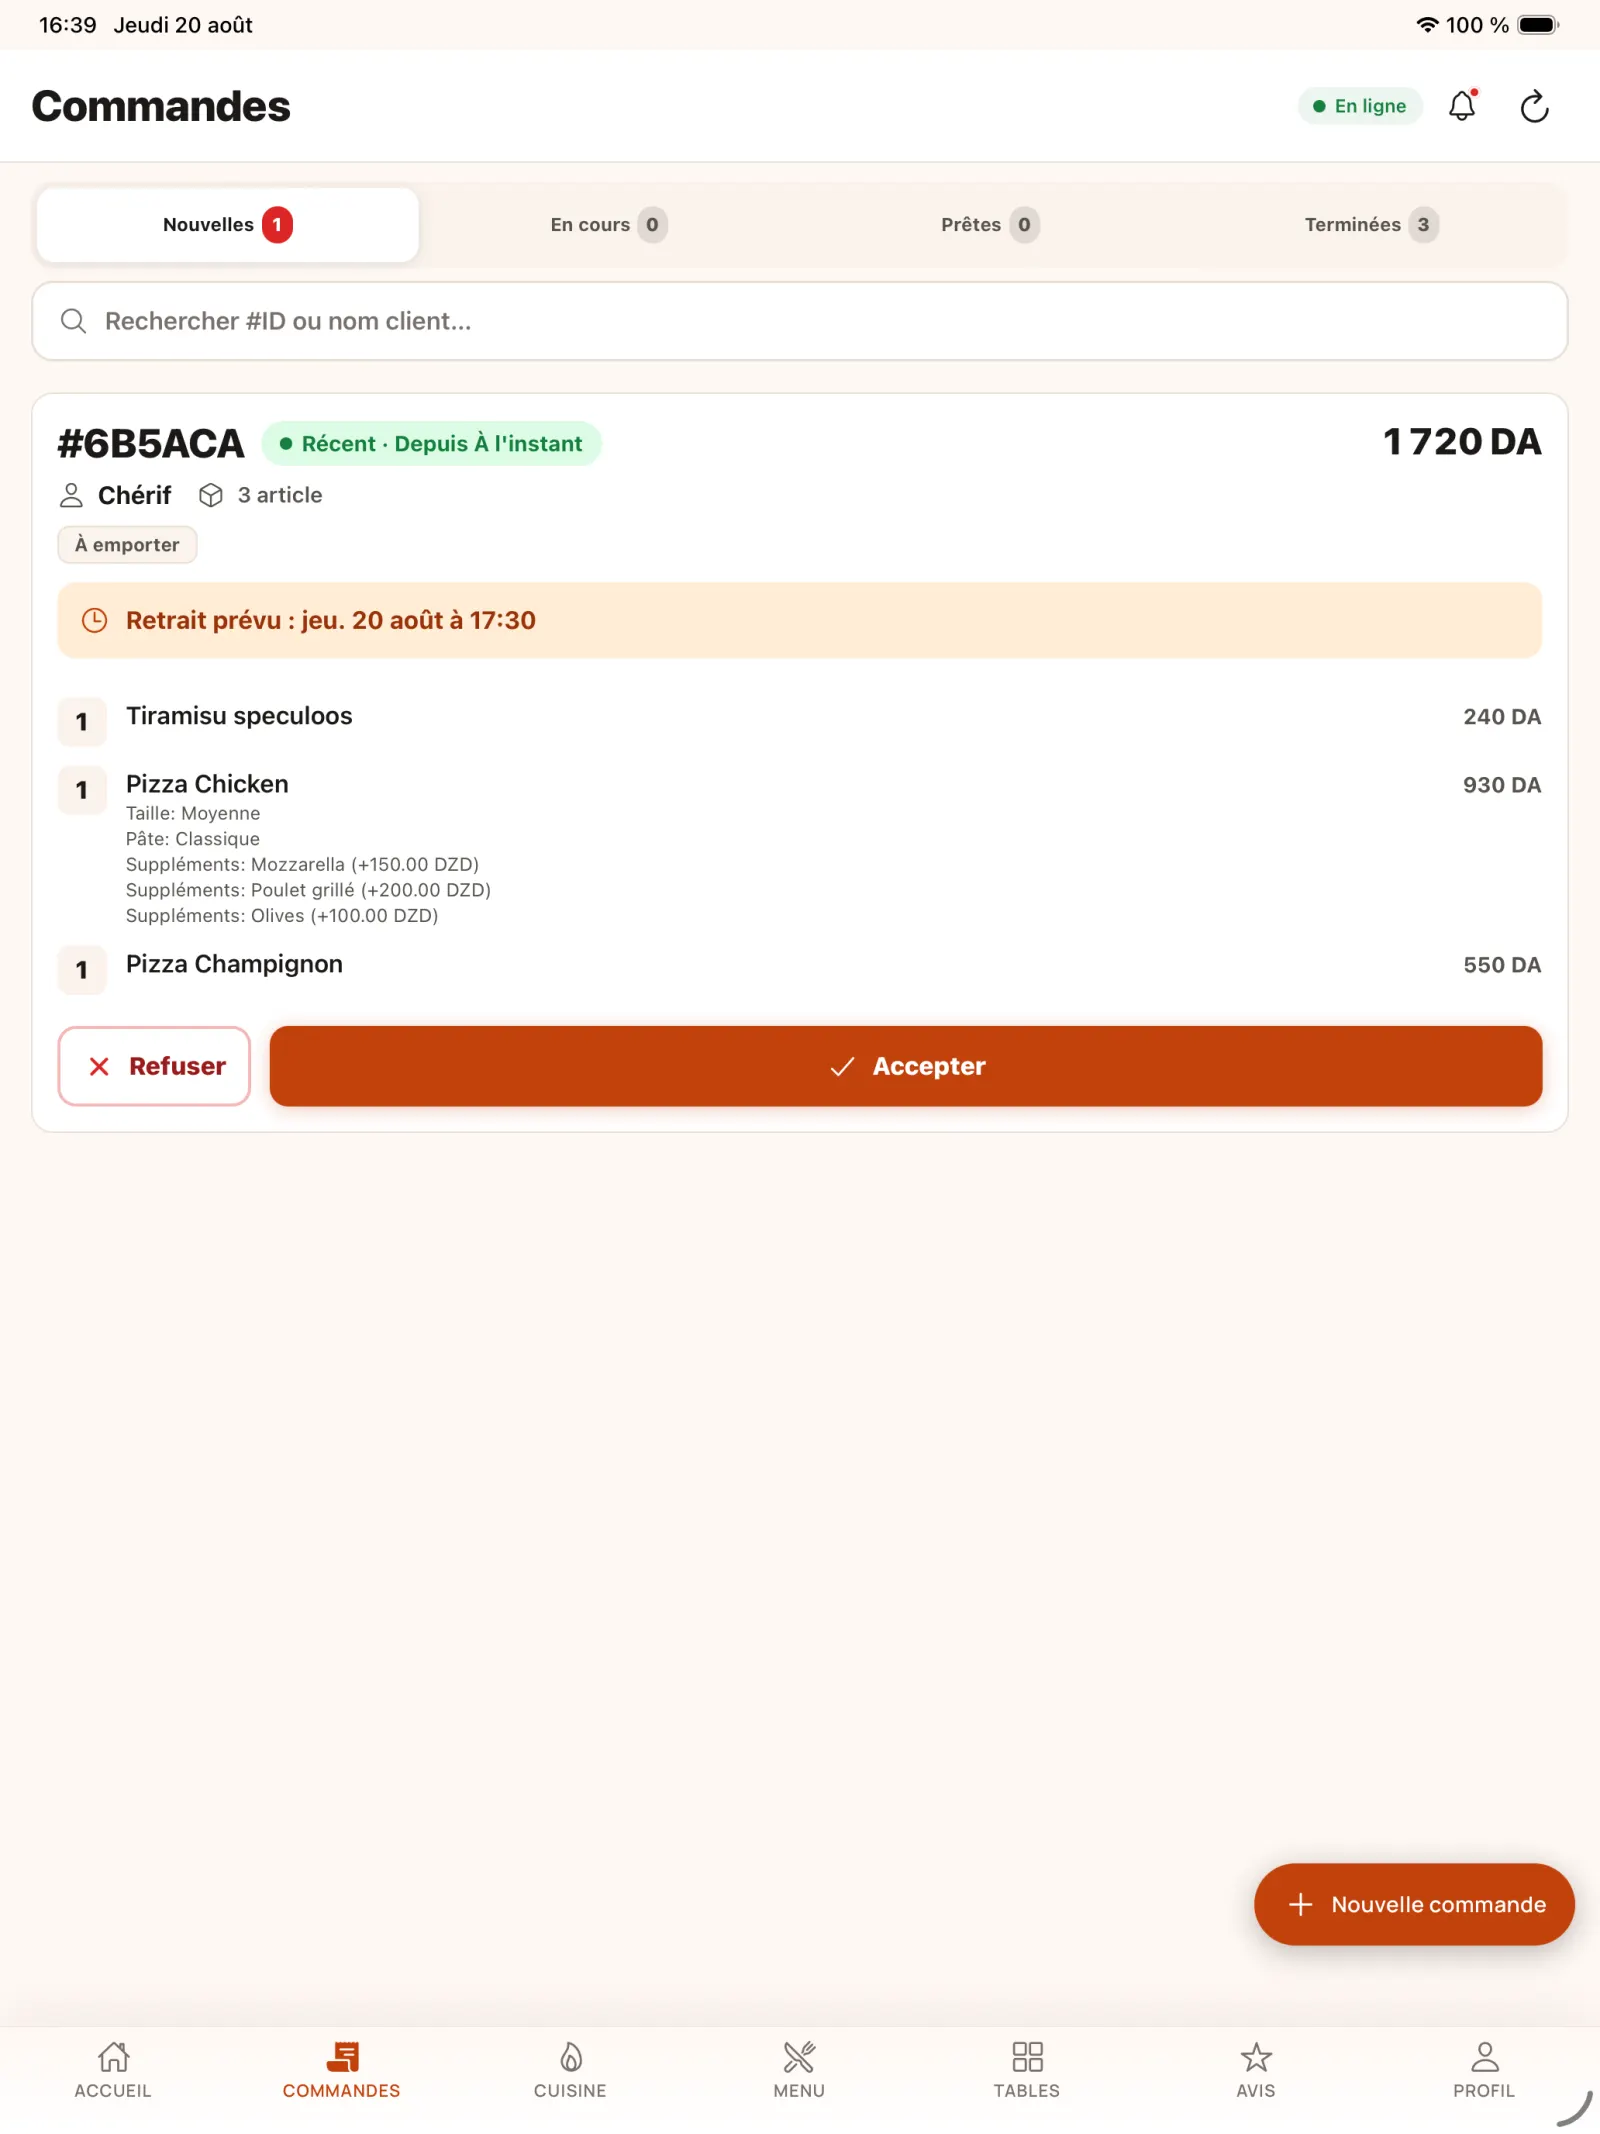
Step 16
Examine then send to the kitchen
The team checks the details of the mobile order before sending it to preparation.
Open full-size image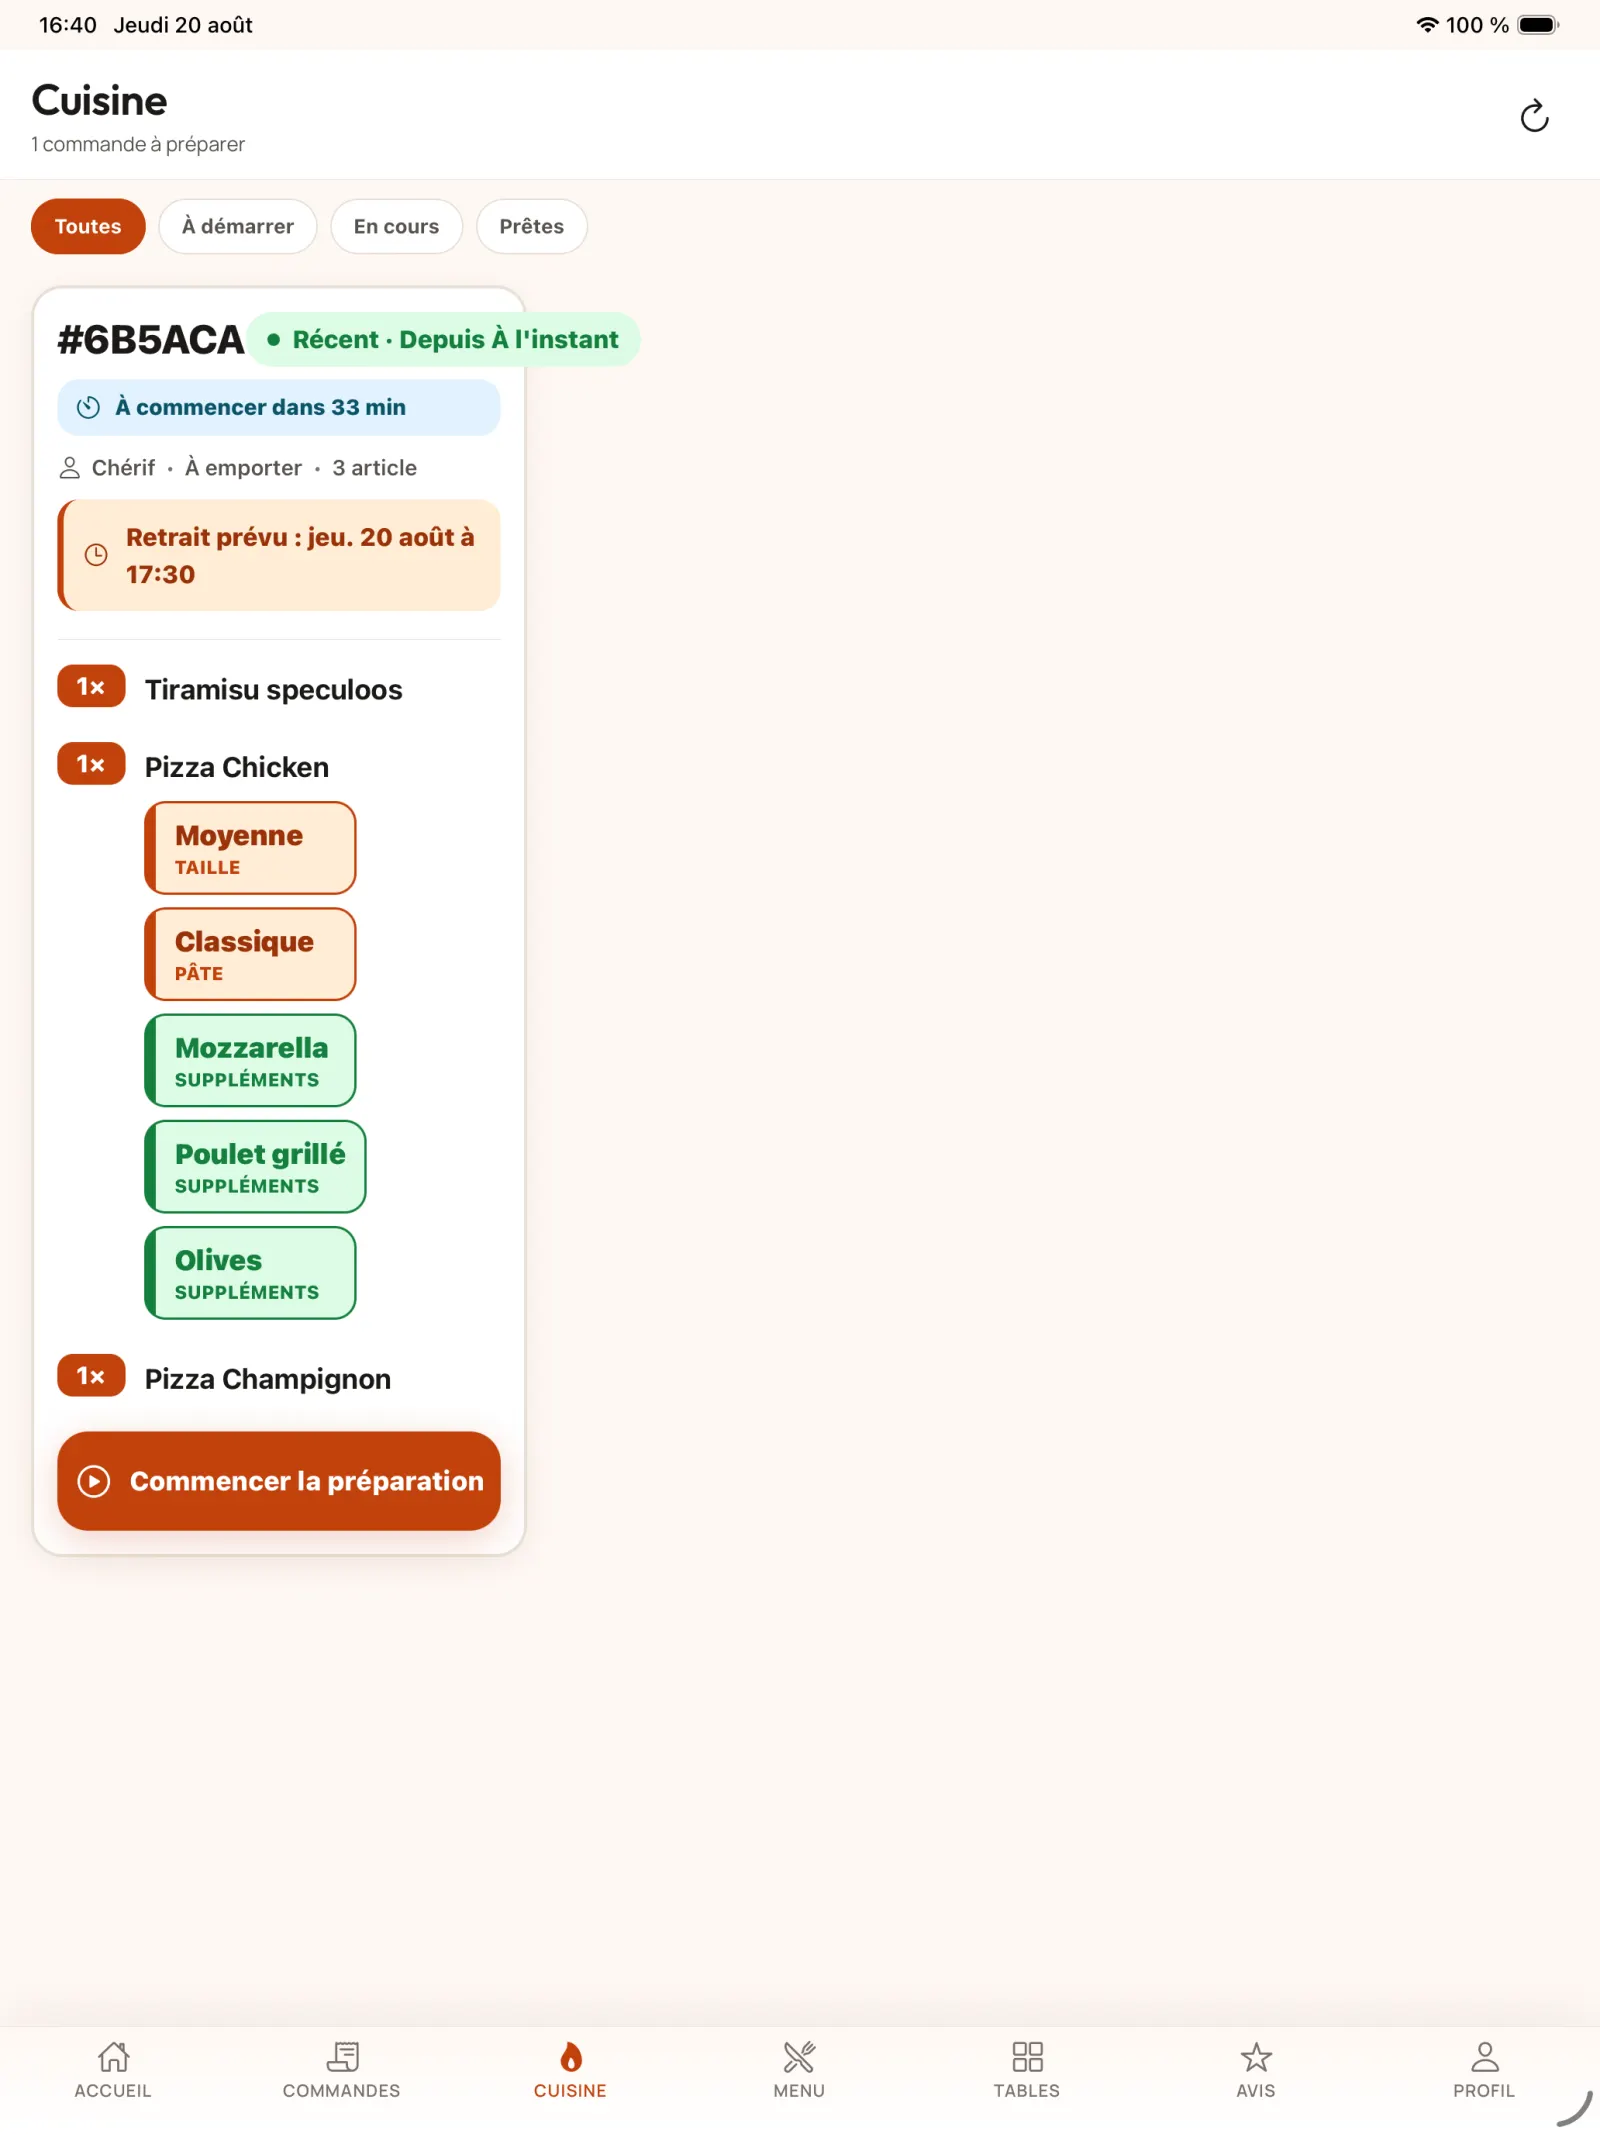
Step 17
Start preparation in the kitchen
The kitchen consults the products and options then starts the preparation.
In practice. At the same time, the restaurant owner sees the order in the kitchen and the customer receives the preparation information. The two applications thus share the same progress without phone calls or manual updating.
Open full-size image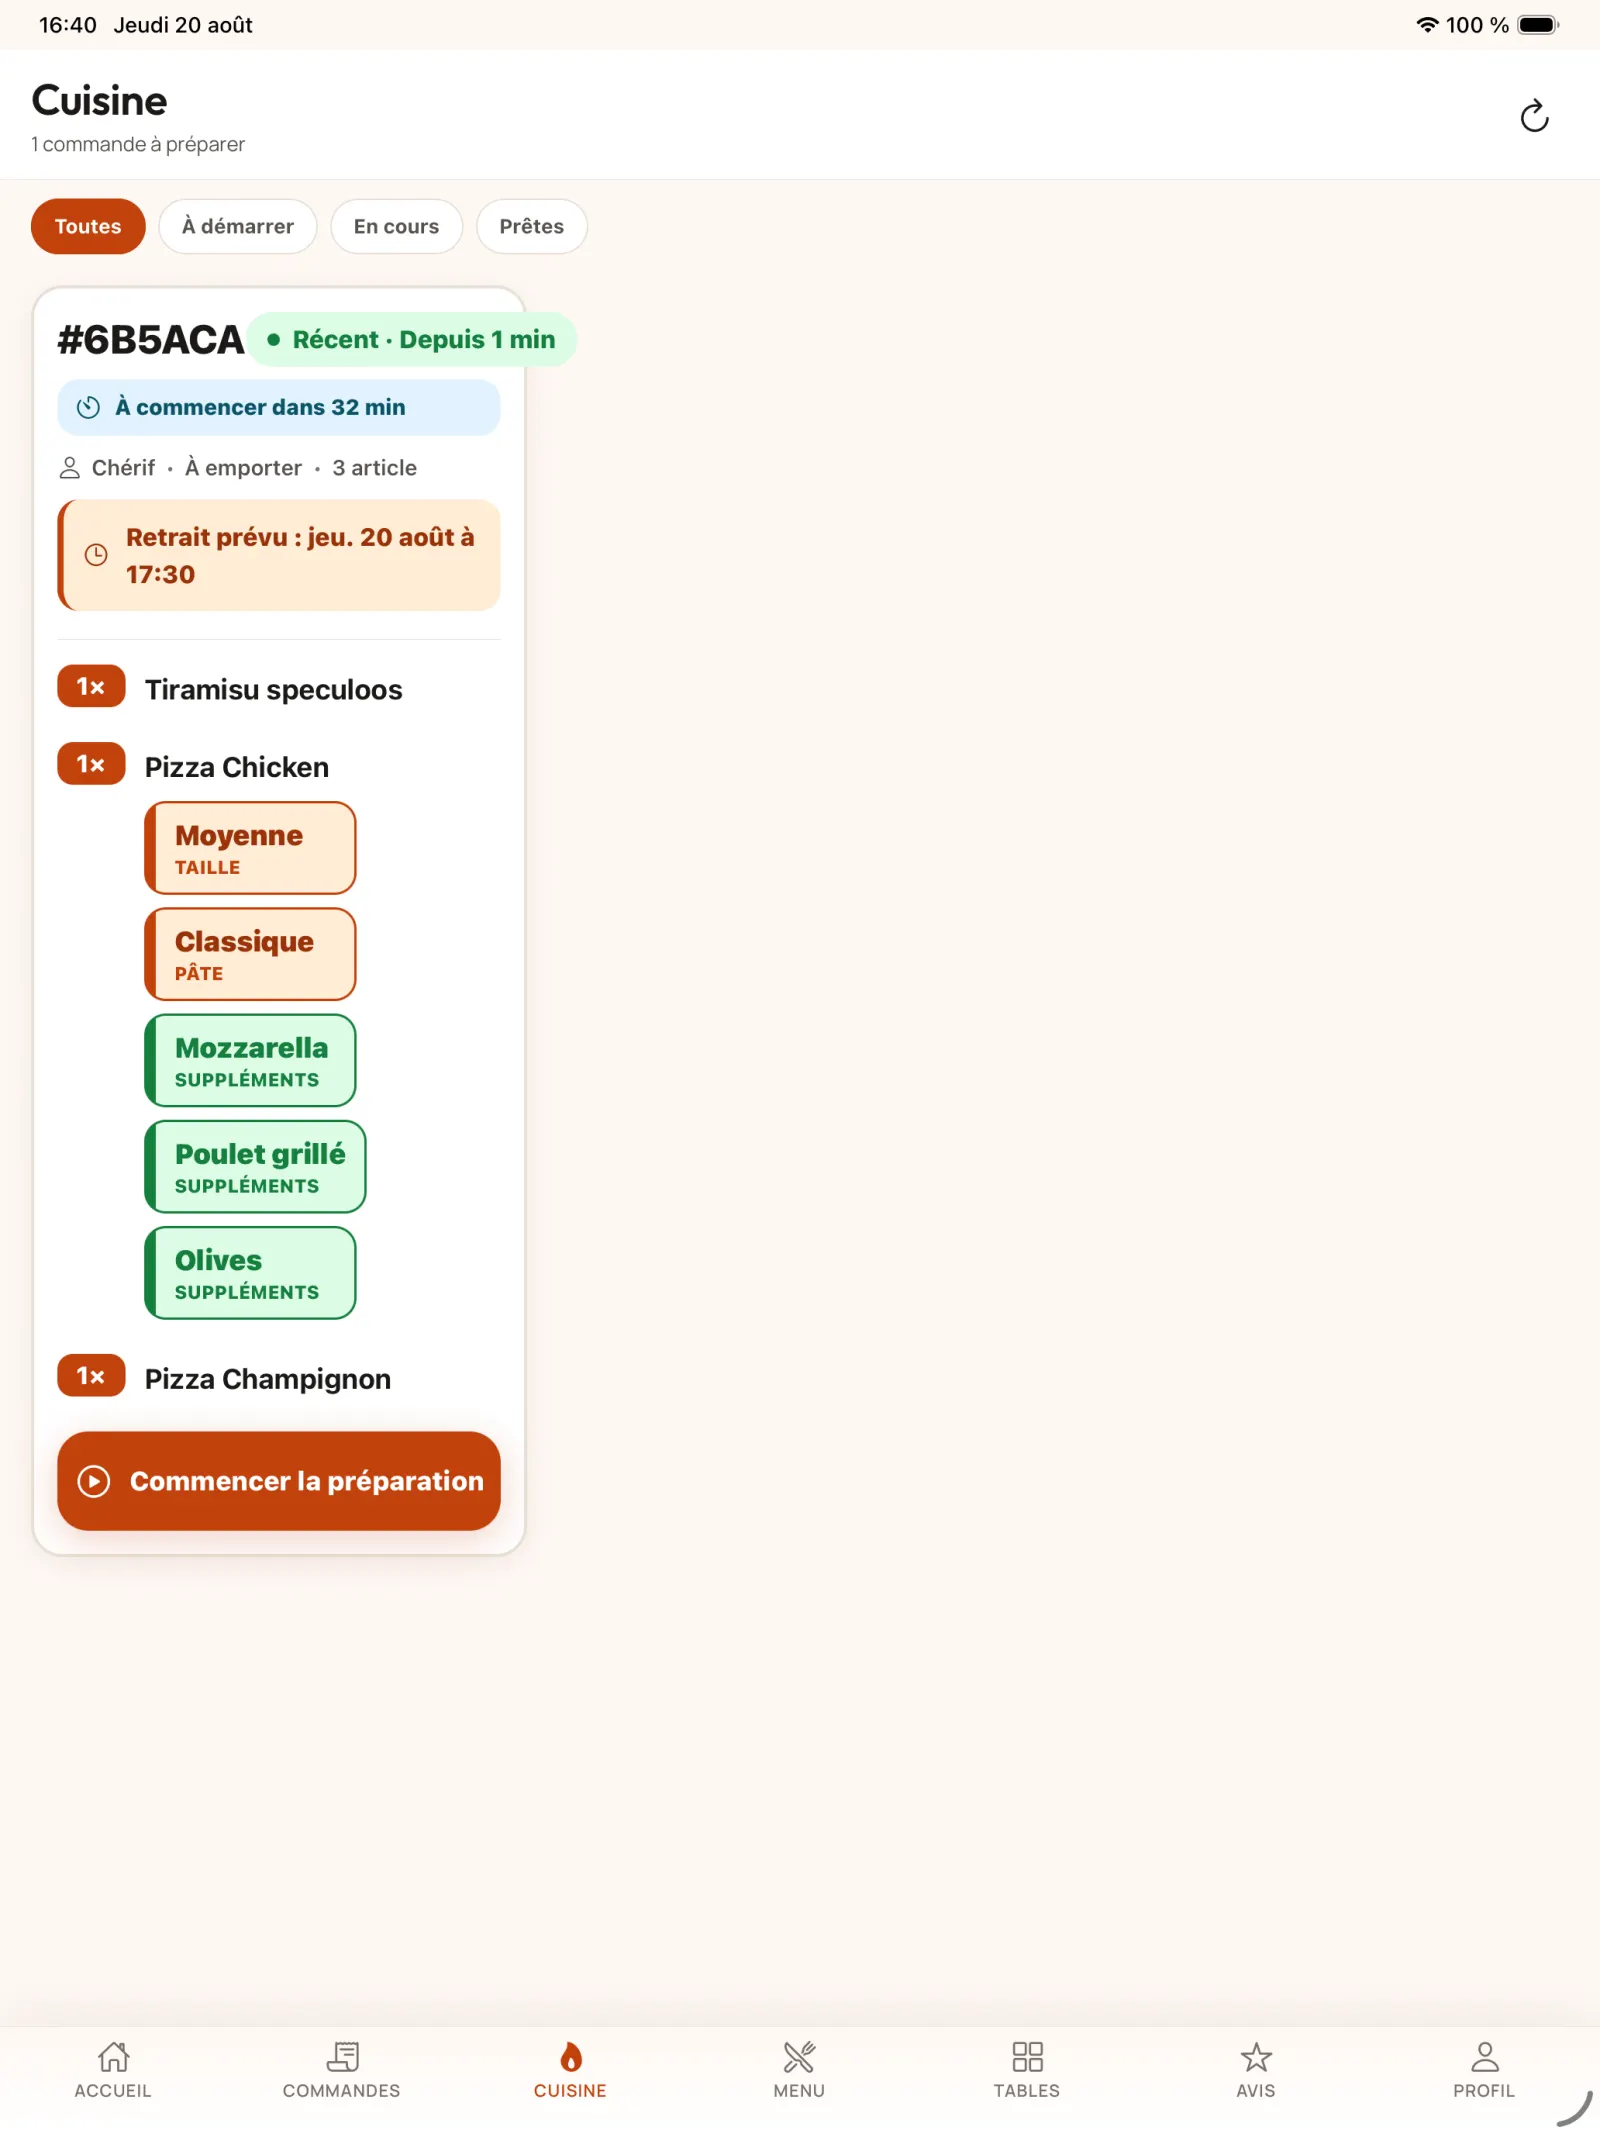
Step 18
Prioritise a scheduled order
The kitchen view shows the time remaining before the recommended start of a scheduled order, helping the team prepare at the right time.
Open full-size image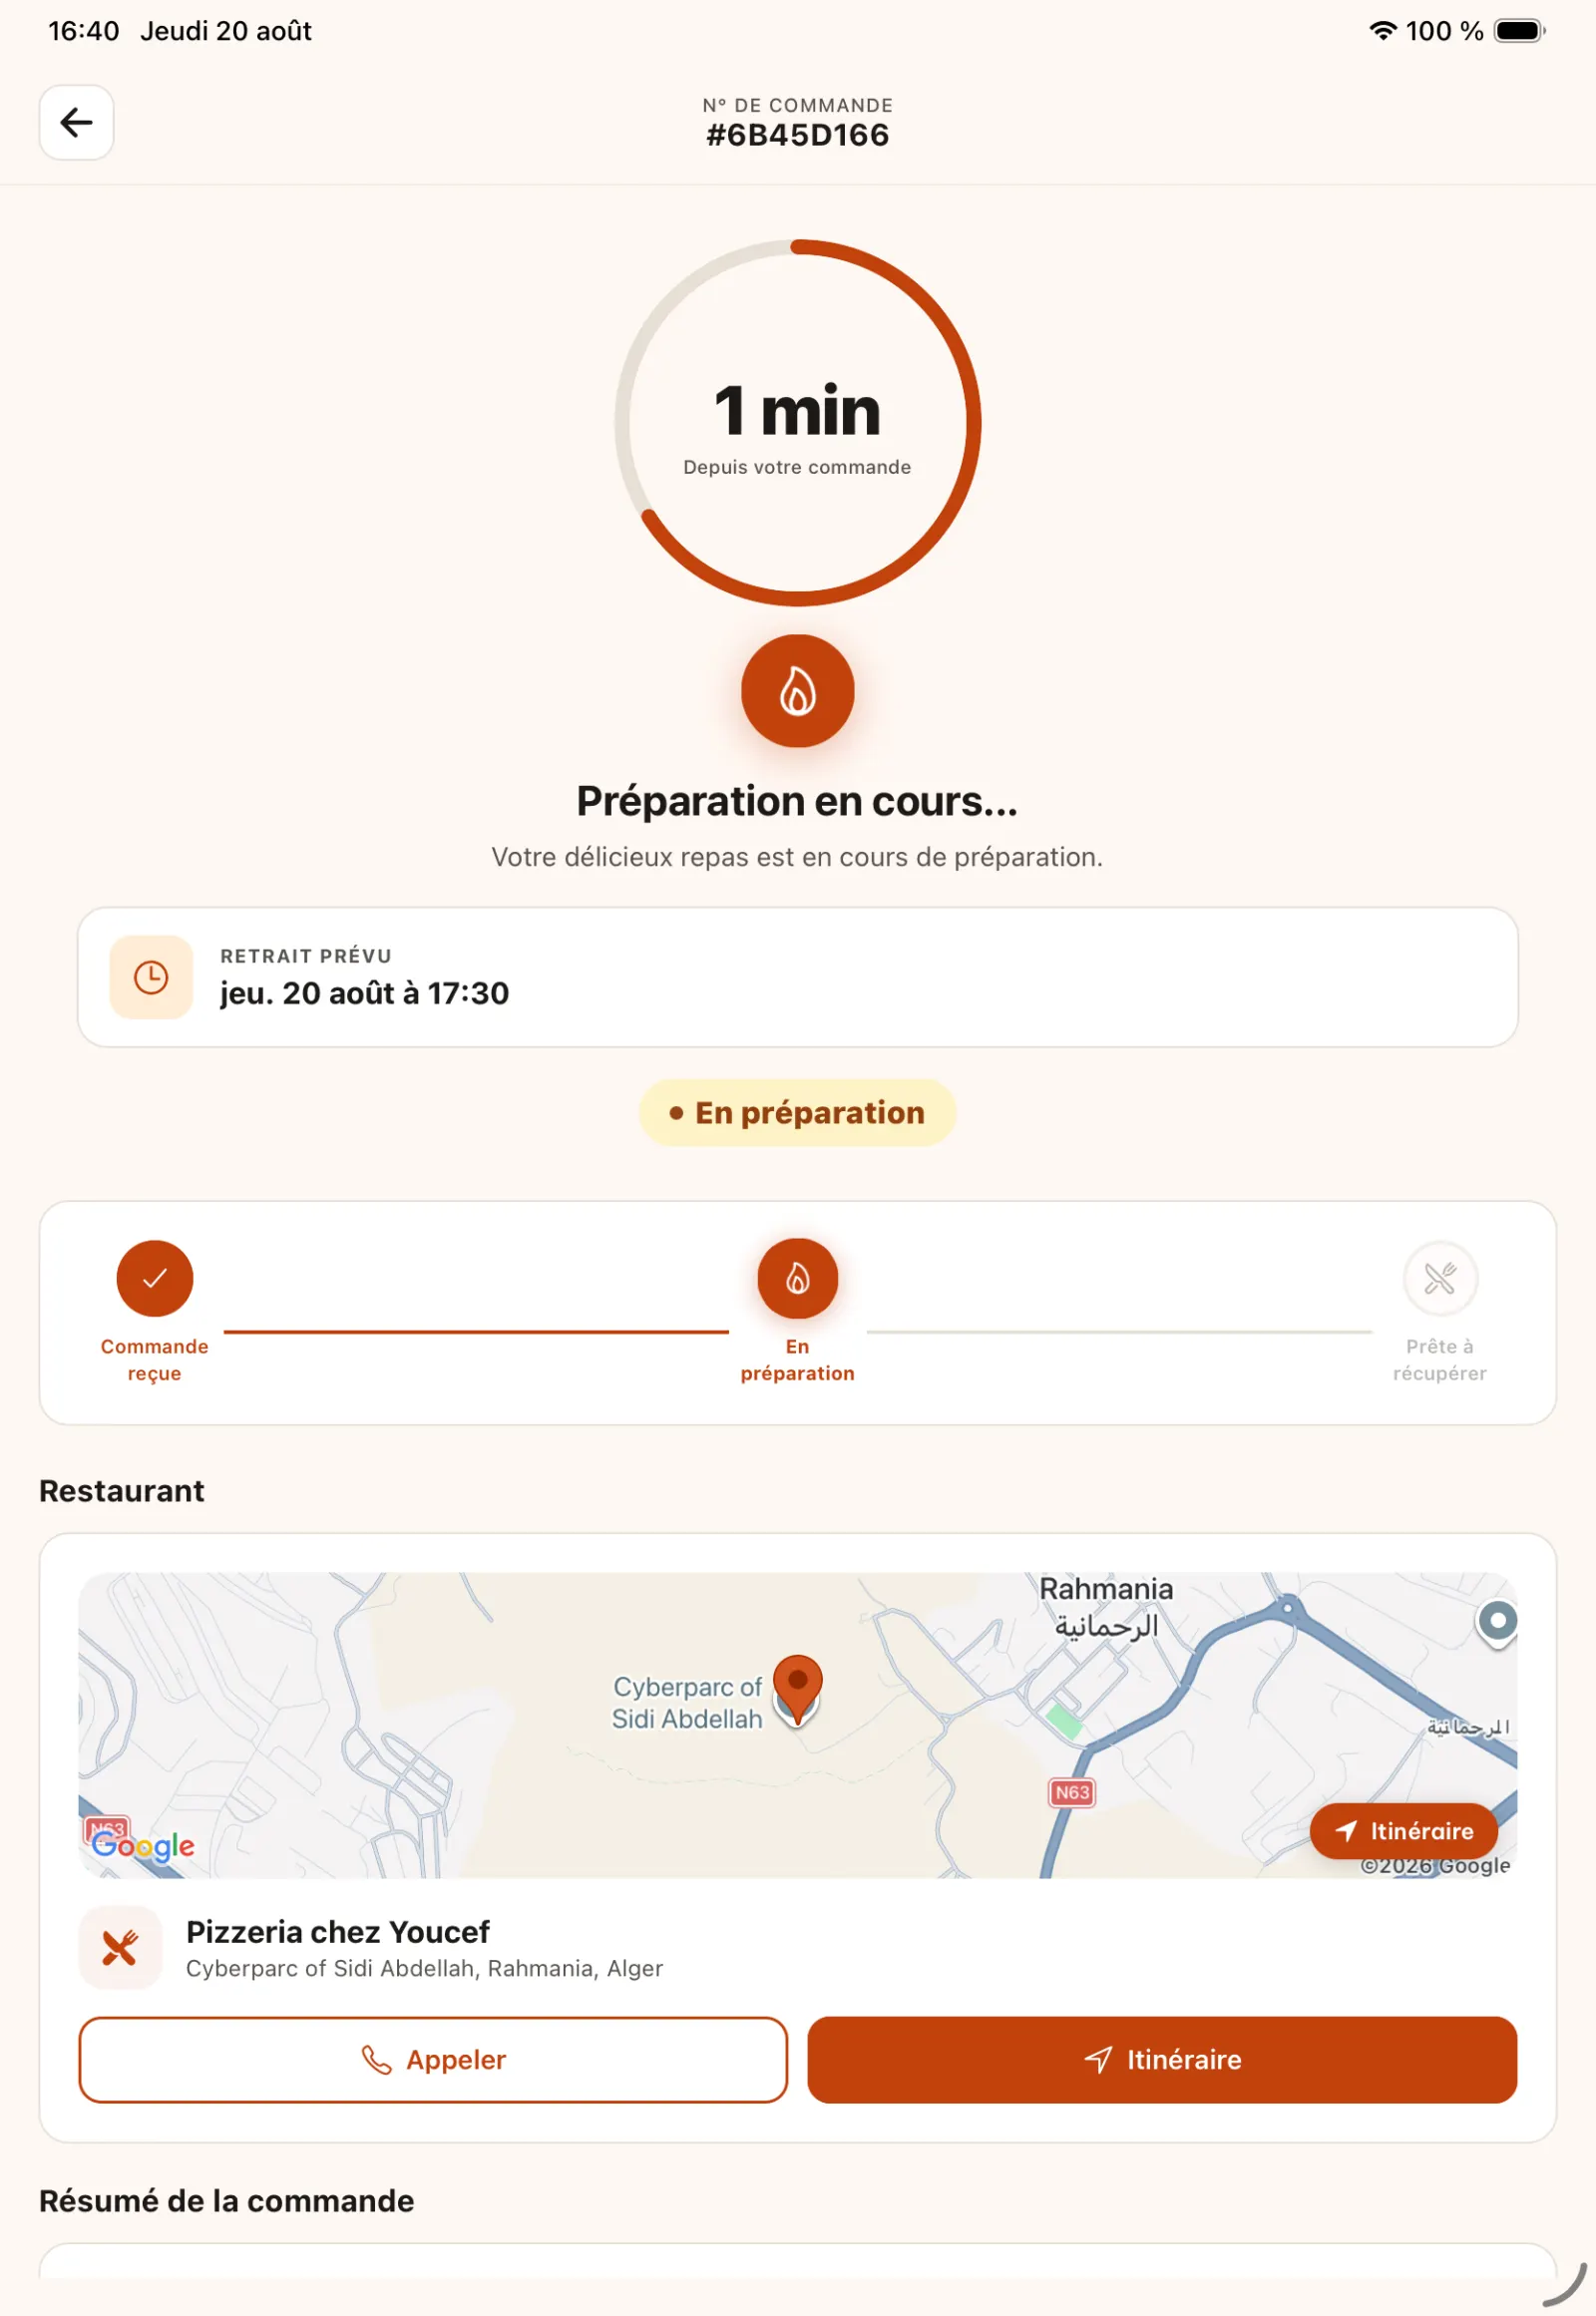
Step 19
See client-side preparation
The order status changes to “In preparation” in the KoulChi app.
Open full-size image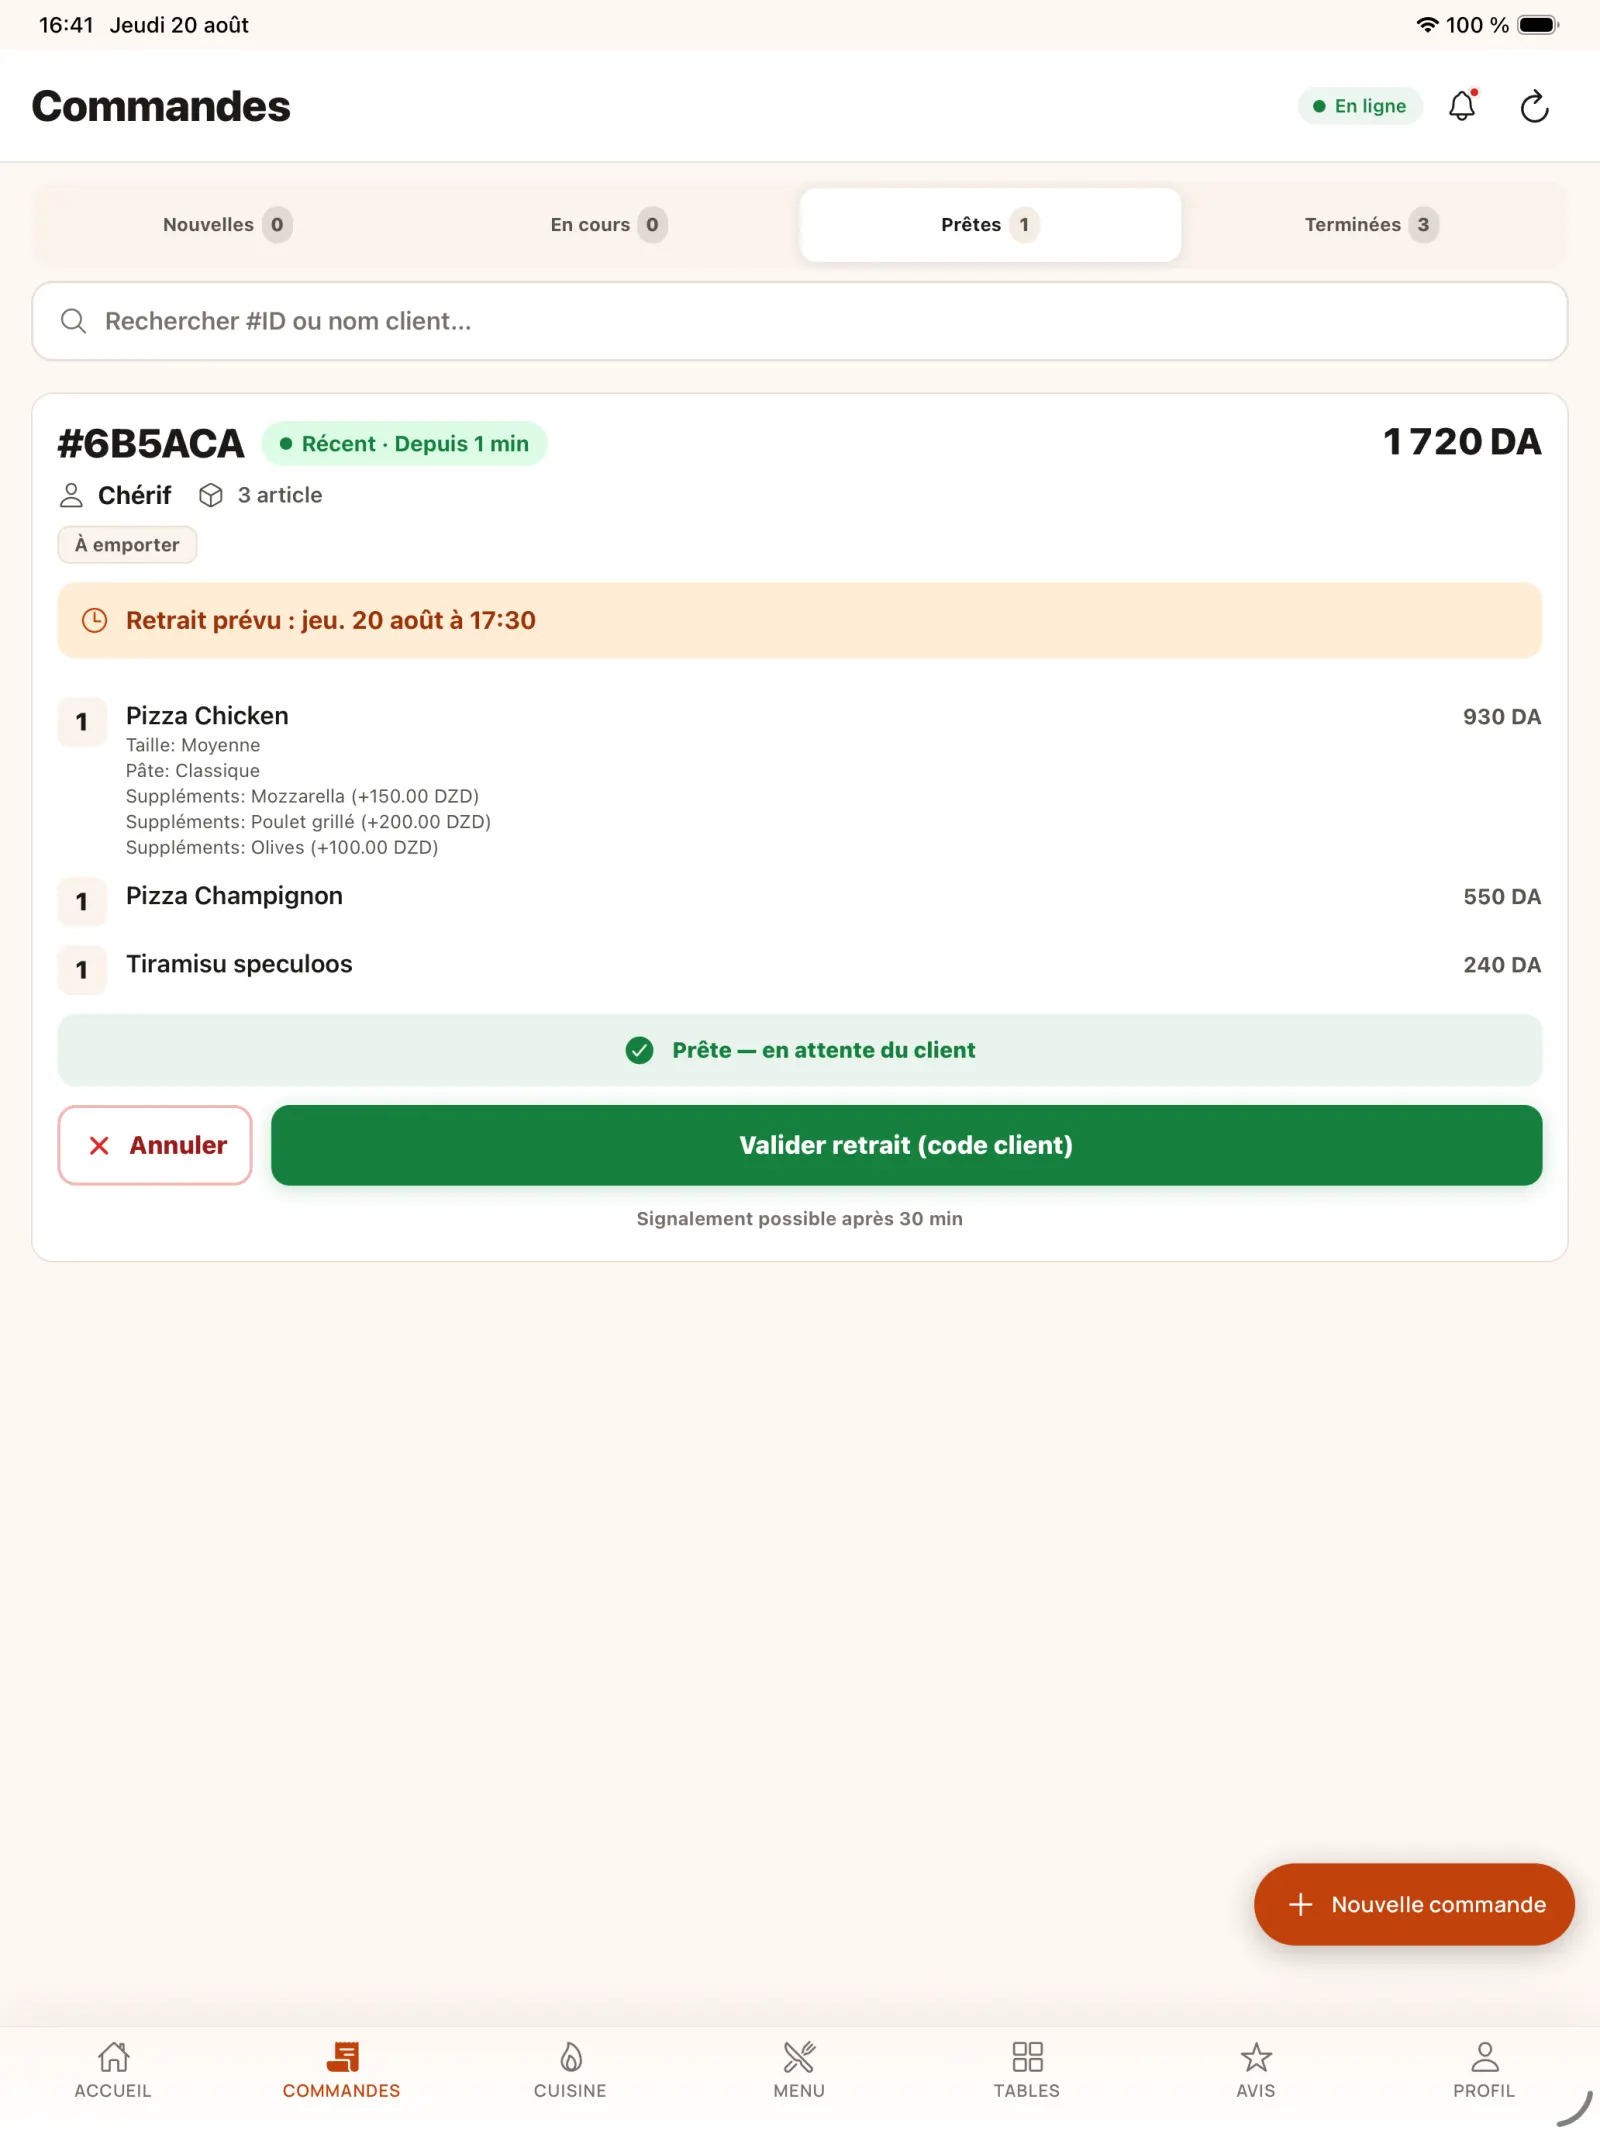
Step 20
Wait for the customer at the counter
When the kitchen is finished, KoulChi Pro places the order in the ready pick-up list.
Open full-size image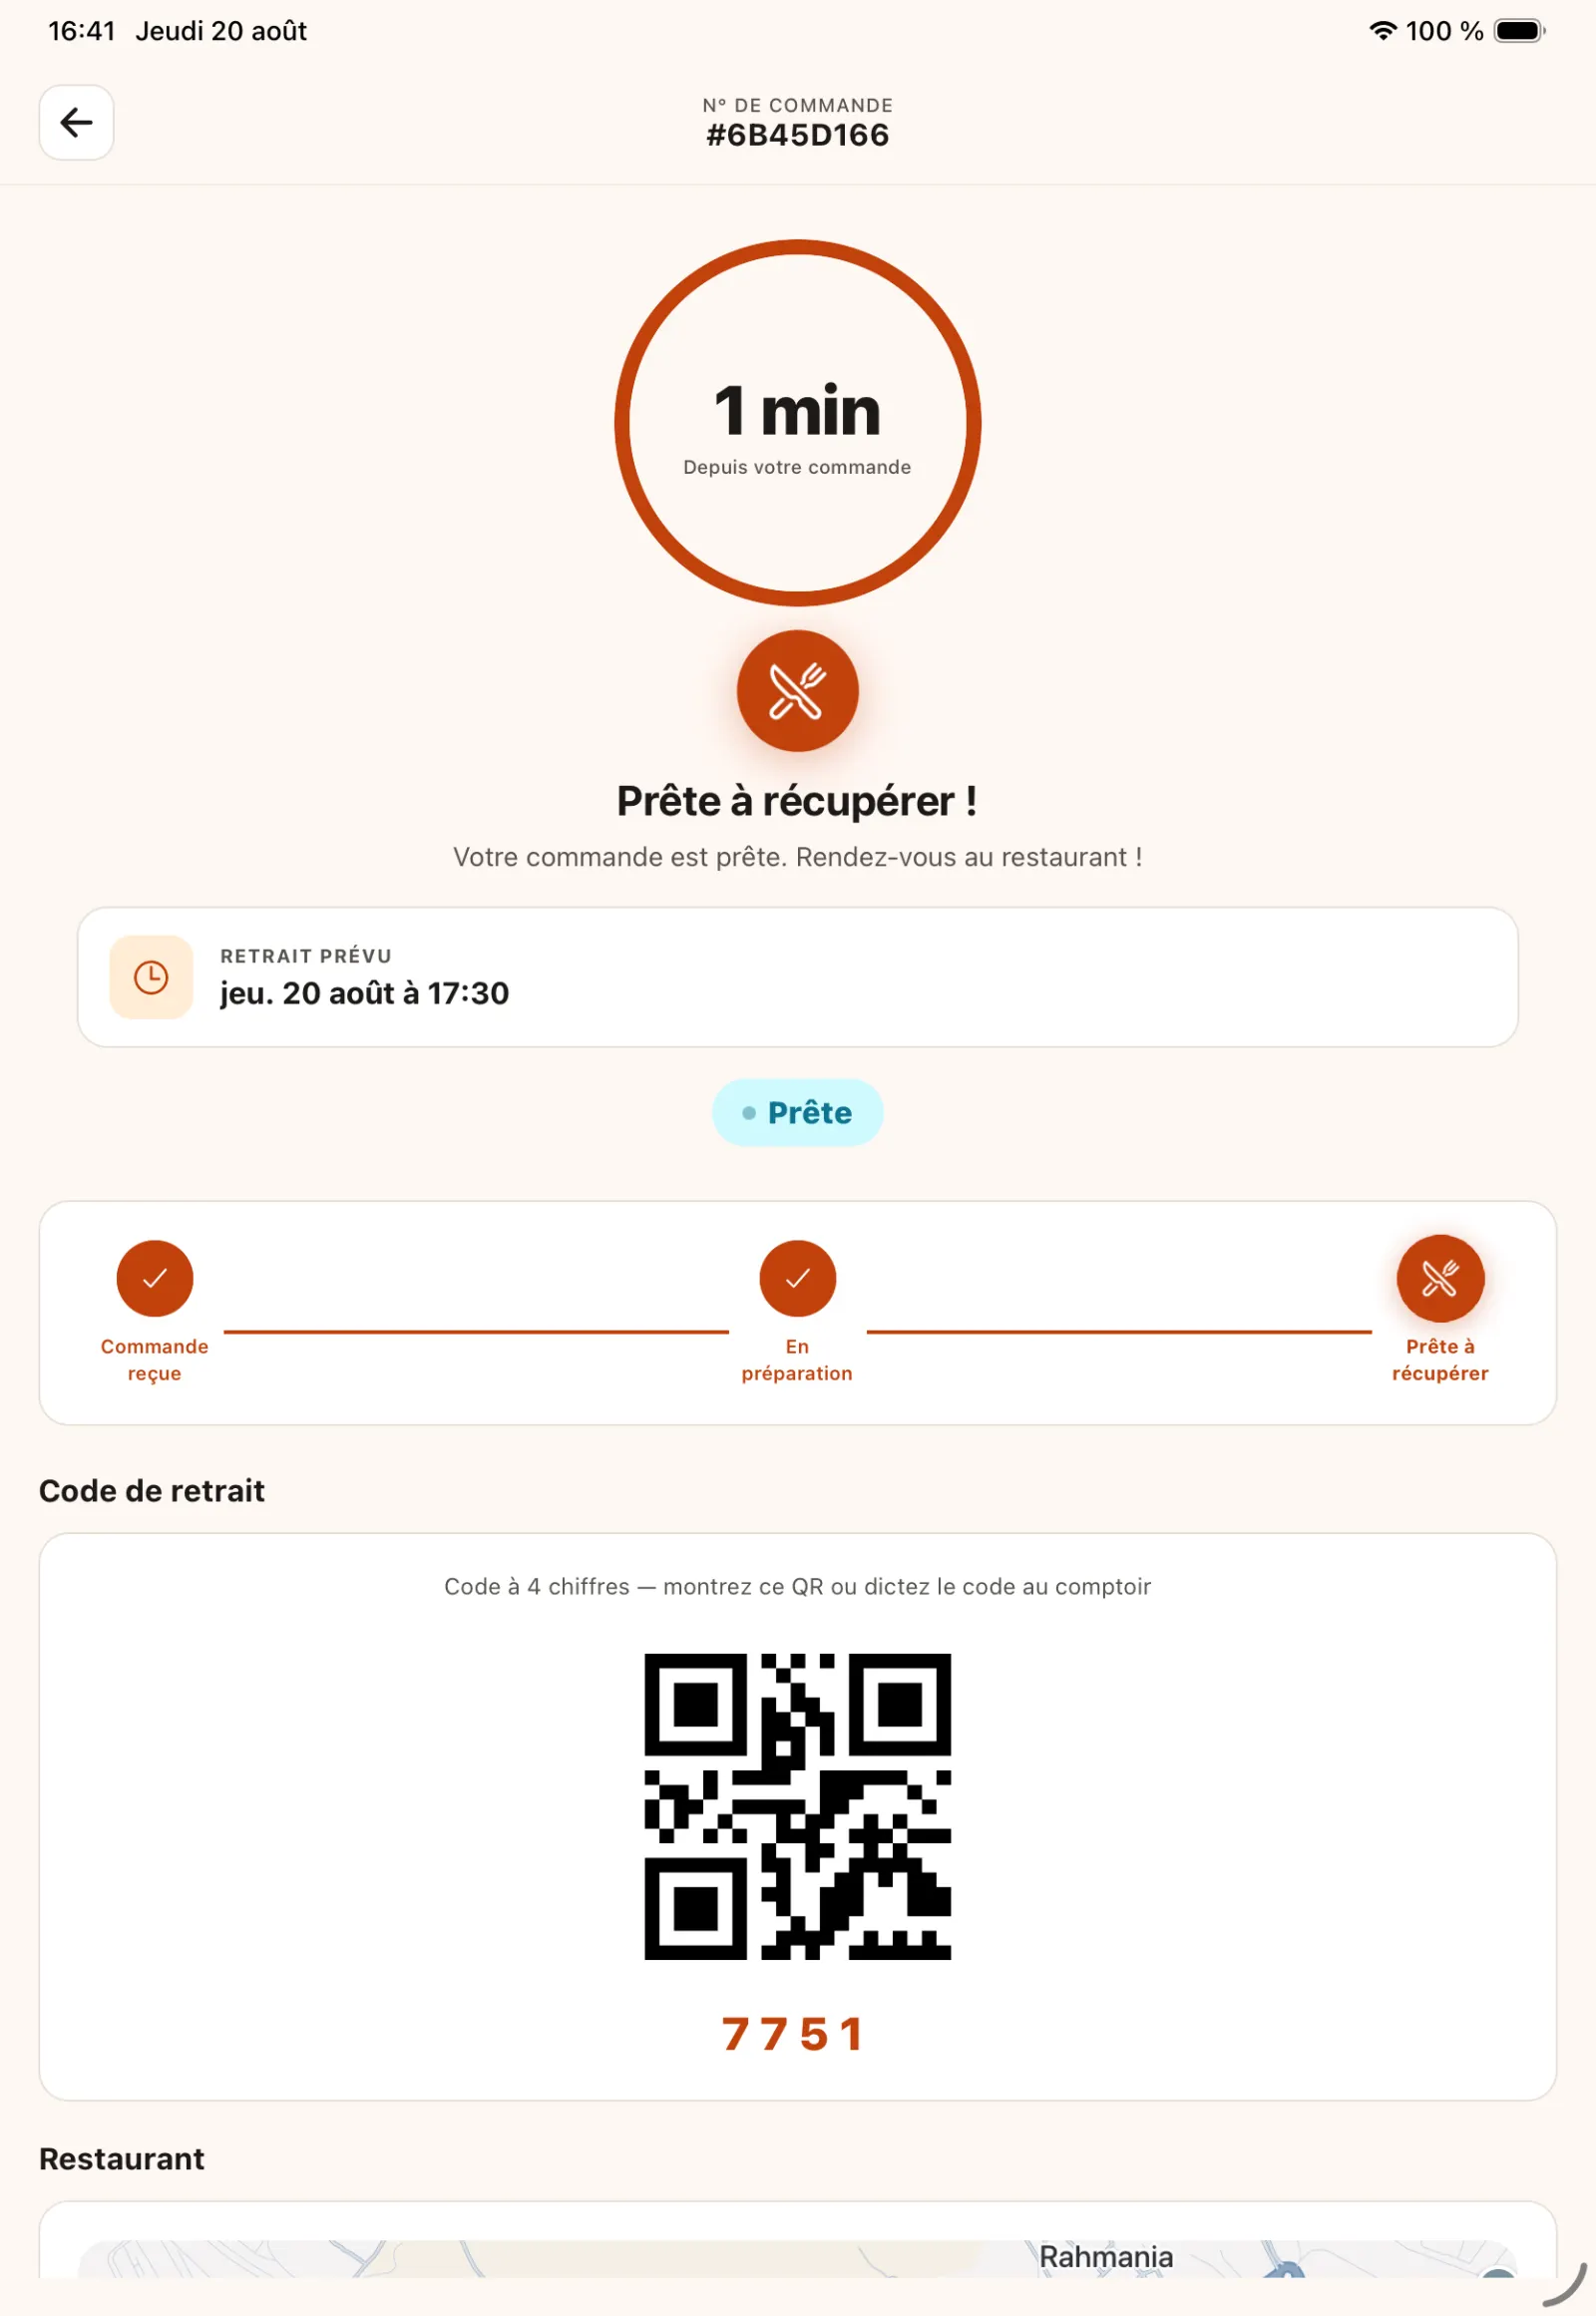
Step 21
Show pickup code
The customer receives a QR code and a four-digit code to present at the counter.
Open full-size image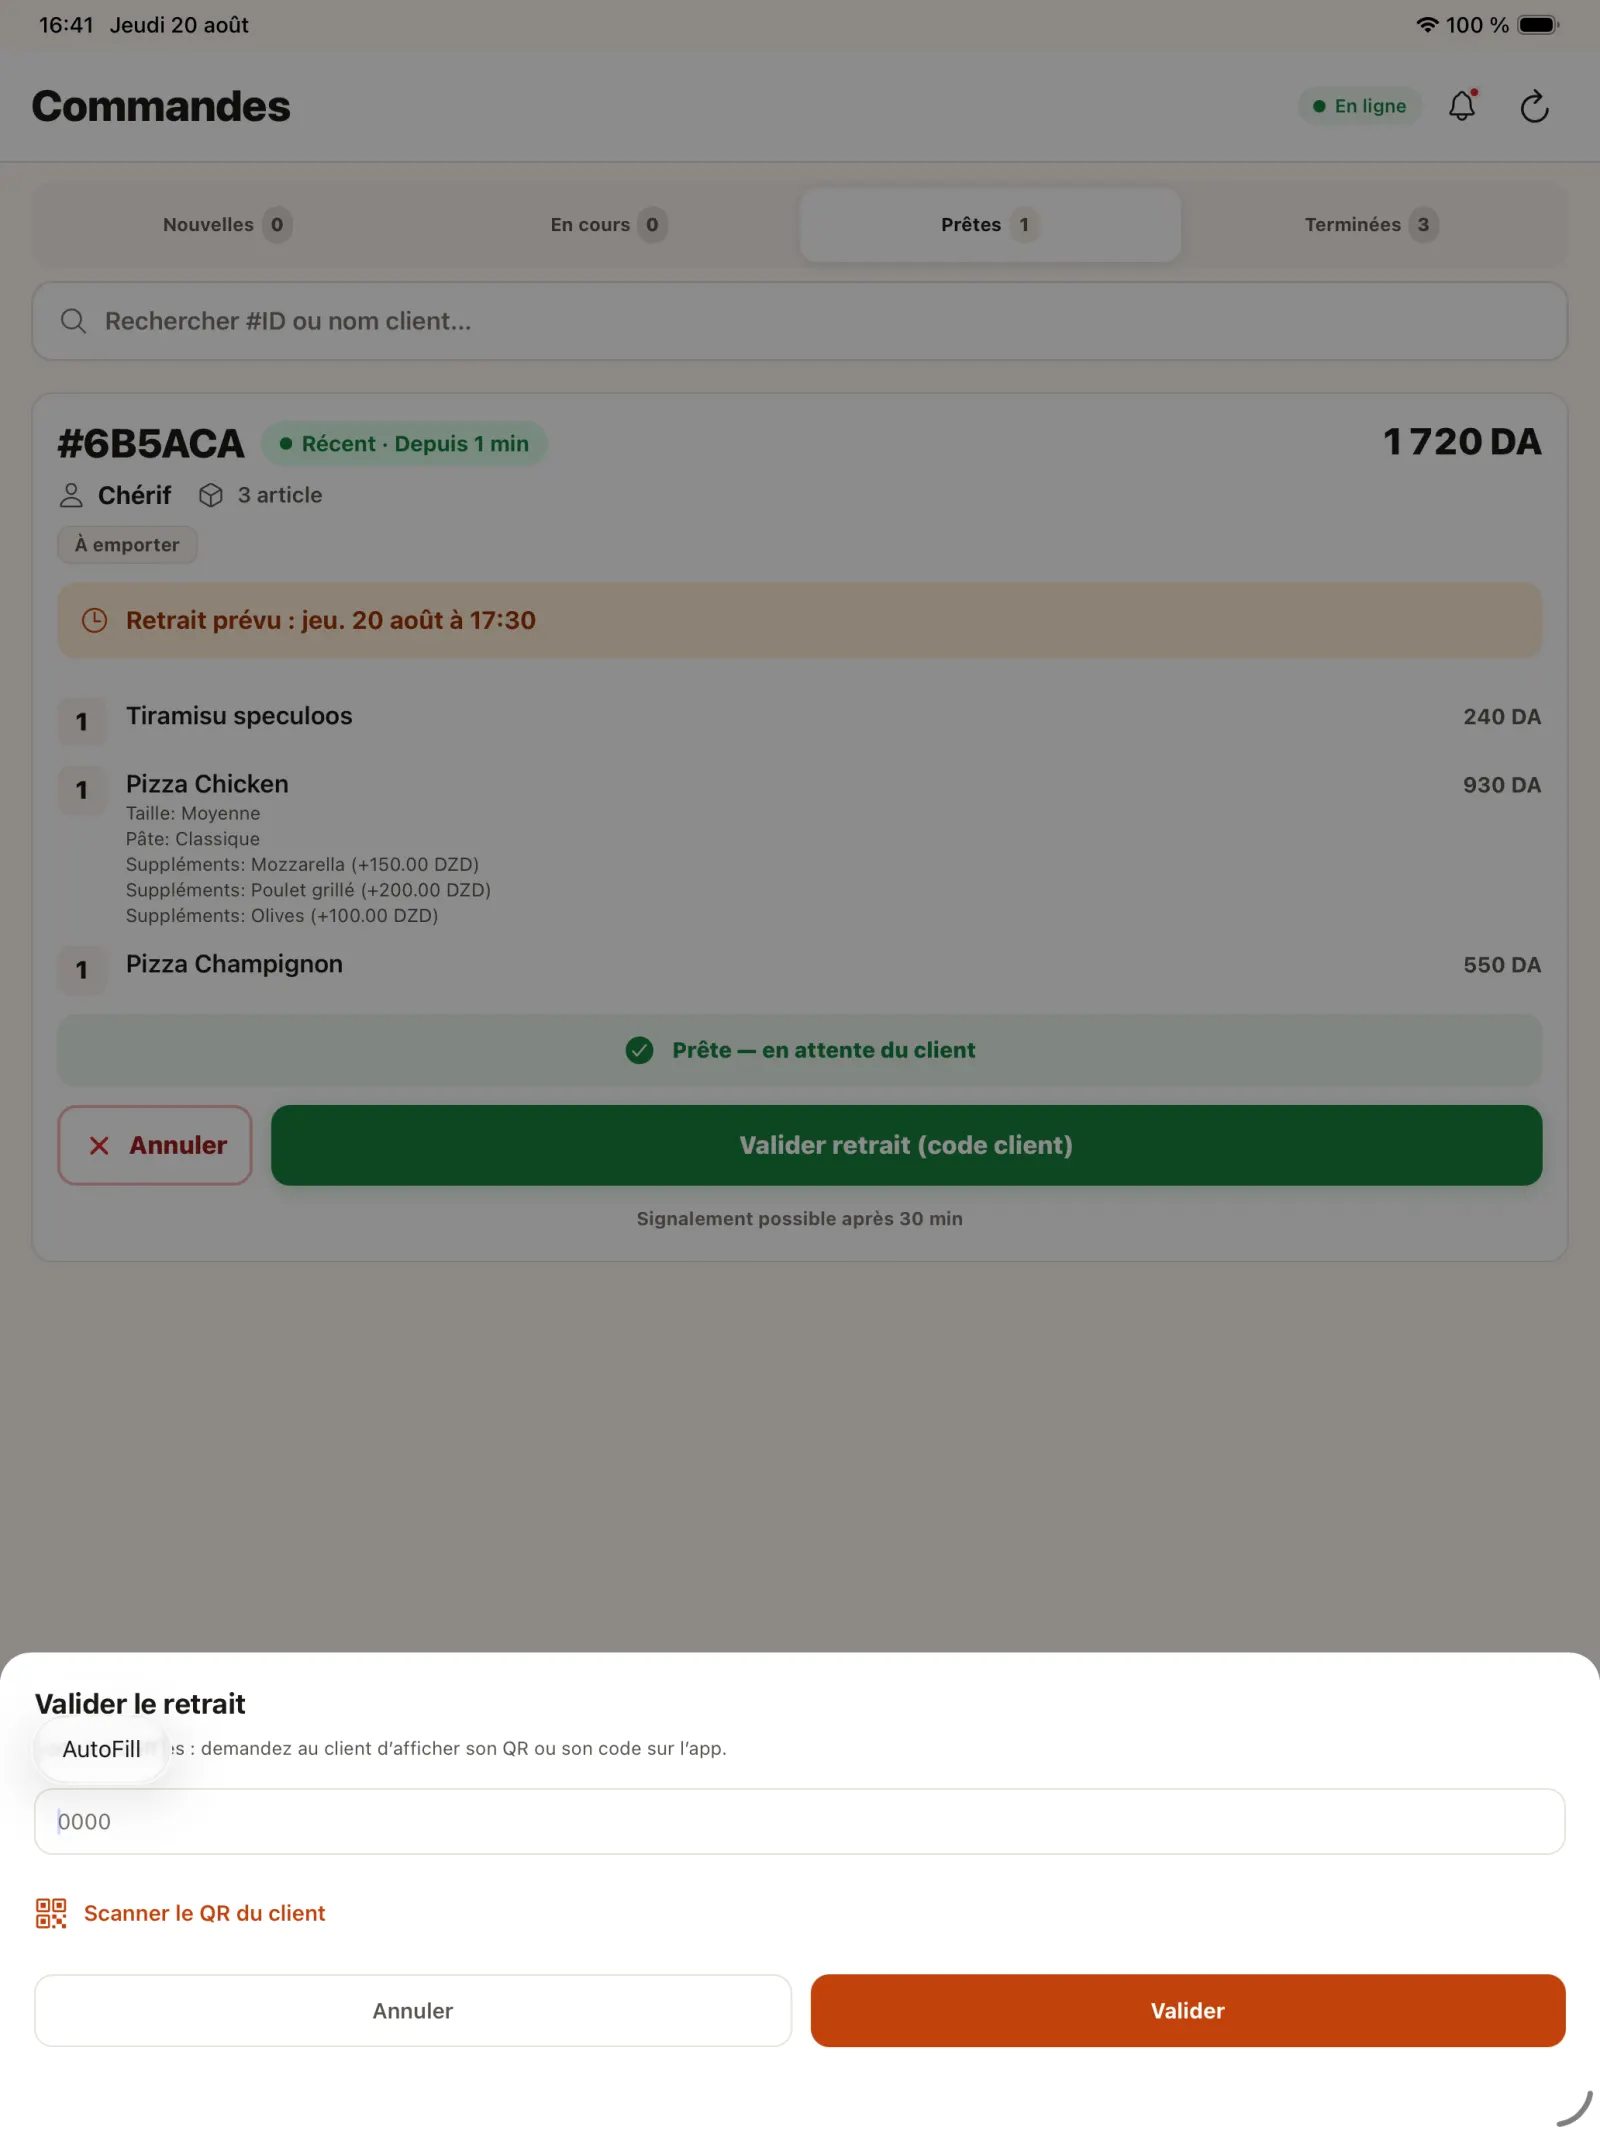
Step 22
Enter the code on the restaurant side
The team opens the pickup validation and enters the code communicated by the customer.
Open full-size image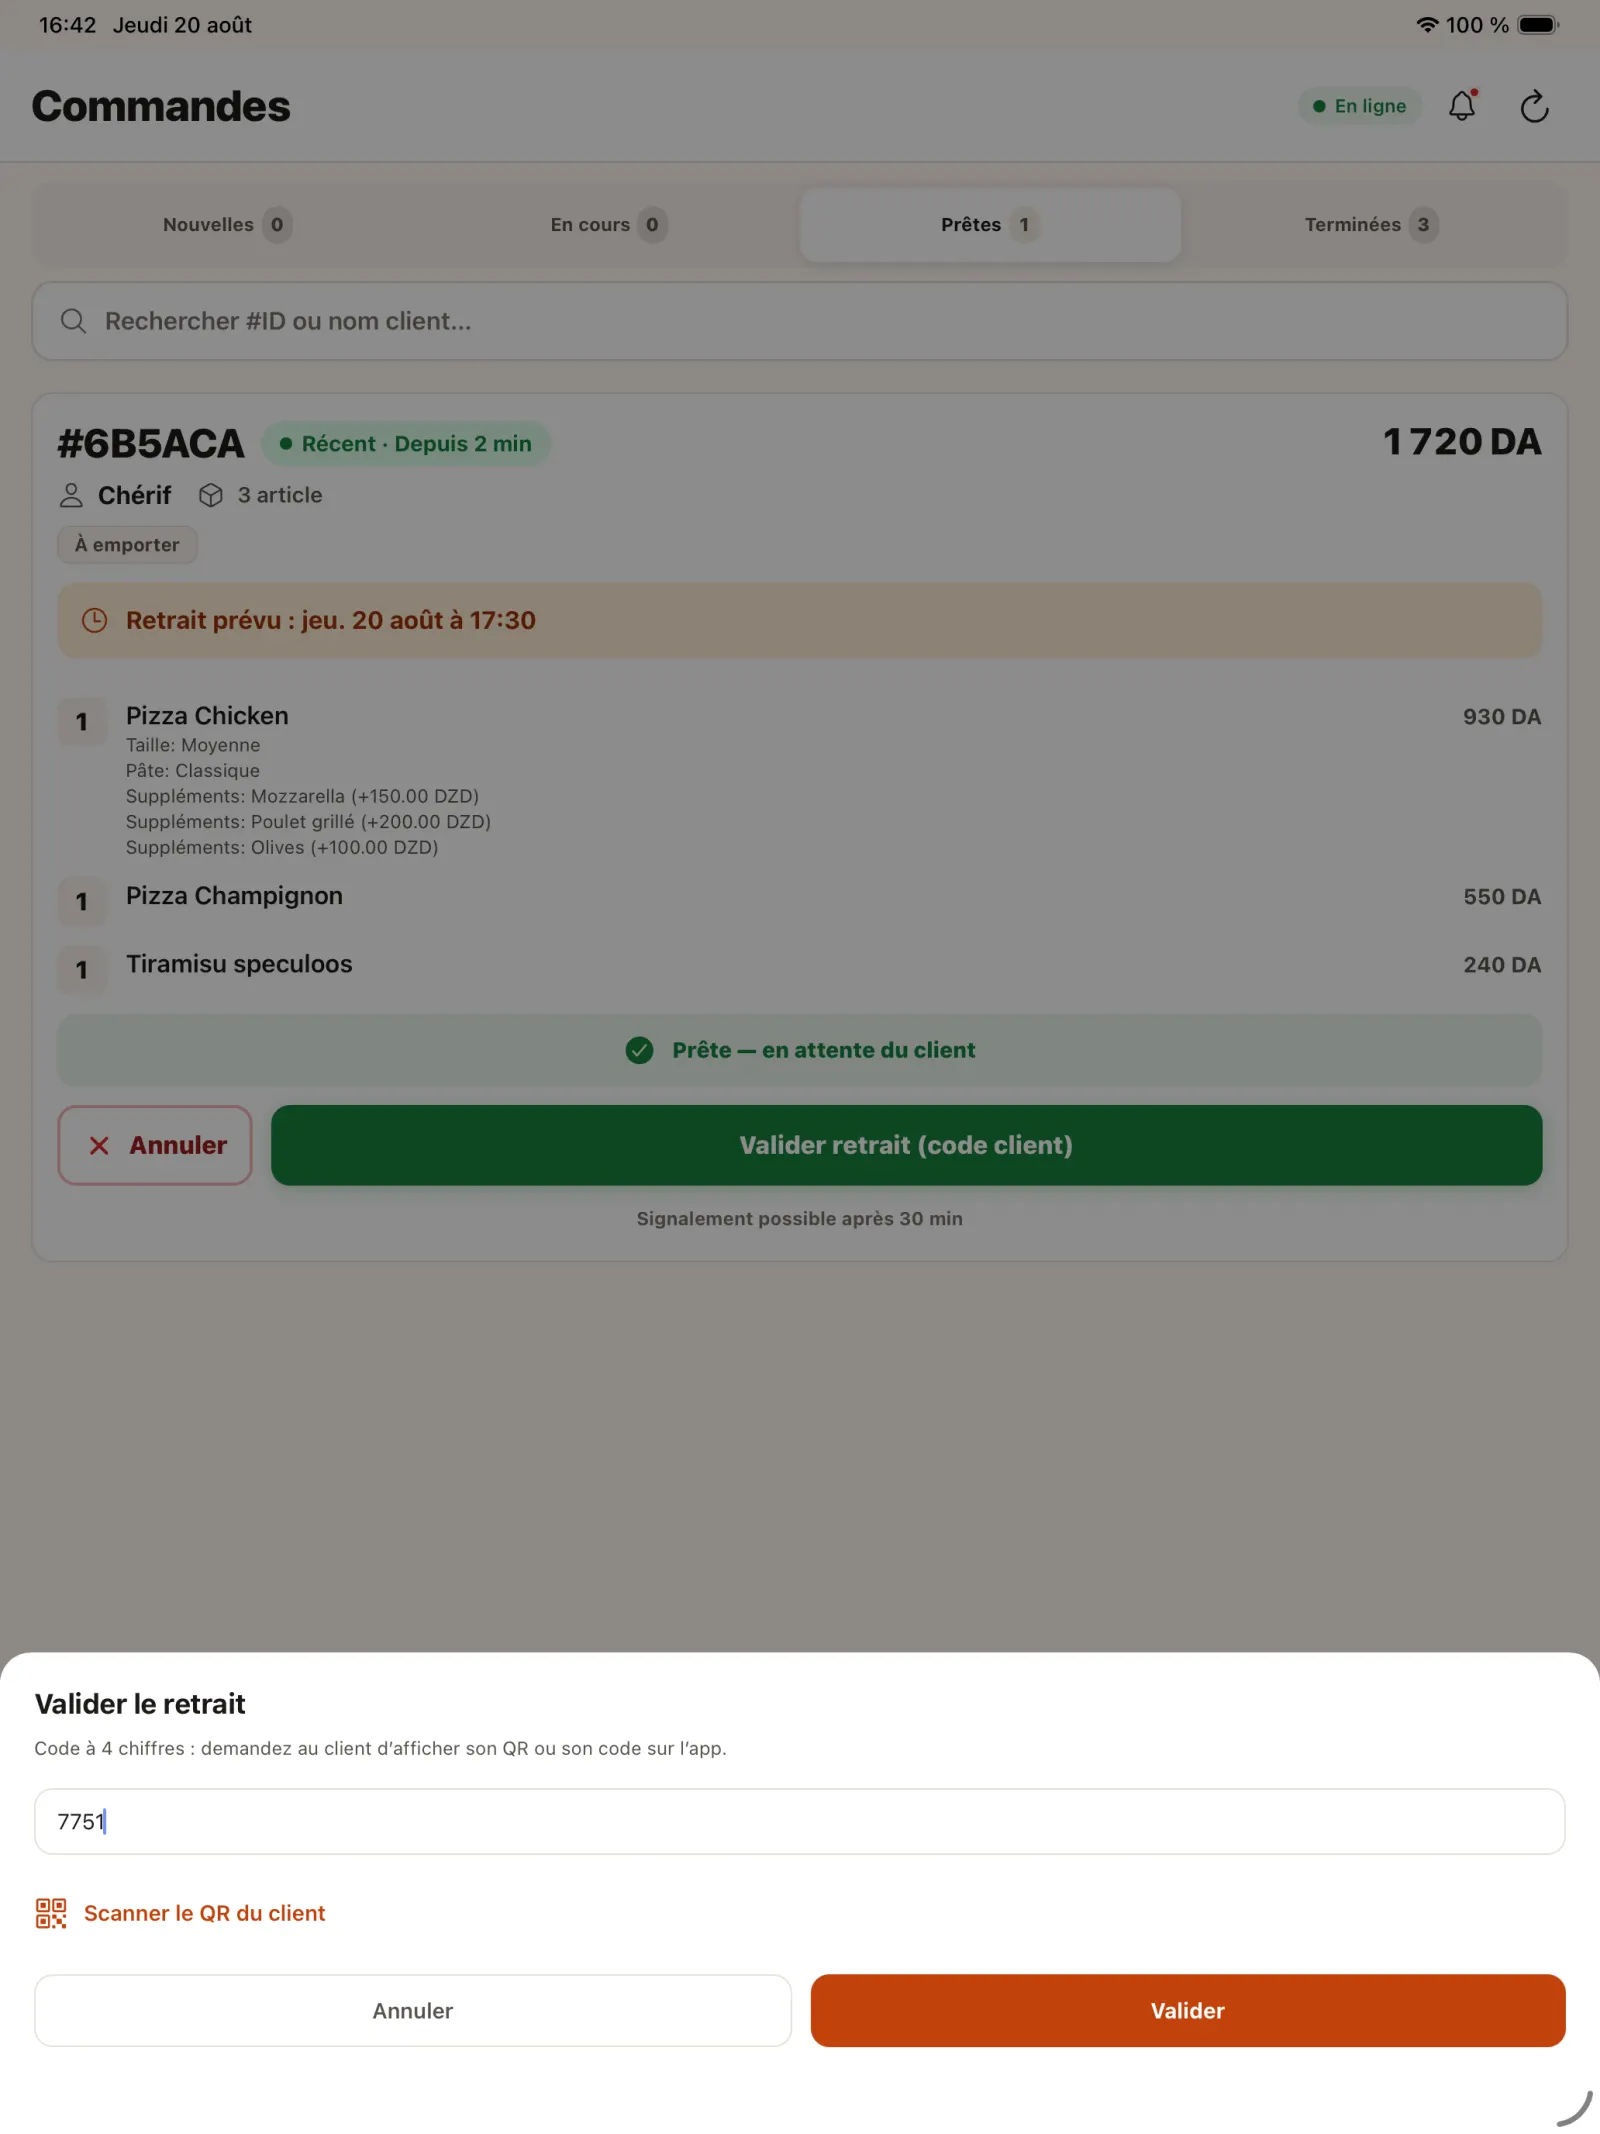
Step 23
Confirm code
Check the code entered before definitively confirming delivery of the order.
Open full-size image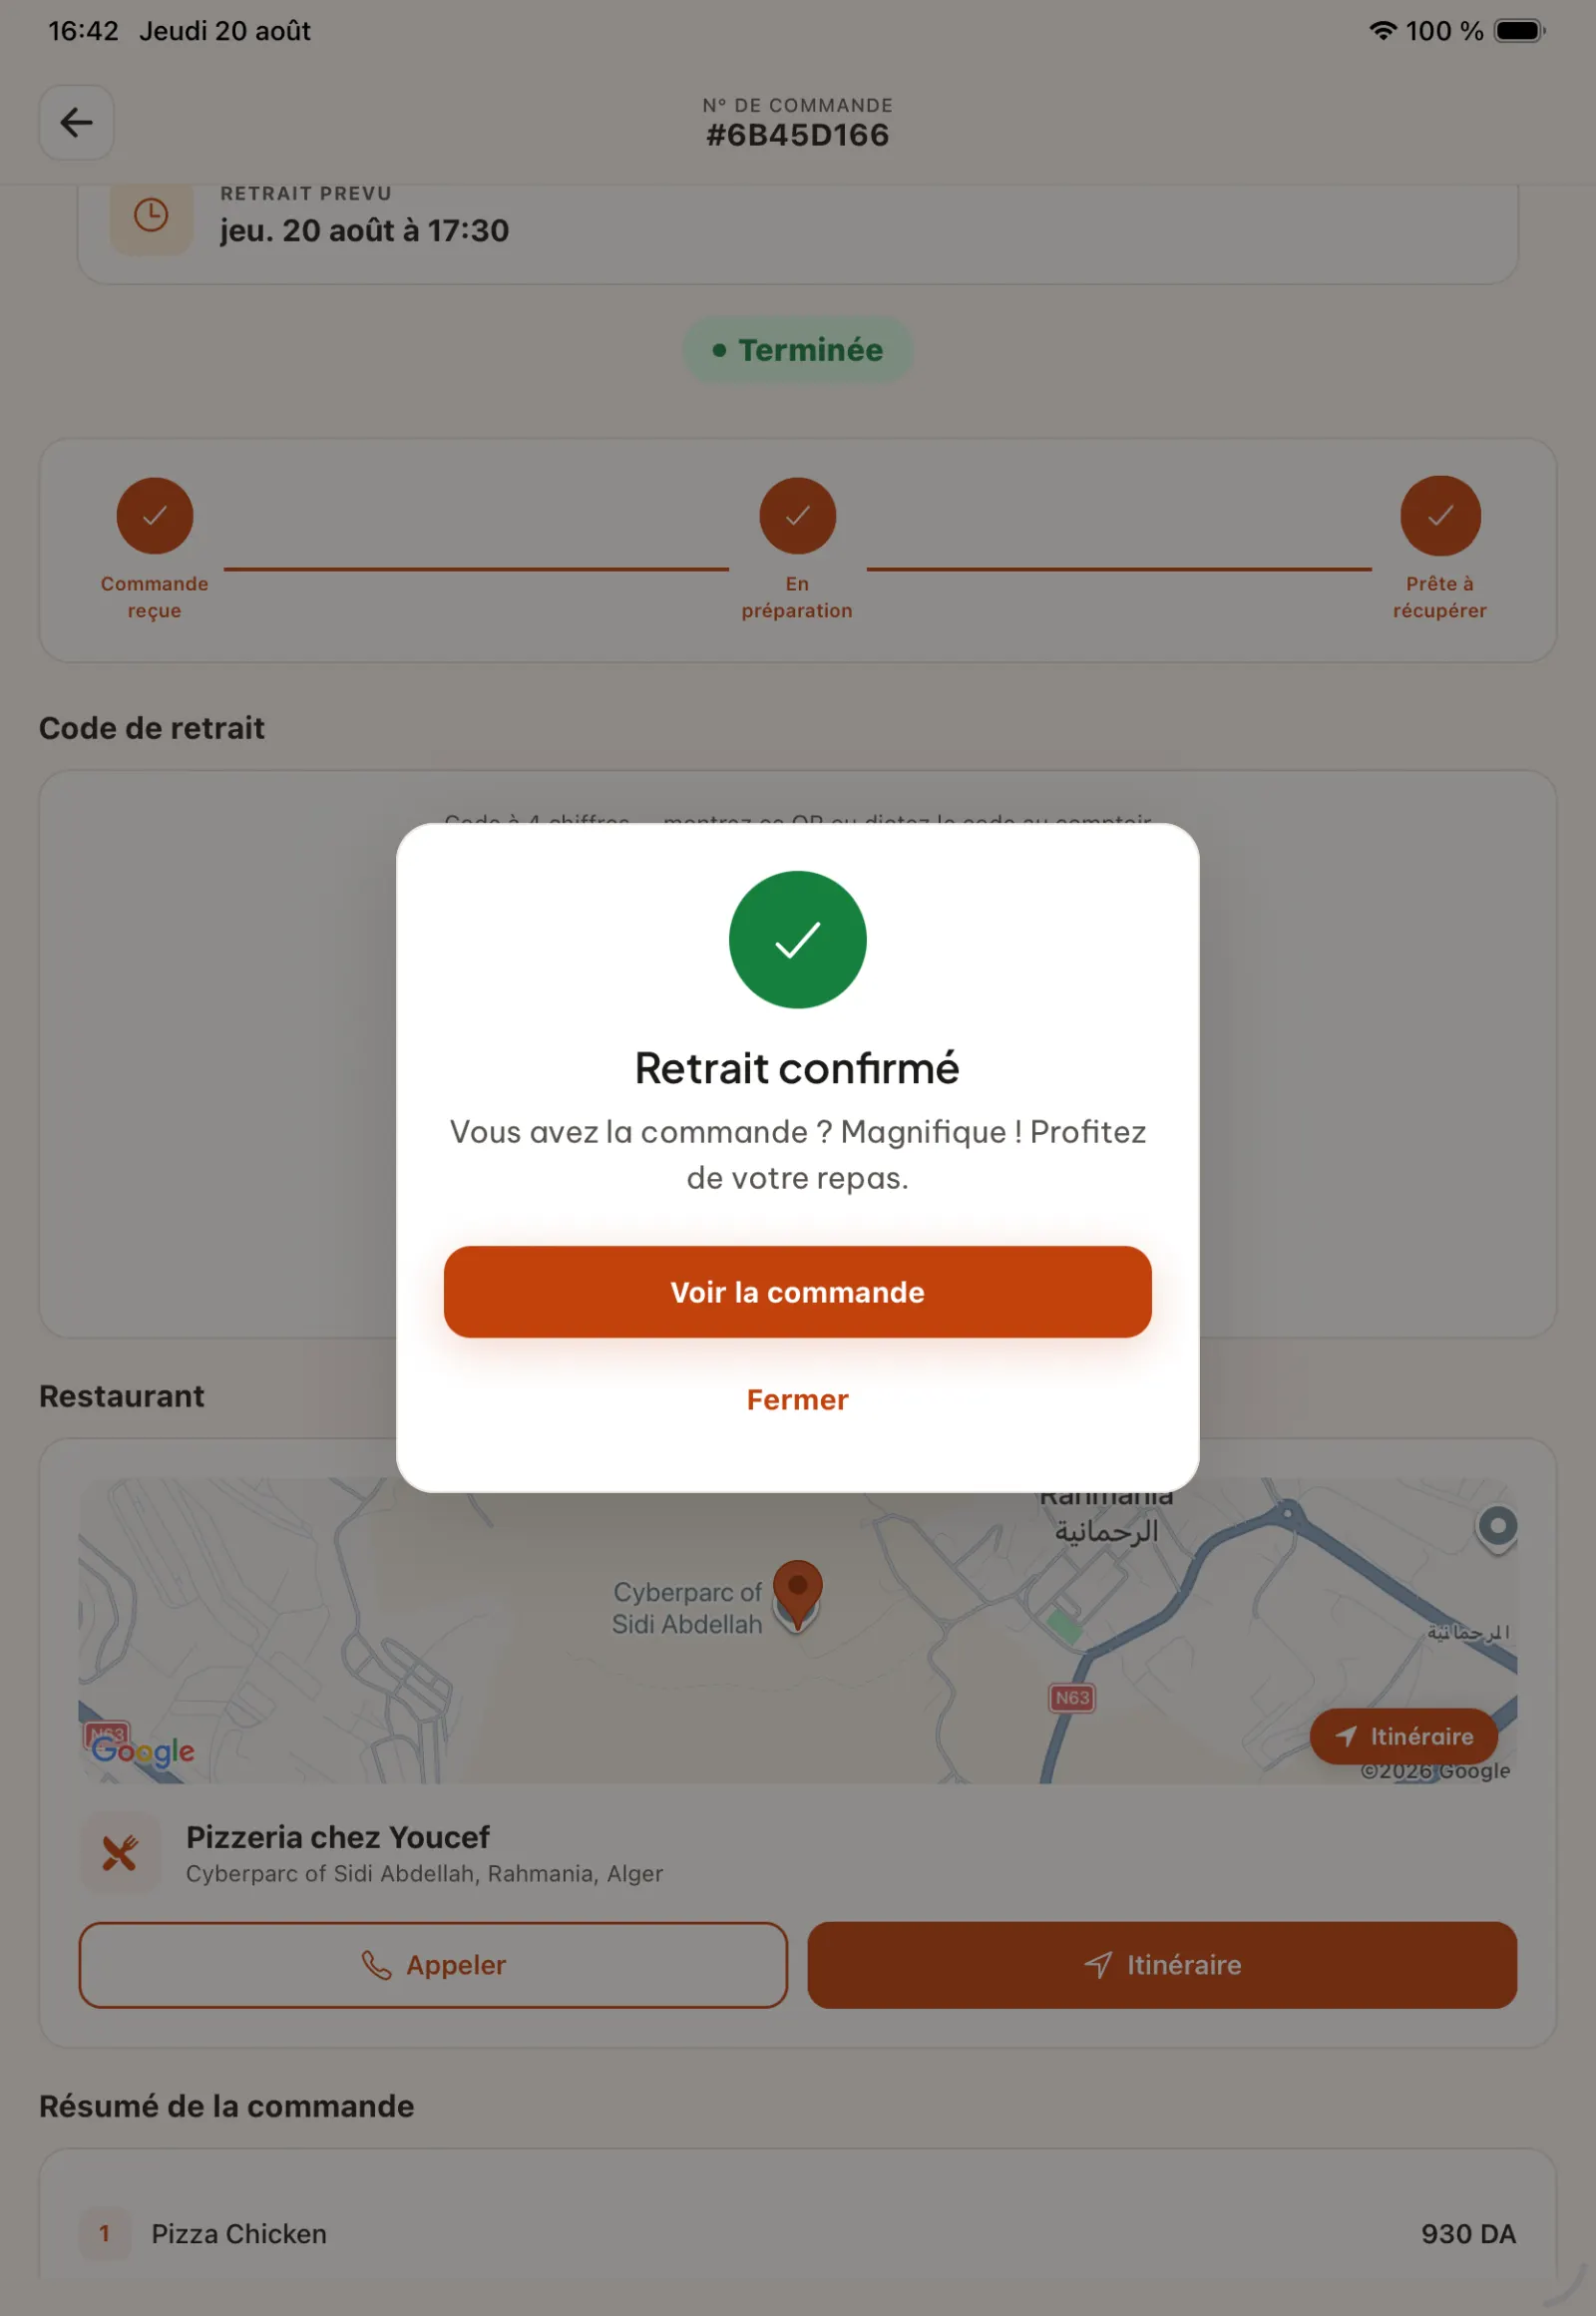
Step 24
Confirm pickup in the customer app
The customer application indicates that the order has been collected.
Open full-size image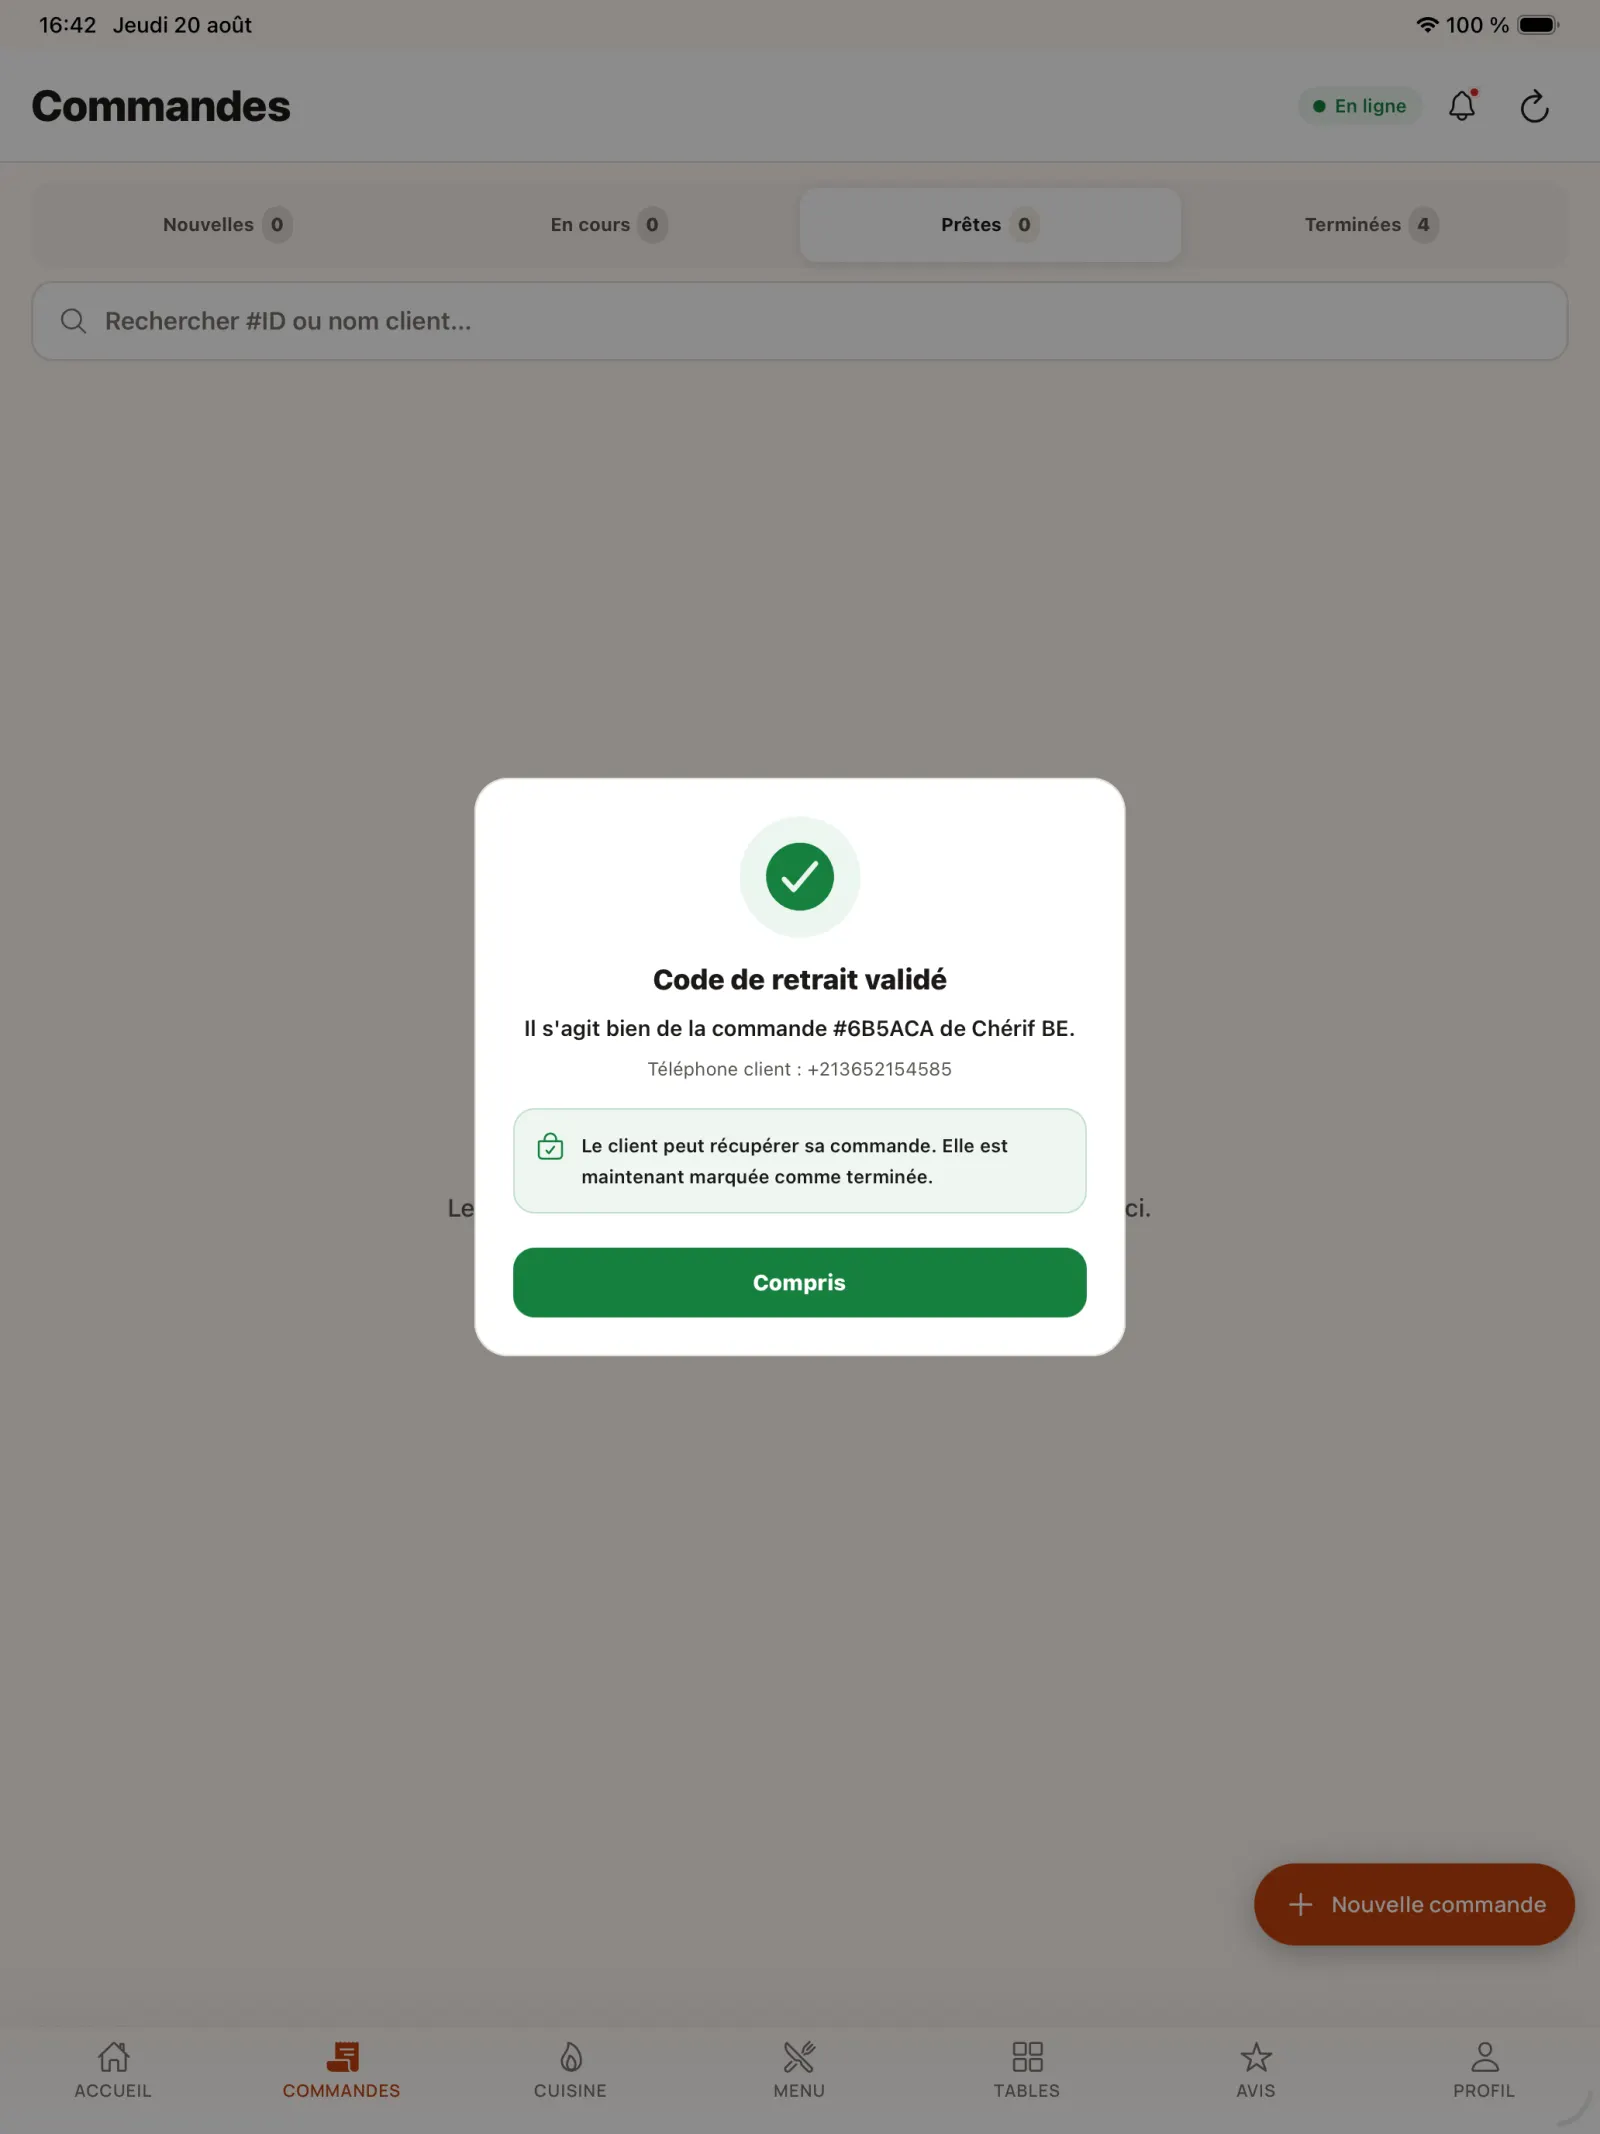
Step 25
Complete the order in KoulChi Pro
The validated withdrawal status also appears in the restaurant app.
Open full-size image
Chapter 4
Collect and manage reviews
After a completed order, the customer can share their experience and the restaurant can respond from KoulChi Pro.
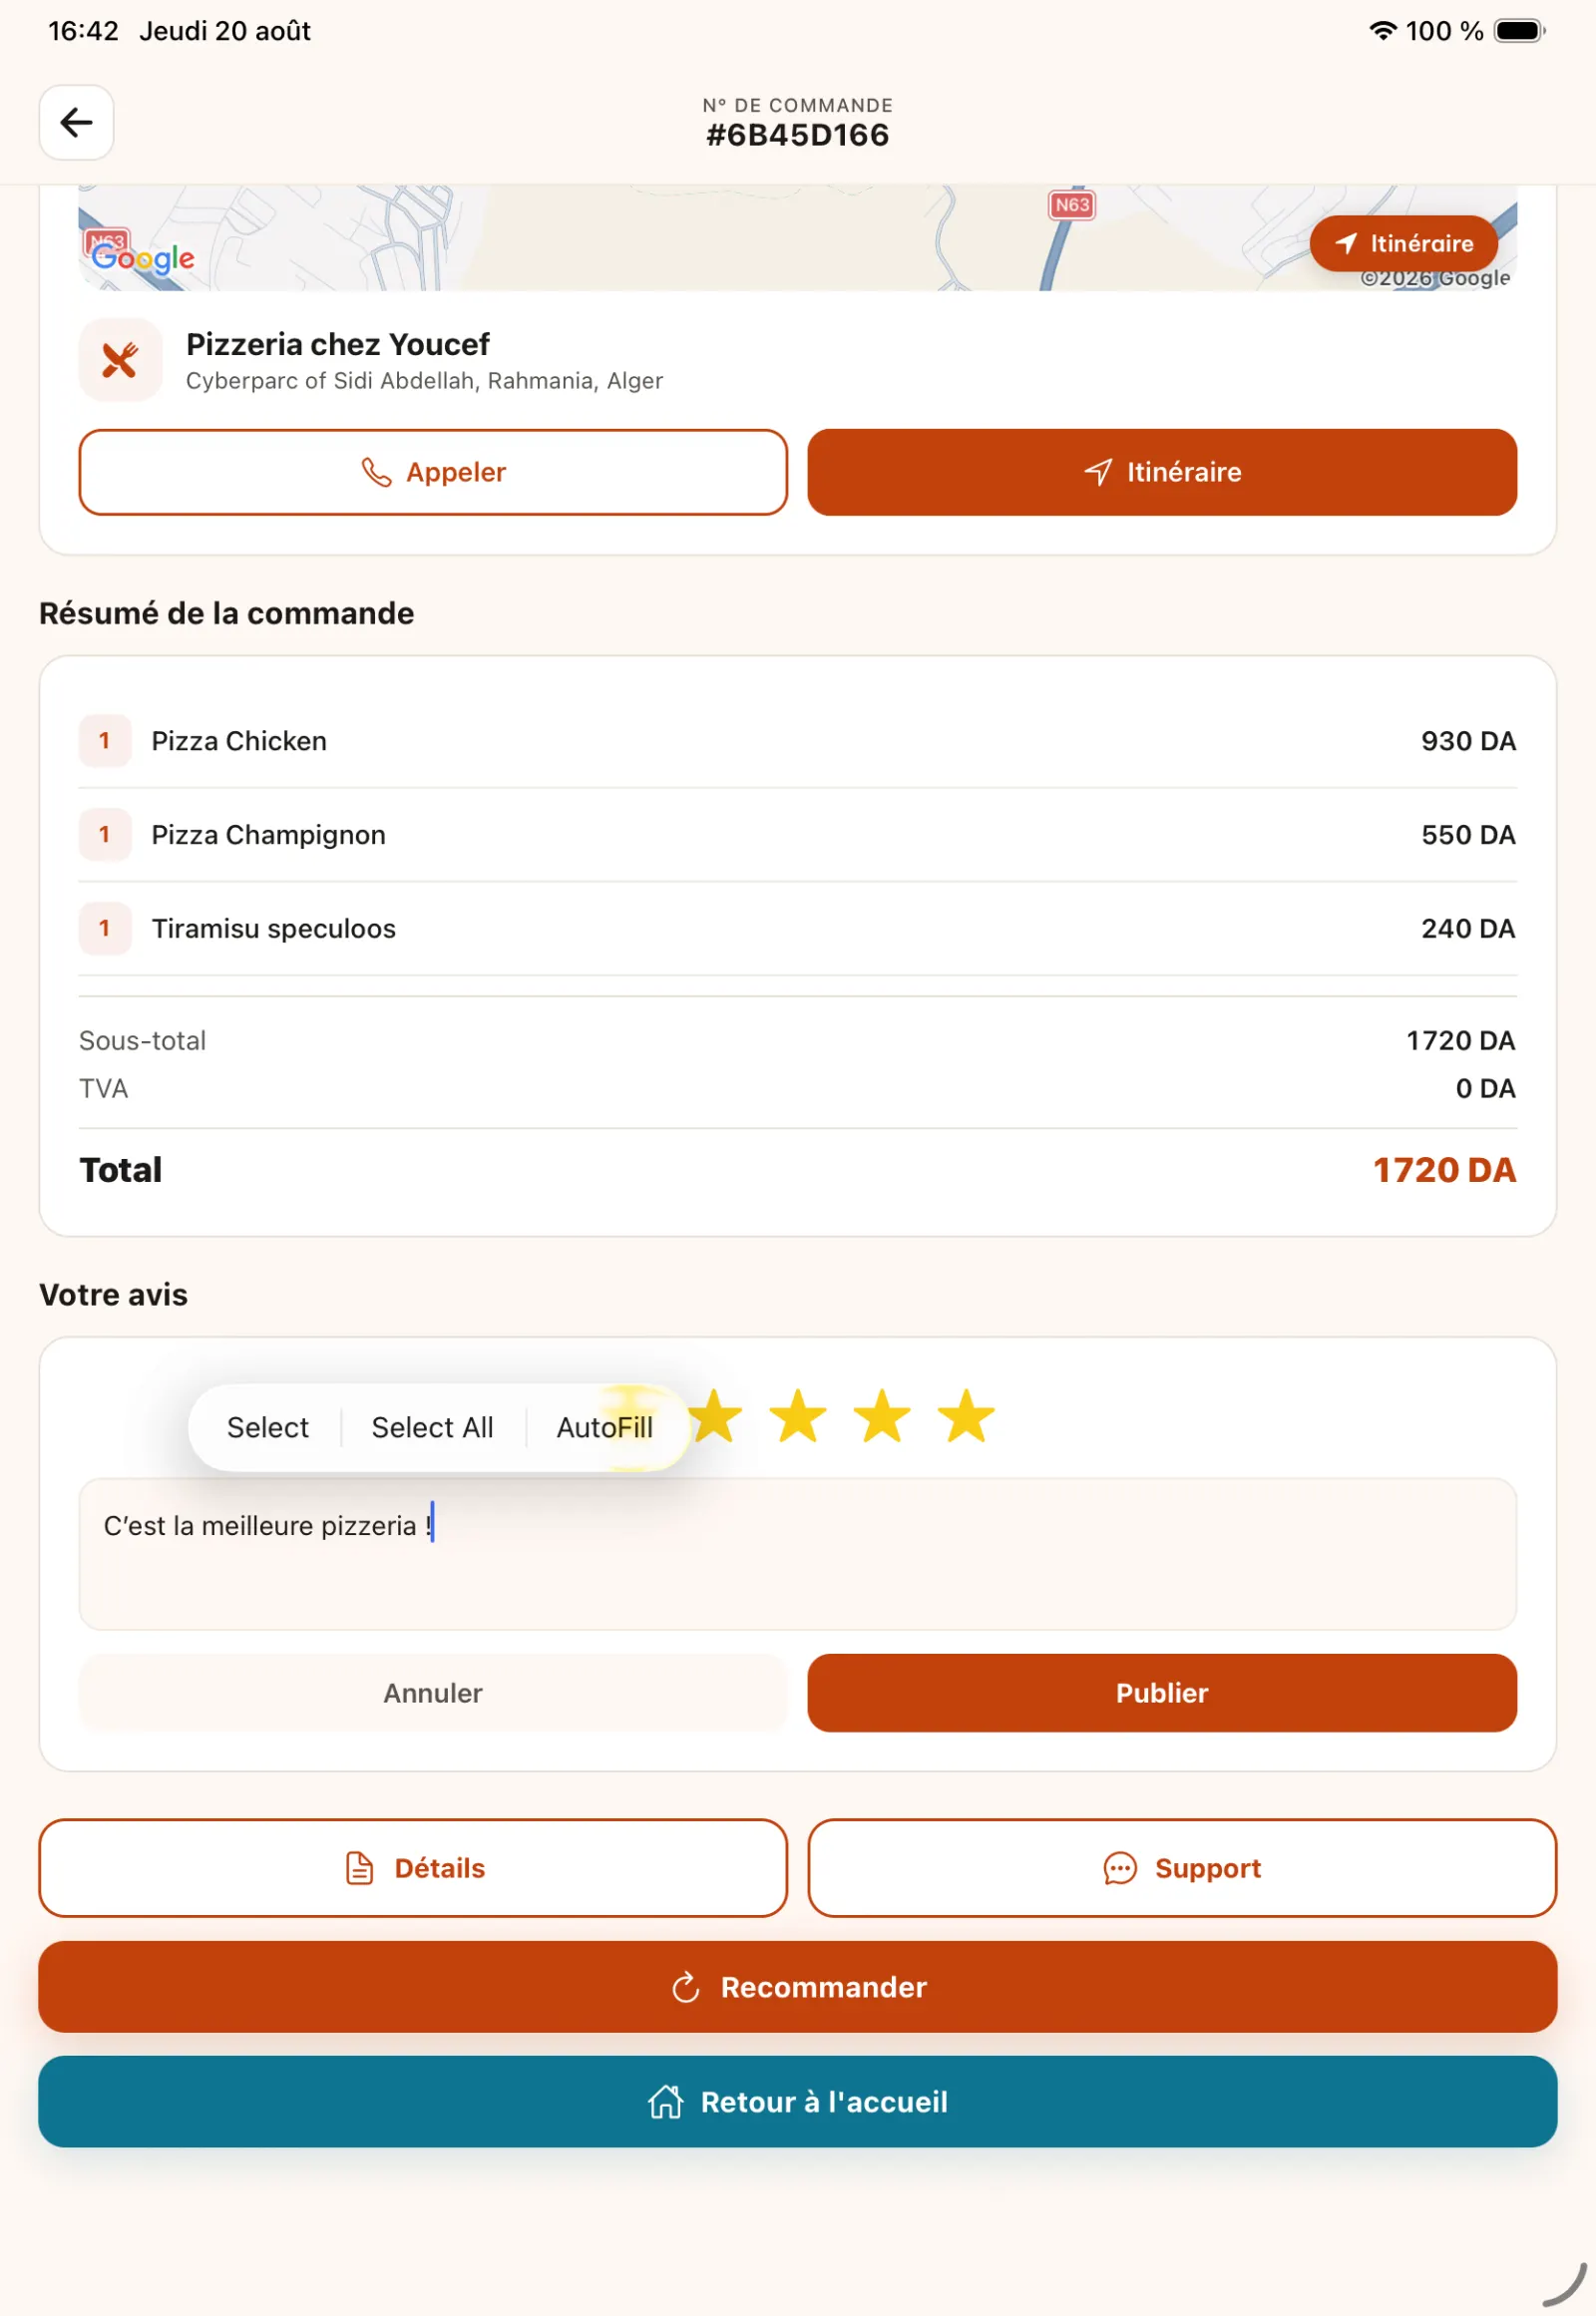
Step 26
Post a customer review
The customer assigns a rating and can accompany their evaluation with a comment.
In practice. The review extends the relationship after the withdrawal. The restaurant can respond publicly, thank the customer or provide clarification, which transforms timely feedback into an element of trust for future visitors.
Open full-size image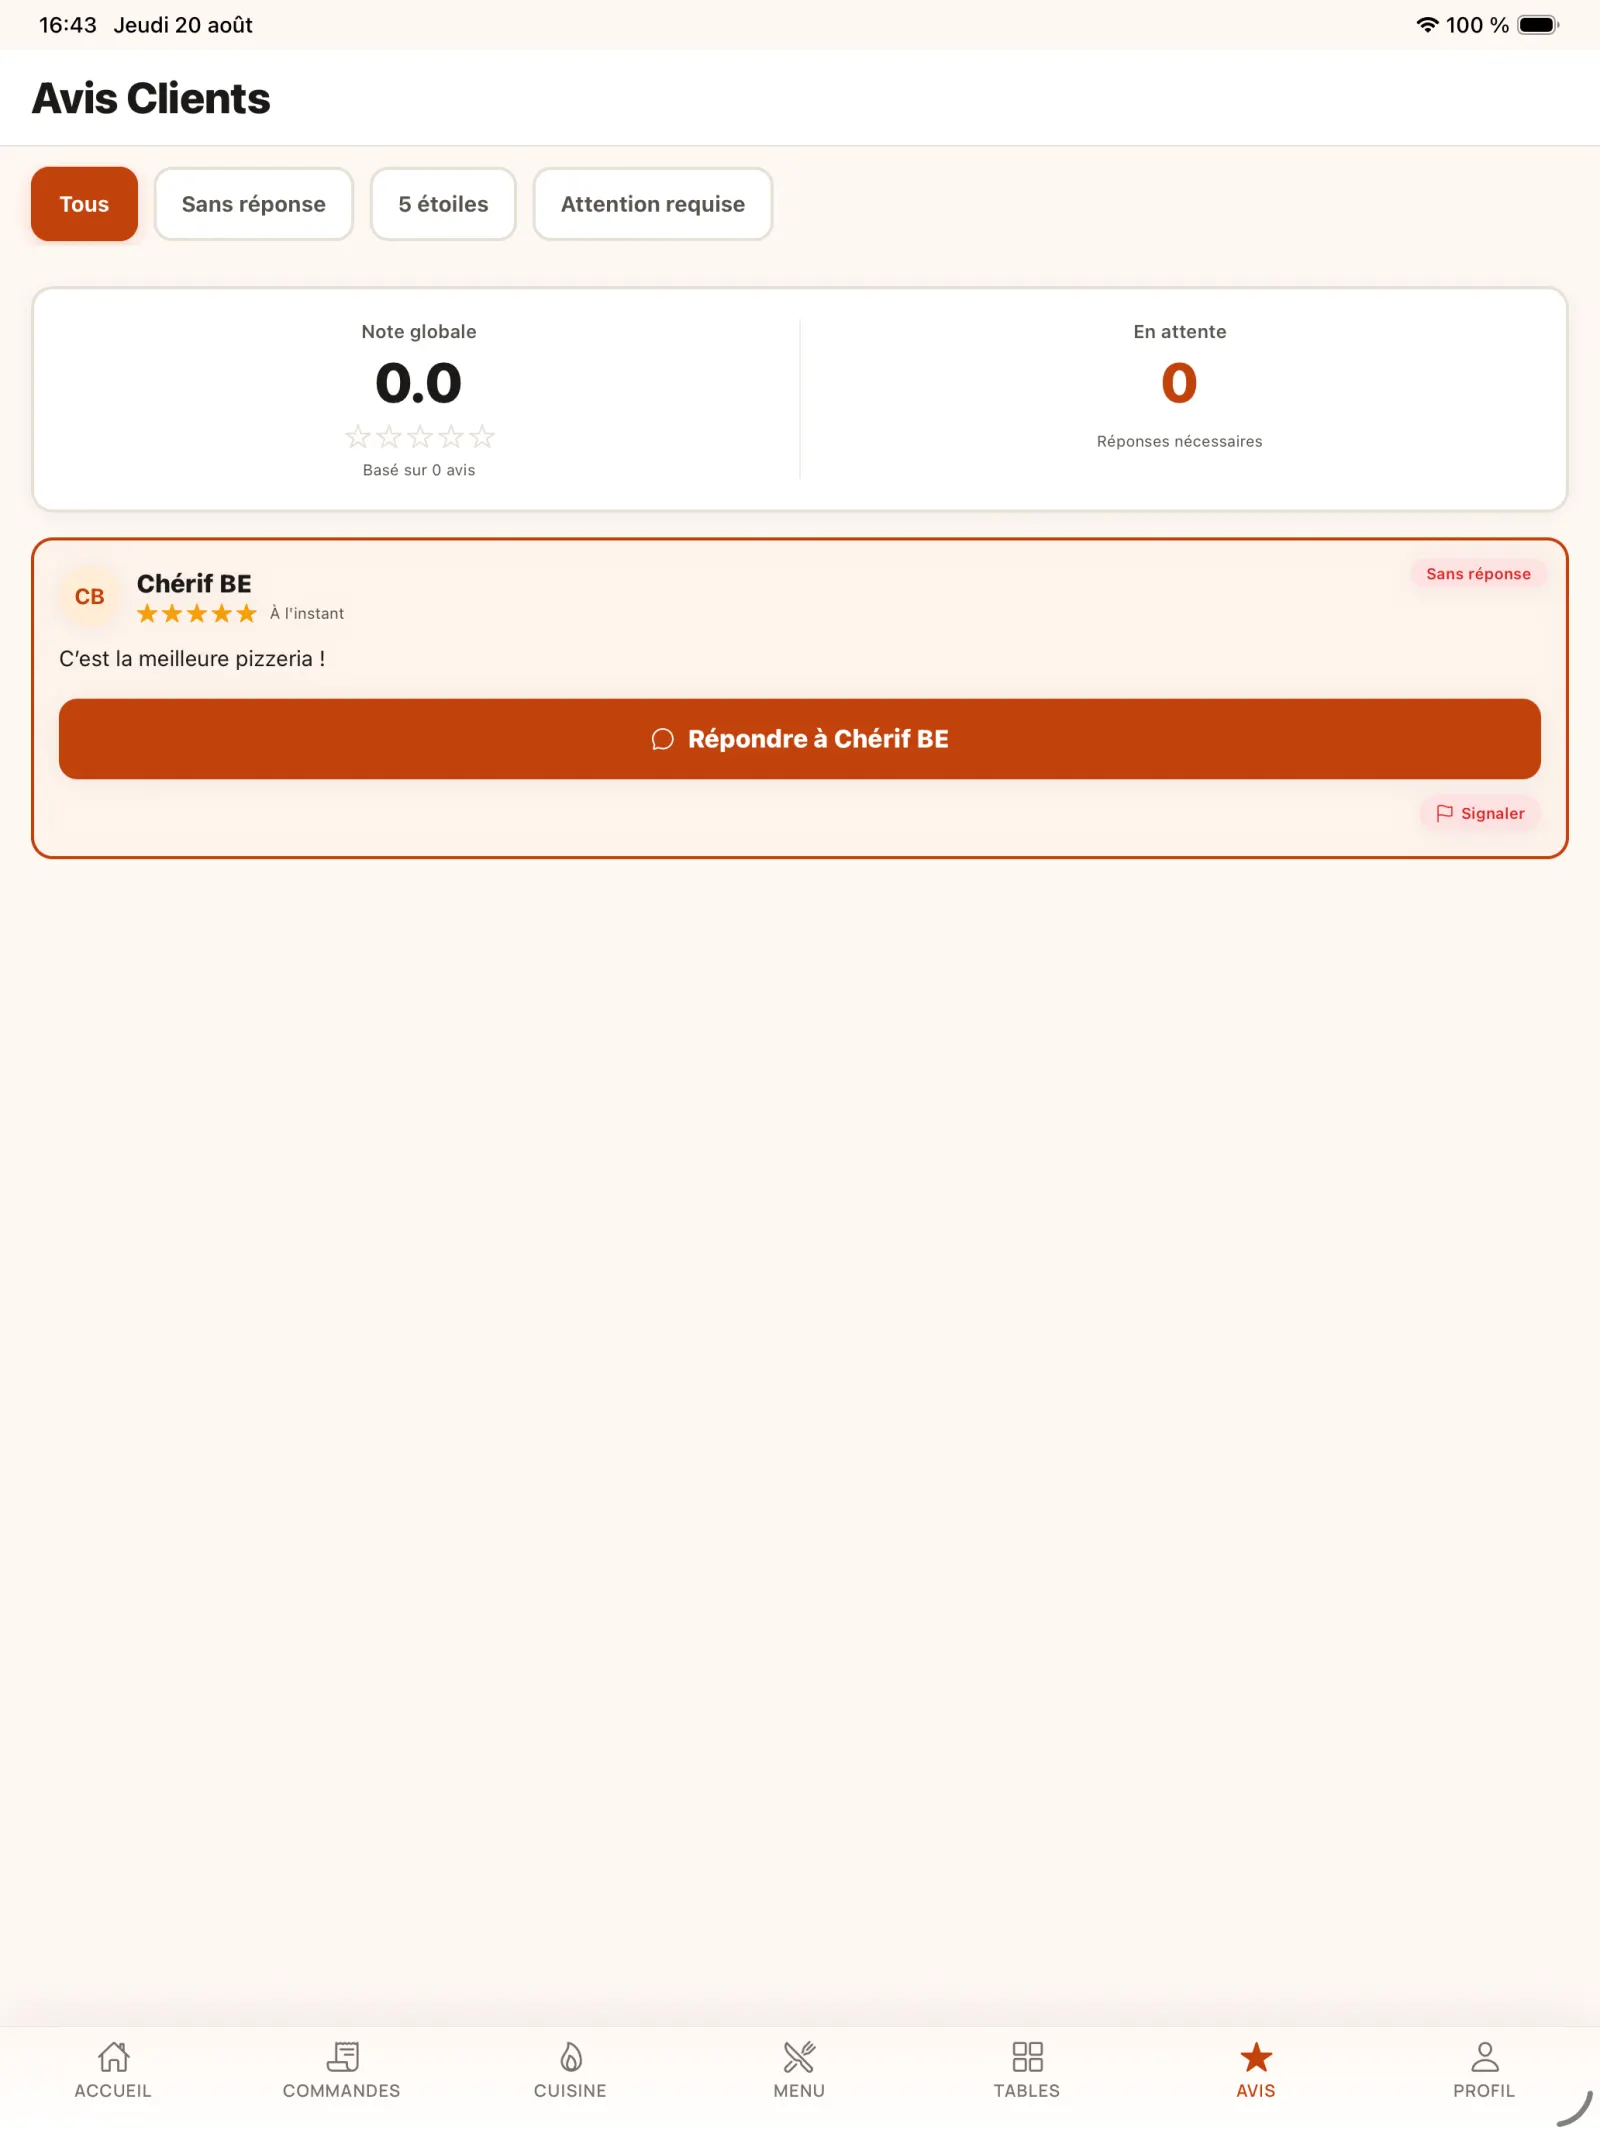
Step 27
Open review management
The restaurant consults the reviews received, can respond to them and has a reporting action for inappropriate content.
Open full-size image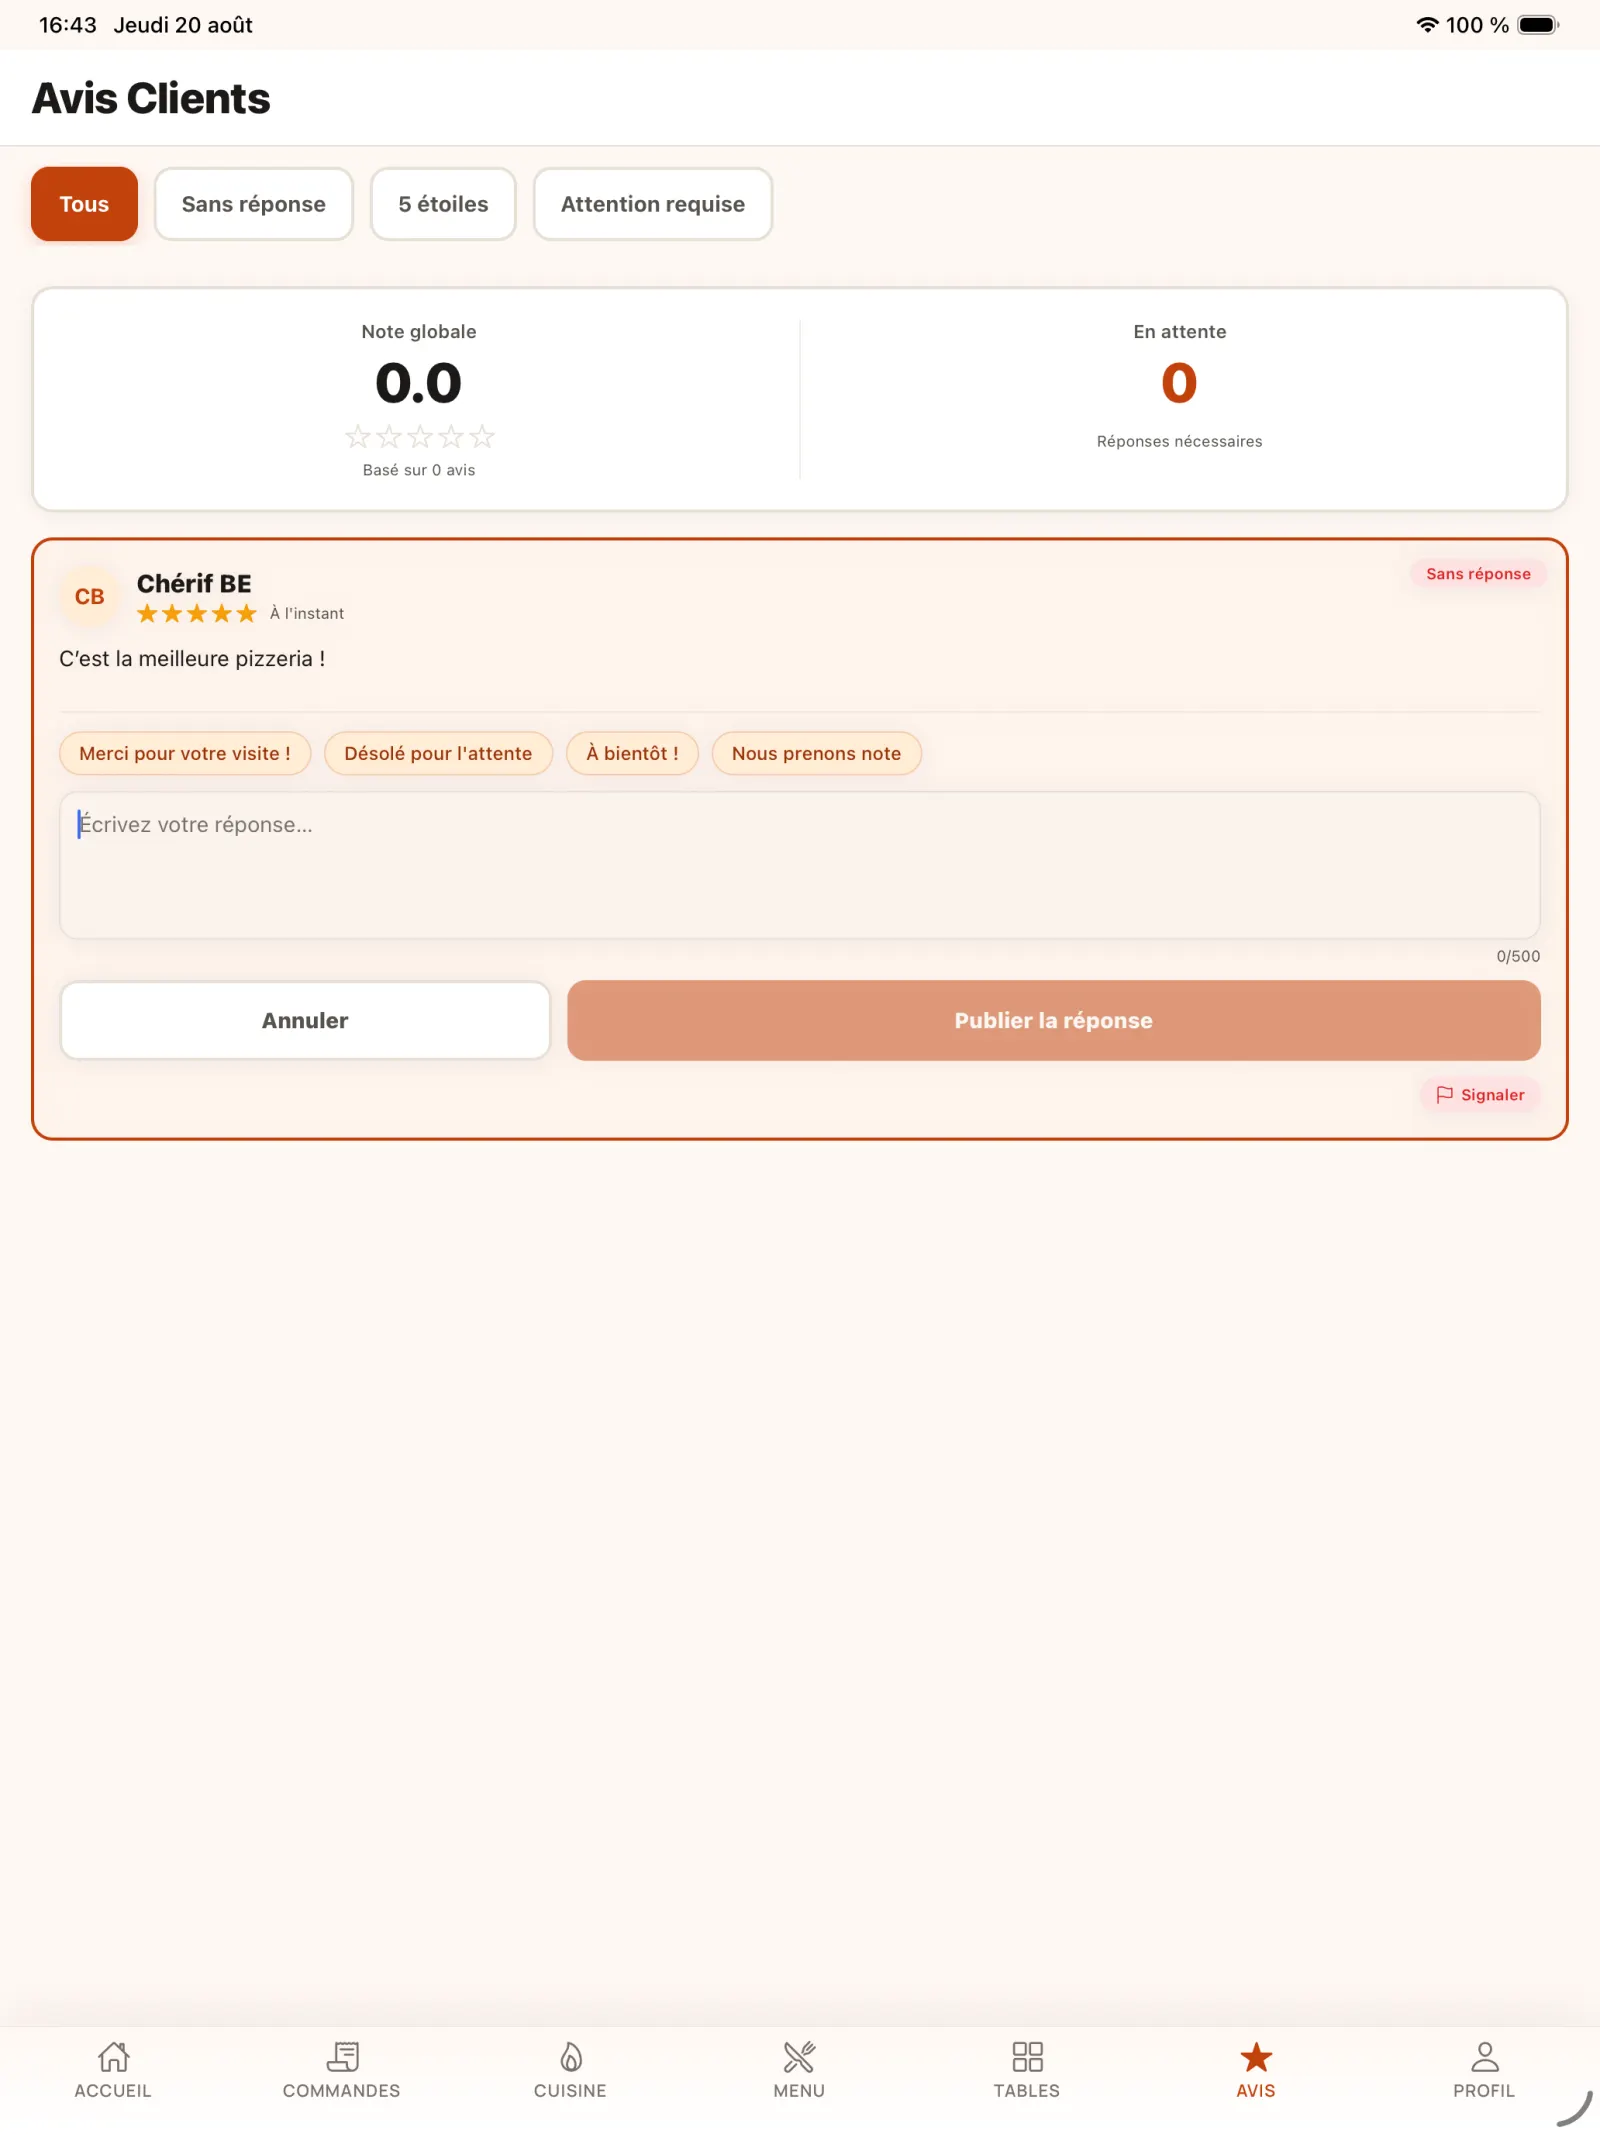
Step 28
Use a suggested response
Pre-populated wording can serve as a starting point for the restaurant's response.
Open full-size image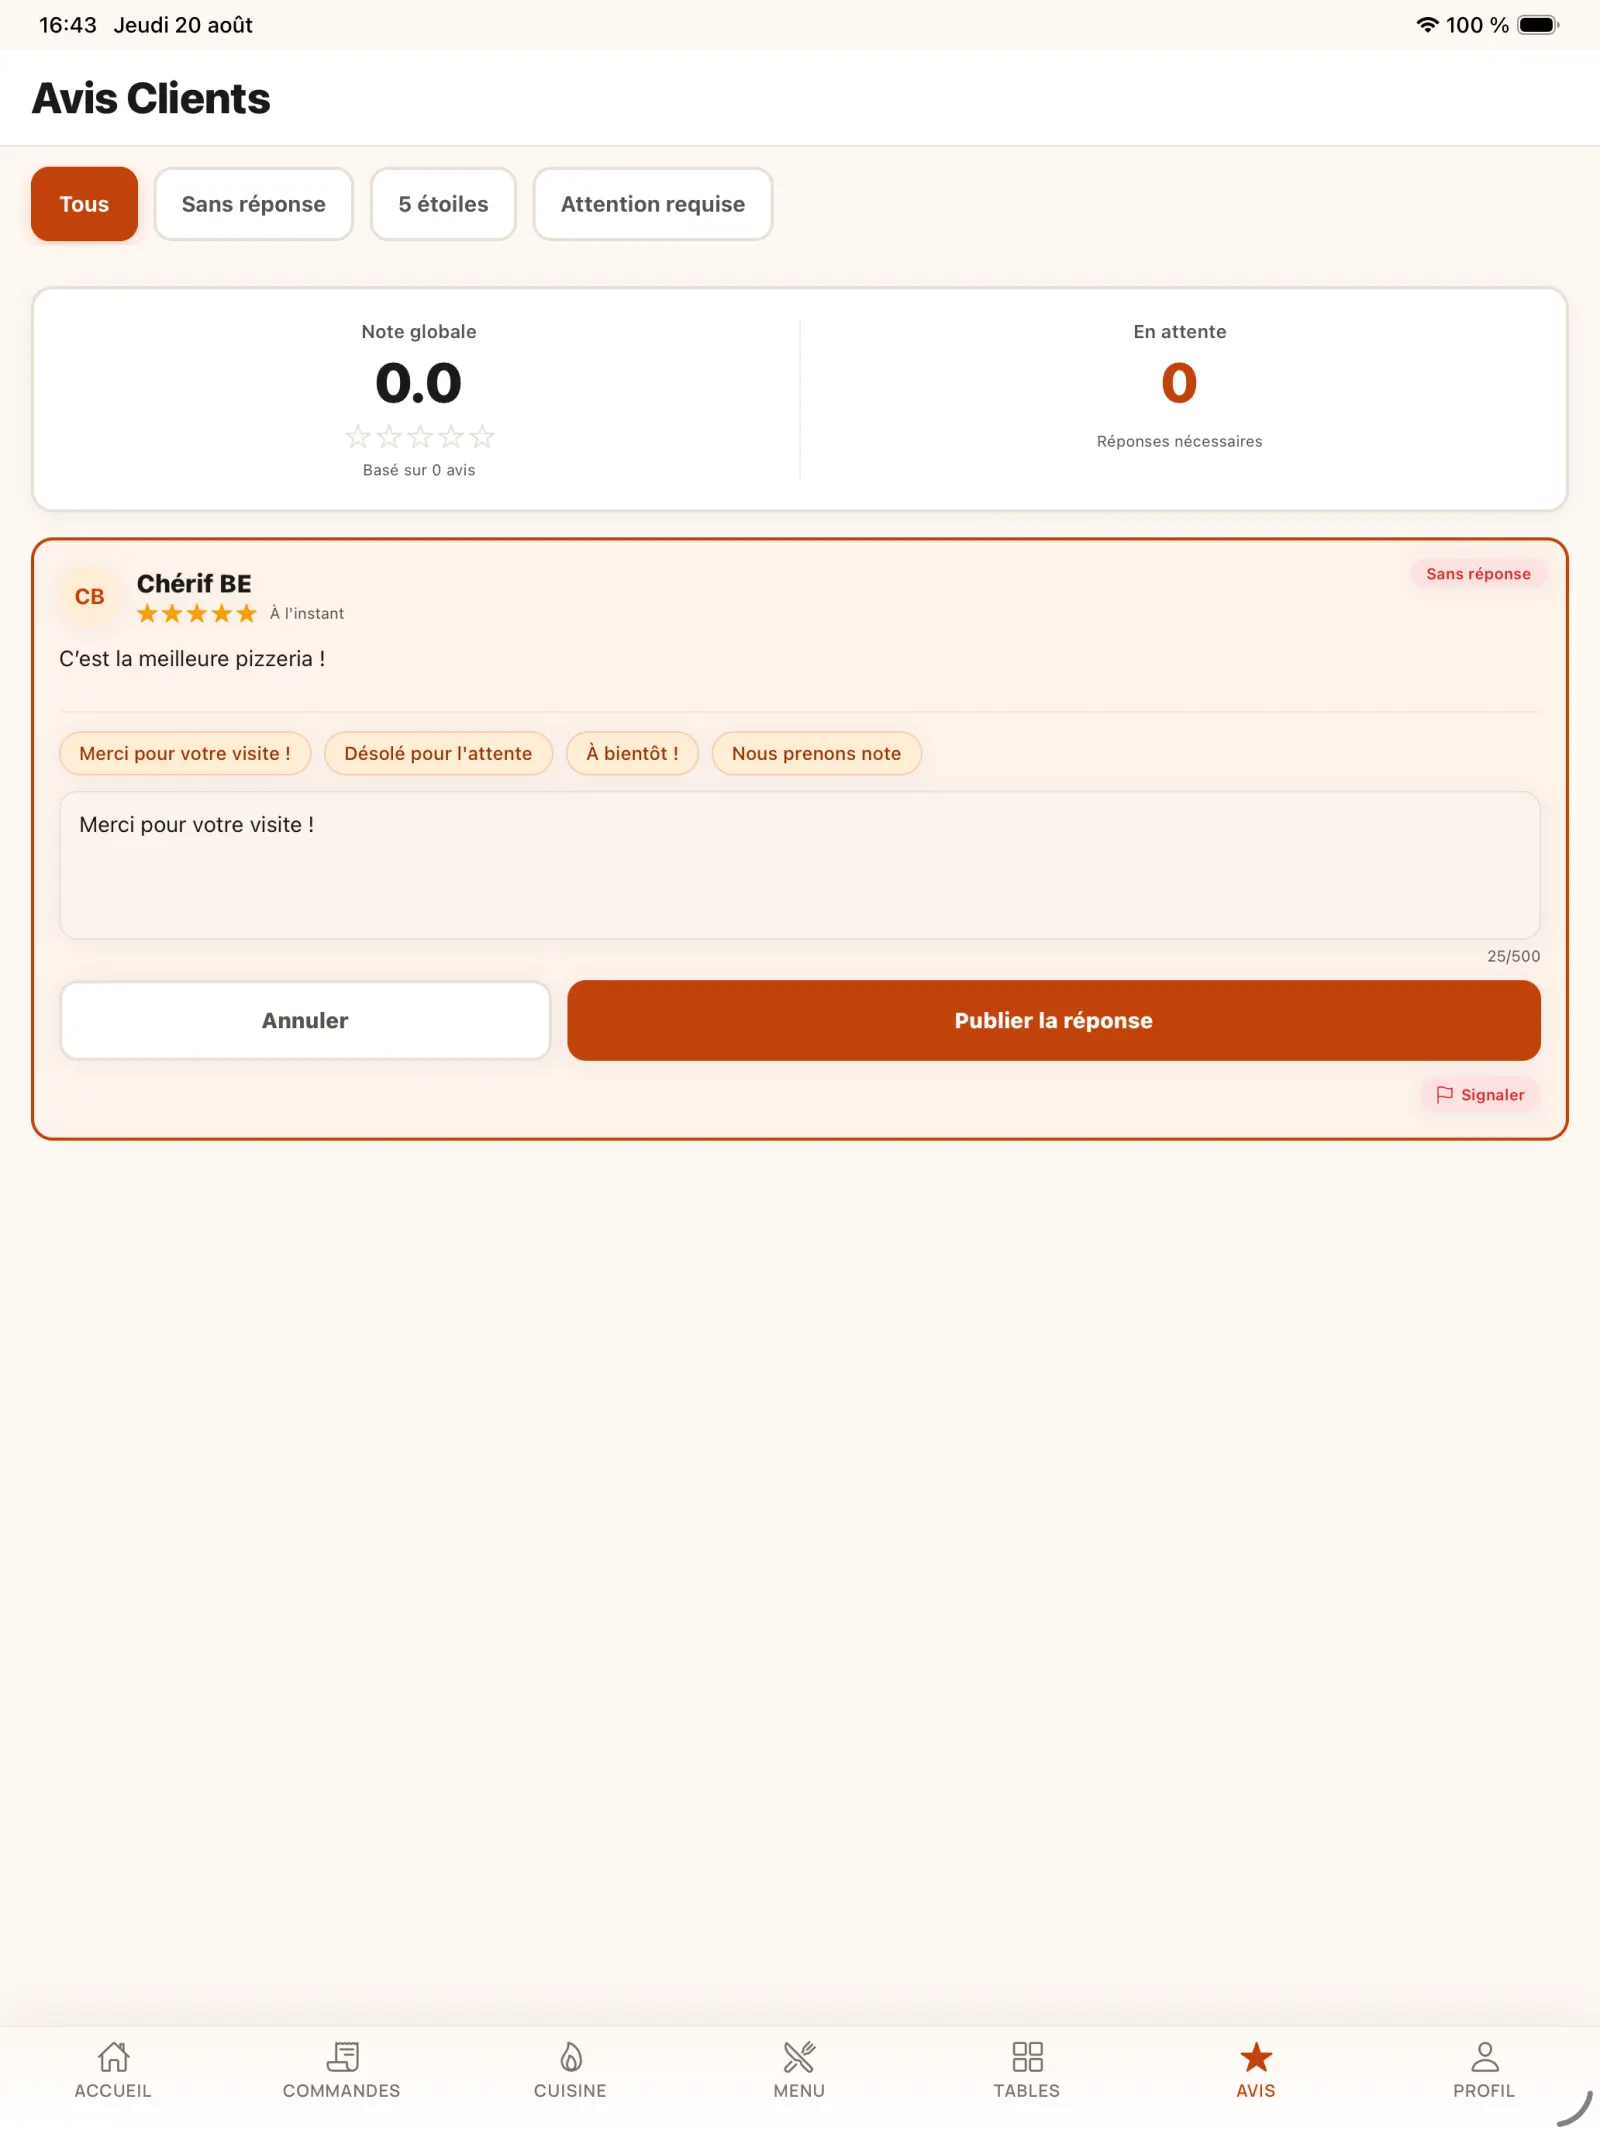
Step 29
Publish the reply
Review the message then select the publish action.
Open full-size image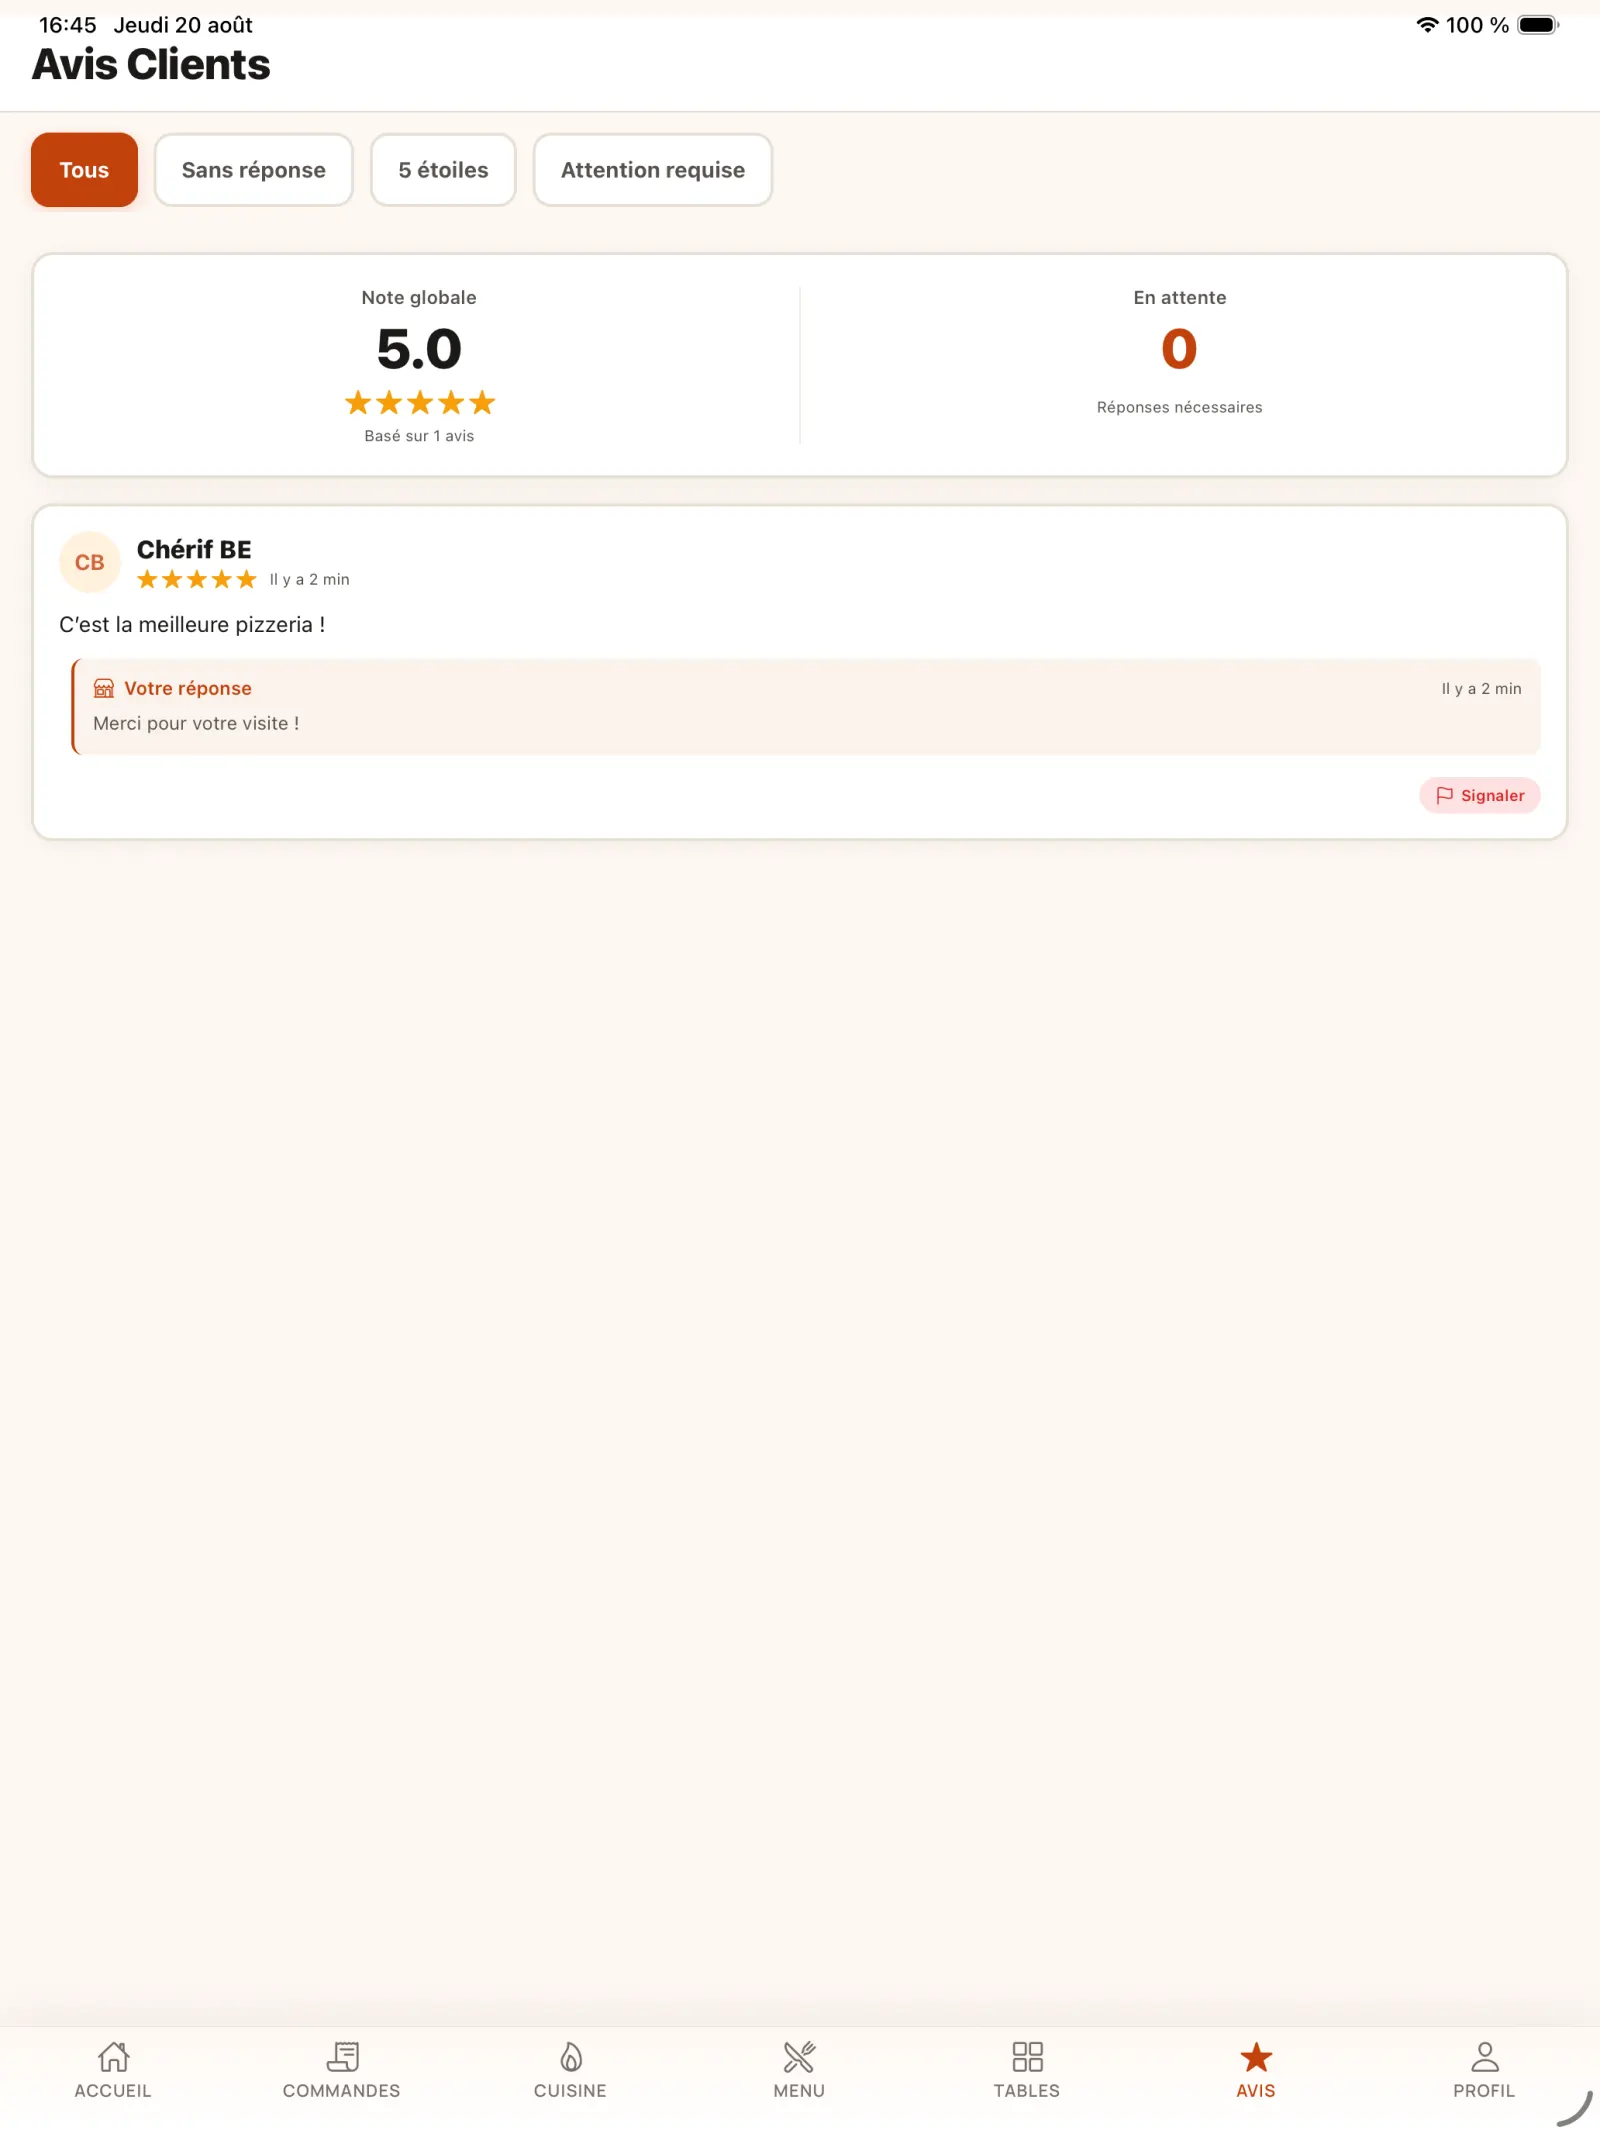
Step 30
Check the review and its response
The card displays the customer's rating as well as the restaurant's public response.
Open full-size image